"grass"

"sand"

"dirt"

"rock"

"basalt"

"void"

"swamp_grass"

"temple_brick"

"dark_ruins_brick"

Game Version: Release v1.21
Cattails: Wildwood Story is an expansive game with many features. A selection of these features can be modified to change, improve, or add to the player's overall experience. This documentation will provide all the information you need to modify your copy of Cattails: Wildwood Story.
In general, most assets and content can be modified; while code and mechanics cannot.
Please do note that Cattails: Wildwood Story can only be modified on the PC (Windows) platform at this time.
To begin modifying game content, you'll need at least:
Cattails: Wildwood Story is available on the Steam store. You'll need a free Steam account in order to purchase a license to install the game. If you're new to Steam, you'll also need to download and install the Steam client, which manages Cattails: Wildwood Story installations for you.
Recommended text editors include Atom or Notepad++, but the basic Windows program Notepad will do the trick as well. There are a large variety of image editors available, but a free program such as Gimp can provide all the required tools.
A mod pack consists of several files stored in specific folders. Generally, these will be text or image files. To create a mod, navigate to the Steam installation folder for Cattails: Wildwood Story (see below), then navigate to the /datafiles subdirectory.
From here, you'll see a very important subdirectory: gameresources. The game reads all of its data and receives much of the information about how to run the game from this folder.
IMPORTANT: NEVER EDIT THE FILES IN THE /gameresources DIRECTORY! These files should remain untouched. They are available for your reference only and should not be edited or moved in any way. Doing so could cause the game to become unstable and crash. Doing so could also lead to a loss of your modifications when Steam auto-updates the game by deleting your changes!
Instead of editing the /gameresources files directly, we'll create a new mod pack in the /mods directory. Start by creating a new folder and name it whatever you'd like your mod to be named. For example, you might make an empty folder named "tylers awesome mod" that will be placed at the location App Data Path/mods/tylers awesome mod. For example, on Windows, you might create a new mod pack folder in %LOCALAPPDATA%/Cattails_Wildwood_Story/mods/tylers awesome mod. If the /mods directory does not exist in your App Data Path, create it as a new folder first.
By creating a new folder for our mod, we are creating a clean environment where we can isolate our own changes without interfering with what other modders have done. This will allow a player to download and use multiple mods at once with a lower chance of an unfortunate merge conflict between the mods. This is another reason that you should never edit the gameresources files or folders directly.
Alright, so we have a brand new empty folder for our mod! Great. Let's call this empty folder location the root of our mod. What do we do next?
That depends on what you'd like to mod! In general, we'll be replicating the structure of the /gameresources directory in our mod folder. For example, if you want to modify an npc, let's say Coco, you'd find all of Coco's files under the /gameresources/npcs directory and copy them into your mod folder, recreating subdirectories where needed.
For an NPC specifically, that means you'd have the following structure created in your mod folder, along with several files. We'll also create a readme.txt file with details about our mod (this is just for us to put any important info about our mod into, the game will ignore all .txt files when it loads in your files.)
mod root (for example, App Data Path/mods/tylers amazing mod)We're only copying/creating files that we want to change into our mod folder, so don't copy or create a file here that you don't actively want to alter in some way or another. At the end of the day the fewer files you have to put in your mod folder the better because it will reduce the risk of a file collision, which the game will detect and refuse to load your mod if it conflicts with another.
Next, we'll edit the files we've decided to modify to our liking, editing them in a text editor or image manipulation program however we see fit, using this documentation as a guide for each file and what it requires.
To distribute your mod, .zip up your mod folder and upload it somewhere that it can be viewed and downloaded by others. They'll need to download your archive, unzip it, and place your mod folder in the appropriate spot (App Data Path/mods/your mod folder).
All filenames and directory names must be entirely lowercase. If you do not lowercase all your filenames in your mods, you may break compatibility!
Want to see how a mod comes together? Download our example mods here.
Instructions: Pick a mod example below to download. Unzip the .zip folder and place the entire subfolder onto your computer at %LOCALAPPDATA%/Cattails_Wildwood_Story/mods (or at the App Data Path/mods.) If the /mods folder does not exist, create it first.
For example, you might download npcmodexample.zip. You'd extract the folder and move the entire contents of the npcmodexample subfolder into %LOCALAPPDATA%/Cattails_Wildwood_Story/mods/npcmodexample.
Then, simply load up your copy of the game. If the mod was loaded successfully, you'll see a popup appear with information as soon as you get to the Main Menu. This popup will also alert you if the mod failed to load due to a file conflict with another mod you have installed.
Did you mess up your /gameresources folder by modifying/adding to/deleting the files within? Don't worry! It's not the end of the world!
We'll simply have to redownload the entire /gameresources folder from Steam's servers directly. It's a fairly simple process!
First, delete the entire /gameresources folder by navigating to the Game Installation Path then right-clicking the /gameresources folder and selecting Delete.
Important: Deleting the /gameresources folder will erase any and all changes you've made to the files within! If you created a mod the wrong way (by modifying these files directly,) you probably want to save your modded files by copying them somewhere else safe before deleting them. You can likely recreate your mod the proper way with these files (see above for more info).
(You can also find the /gameresources folder by opening Steam, finding "Cattails: Wildwood Story" in your library, right-clicking "Cattails: Wildwood Story" in the lefthand pane, selecting "Manage -> Browse Local Files")

Next, we'll redownload the game resources from Steam's servers. We'll need to Verify File Integrity on Steam.
Find "Cattails: Wildwood Story" in the lefthand pane of the Library tab in Steam. Right-click "Cattails: Wildwood Story", select "Properties", then in the window that opens, go to "Local Files". Finally, select "Verify Integrity of Game Files..."

Steam will now redownload your gameresources folder and you'll have a fresh, unmodified copy.
When the verification process completes and Steam has finished downloading the files, try launching your game again!
Many of the files that store important game information and can be modified are formatted as JSON. JSON, or JavaScript Object Notation, is very useful for storing large amounts of dynamic data. It is also fairly human-readable, which should make the job of modifying Cattails: Wildwood Story a bit easier.
However, like many languages and filetypes, JSON has a strict format that must be followed in order for a file to be considered valid. If a JSON file contains invalid data for any reason, Cattails: Wildwood Story will not be able to read the data from that file and the game will likely throw errors, or even crash, depending on which file is affected. Please be sure to double-check all your JSON files to make sure that you've closed quotations and brackets, provided commas to all but the last items in a list, etc.
If you are struggling to get the format exactly right, there are a number of online JSON Validators available, which will allow you to copy and paste your JSON and see if there are any outstanding errors. This may help quite a bit, especially if you are new to the world of JSON!
All Cattails: Wildwood Story-related files are found in two locations on your computer.
This is the folder where Cattails: Wildwood Story is installed on your computer. Almost all types of data files (languages, NPCs, stores, portraits) can be found here under the /gameresources directory. DO NOT EDIT THE FILES STORED IN GAMERESOURCES DIRECTLY!! See above for best practices in creating a mod for Cattails: Wildwood Story.
For Steam installations:
This is the folder where Cattails: Wildwood Story stores user data, including save files, Coat Studio image files, and mods. Players may wish to copy their files from this location and send them along to others (such as custom coat color designs or neat save files.)
There are 10 save slots available in Cattails: Wildwood Story. The save data is stored in unencrypted JSON .sav files located in the %LOCALAPPDATA%/Cattails_Wildwood_Story/saves directory.
Each slot has its own .sav file (for example, Slot 1 corresponds to the slot1.sav file.) You can open these files in any text editor and modify the values stored within, just be careful that you always maintain valid JSON formatting when you've finished editing.
In this directory you may also find a backups subdirectory. This folder contains automatic backup .sav files generated by the game during runtime. These files contain a copy of the data stored in your saveslots and will be auto-restored if anything happens to the normal .sav files. Because of this, if you are trying to delete your savefiles directly from a file explorer window, you will need to also clear out the corresponding backup files or else the game will auto-restore them to the appropriate slot when it is run.
It is not recommended that you modify, copy, delete, or otherwise tamper with the savefiles directory while the game is actively running. Doing so may cause unexpected errors to occur. Please close Cattails: Wildwood Story before attempting to alter your savefiles manually.
There are two types of backup files: slot#backup.sav files and slot#backup_old.sav files. Generally, when restoring from backups, you'll want to use the normal backup.sav files as they tend to be more recent savedata. The backup_old.sav files are created the last time the game was successfully shut down, so restoring from a backup_old.sav file may result in a loss of recent progress. The auto backup restoration process always prioritizes normal backup.sav files over backup_old.sav files, but both are maintained just in case.
If your savedata is corrupted, the game will display an error when you attempt to load the file. The game detects corruption by locating a number of important keys from within the savedata. If it is unable to read the keys, it will label the file as corrupted. You may be able to manually restore your file by restoring a backup .sav, but your data may also be lost.
Some versions of Cattails: Wildwood Story may not be compatible with some savefiles, depending on the version the savefile was created on and the version of the game you are currently running. In particular, if the savefile was created using a newer version of Cattails: Wildwood Story, the game will refuse to load the file. Additionally, some versions of the game may reject a load attempt on a file that is deemed to be too old.
If this is the case for your savefile, you may attempt to force the game to load the file anyways by altering the "version_major", "version_minor", and "version_type" keys within your savefile to match the current version you are running. Note that doing so may lead to unintended consequences or bugs, so proceed at your own risk.
The version is displayed in the lower left hand corner of the main menu. For example, it may read "Alpha v0.5", in which case the "version_type" should be set to "Alpha", "version_major" should be set to 0.0, and "version_minor" should be set to 5.0.
When running Cattails: Wildwood Story through Steam, a feature called Steam Cloud is enabled by default. Steam Cloud attempts to keep your savefiles syncronized across all your devices logged into the same Steam account by uploading your files to a remote server everytime you exit the game and restoring the remote versions of your files everytime you start the game.
This feature may cause unexpected savedata changes if you manually alter your savefiles for any reason because Steam may overwrite your changes the next time you run the game. You can disable Steam Cloud at any time if it is causing you problems. Please refer to the official Steam Cloud documentation for more information on how to enable/disable Steam Cloud for Cattails: Wildwood Story.
Within the App Data Path (see discussion above,) you'll find a /colors directory as long as you have at least 1 custom color design. If not, you may add an empty folder named "colors" to this location.
This folder contains PNG image files that store the data for custom coat designs. These files serve 2 primary purposes:
Below is an example of one of these files:

A player can quickly make a new coat color design through the in-game Coat Studio menu by navigating to the end of the colors list and clicking the "+ New" button. Upon completing their design, a new image file will be saved to the disk at this location.
It's important that you do not edit these files on disk while the game is running, as the game only checks for new files at very specific times while running and it may not pick up your changes.
Each image file is 256x256 pixels and is named in the following manner:
A few examples of valid color file names:
The actual image itself isn't all that important, with one crucial exception: The game uses a 1-pixel tall by 24-pixels wide strip of pixels, located in the upper-left hand corner of the image files, to store the actual color data for the design. The rest of the image may be altered, but it will have no impact on how the coat design displays in-game. You can see the strip of pixel color data fairly easily by zooming on on the upper-left hand corner. Leave it alone unless you want to change the colors of the design!!
Also, because this small strip of pixels is so important, it's extremely important that anytime you share one of these files with a friend, you must send an uncompressed copy of your file with its name intact. Any sort of file compression or renaming of the file will result in an unusable coat studio file.
Language files contain top-level translations for most non-dialog text (and special dialog text) in the game. These files can be found in the Game Installation Path (see discussion above) in the /gameresources/languages directory.
Several of these files are provided by the developers and our localization partners so that the game can easily be played around the world, but some users may wish to use these files to add support for additional languages.
Cattails: Wildwood Story uses a custom, hand-drawn font. Because of the extremely vast number of languages and characters, the game can only support certain character sets.
The following character sets are supported by the game engine and may be used in a Language or Dialog file:
To add support for a new language, it is recommended that you copy the file english.lang (the most complete and accurate file, as it is our developer's first language), rename it according to the instructions below, and work from your new copy. It should be noted that solely translating a top-level Language File will not yield a complete translation, as NPC dialog is stored in a different directory. Please see the section on Dialog Files for more information.
A language file is named in the following manner:
A few examples of valid language file names:
The contents of a .lang file are structured in the JSON format. Essentially, the contents are structured as human-readable key-value pairs. Below is a sample from english.lang:
			{


					"lang_game_title": "Cattails: Wildwood Story",


					...


					"lang_season": "Season",

					"lang_spring": "Spring",

					"lang_summer": "Summer",

					"lang_autumn": "Autumn",

					"lang_winter": "Winter",

					"lang_on": "On",

					"lang_off": "Off",

					"lang_simple": "Simple",

					"lang_fancy": "Fancy",


					...


			}
Note that on each line, there is a key (for example, "lang_summer") and a value (for example, "Summer".)
The keys are unique identifiers used by the game whenever it needs to display text; the values store translated text to display to the player.The contents of español.lang (the Spanish language file) would look a bit different (note that the game title does not get translated in this particular case):
			{


					"lang_game_title": "Cattails: Wildwood Story",


					...


					"lang_season": "Temporada",

					"lang_spring": "La primavera",

					"lang_summer": "El verano",

					"lang_autumn": "El otoño",

					"lang_winter": "El invierno",

					"lang_on": "Encendido",

					"lang_off": "Apagado",

					"lang_simple": "Sencilla",

					"lang_fancy": "Lujosa",


					...


			}
In all cases, the key does not get translated, whereas the value usually does.
Keys will almost always begin with the substring "lang_". Below are some special cases to watch out for when translating:
"lang_collected": "You've collected #number_collected#." The placeholder #number_collected# will be detected by the game engine, and the true number will be inserted in its place in-game."lang_pause_title" has the value "Paws". This is a pun that only works in English. To translate this value to another language, it is recommended that you translate the word Pause, not the word Paws."lang_example_key": "lang_example_key_2","lang_example_key_do_not_translate": "special_value",The following keys have very specific allowed values. Below is a table of all special keys, their possible values, and a brief description.
| Special Key | Allowed Values | Description |
|---|---|---|
"lang_keyboard_alphabet_do_not_translate" |
"latin", "cyrillic" |
This key specifies what type of keyboard the player has access to within the game. In general, use the value of latin for Latin-based languages (like English and Spanish) and the value of cyrillic for Cyrillic-based languages (like Russian.) |
Optionally, each localization language can have its own Language Icon, a small pixel art representation of the language (typically an associated country flag.) It is very simple to add a language icon to an existing language, simply add a 32x32 resolution .png file to the /gameresources/languages/sprites directory and name it {LanguageUID}.png (for example, english.png.)


Time passes in Cattails: Wildwood Story at a constant rate. This rate is represented by the time_tick value, which can be modified in the time.meta file. This file is located in the /gameresources/time directory.
By changing the value of time_tick, you can effectively make the days pass quicker or slower, depending on your preference. A lower value will make time pass faster; a higher value will make time pass slower. By default, time_tick has a value of 40.
time_tick has a minimum value of 1 and a maximum value of 200.
The world of Cattails: Wildwood Story is inhabited by many NPCs (Non-Player Characters), with a broad range of personalities, schedules, and types.
NPC data is found within the Game Installation Path (see discussion above) under the /gameresources/npcs directory.
The simplest NPC modification involves changing the NPC's portrait appearance. These portraits are displayed to the player when speaking with the appropriate NPC. NPC portraits are stored as PNG image files in the /gameresources/npcs/portraits directory. Below are a few examples of NPC portrait files:


Each portrait file showcases one of 8 emotions (neutral, playful, happy, sad, angry, thinking, shocked, angry, blushing) or 1 unique portrait that is reserved for each character (Special).
A portrait file is a PNG image that is 416x416 resolution. The naming convention is as follows:
A few examples of NPC portrait file names:
In most cases, the special portrait is an identical copy of the neutral portrait, but it has been provided to add some flexibility to particularly creative users.
You can use Portrait PNGs to replace existing characters' in-game portrait appearances, or add portraits to new custom-made NPCs.
Each NPC has a face icon, which will be displayed on the minimap and may appear in various GUIs like dialog and the social panel. If an NPC is not provided an Icon, their icon will appear as a black silhouette of a cat with a "?" on it.
Icon files are stored in the /npcs/icons directory. They must be .png files, 64x64 resolution. They should be named #NPC_UID#icon.png. For example, charlotteicon.png or molbyicon.png.


Each NPC has a .meta file which contains appearance data, scheduling data, and other relevant info about the character.
The naming convention for Metadata files is as follows:
A few examples of NPC Metadata file names:
The contents of a .meta file are structured in the JSON format. Essentially, the contents are structured as human-readable key-value pairs. Below is a sample from Coco.meta:
			{


					"npc_enabled": true,


					"npc_type": "cat",

					"npc_cat_voice": 1,

					"npc_cat_voice_pitch_modifier": 0.1,


					...


					"npc_appearance_torso": "cat_shorthair_torso",

					"npc_appearance_face": "cat_fluffy_face",

					"npc_appearance_ears": "cat_small_ears",

					"npc_appearance_tail": "cat_upward_tail",


					"npc_accessories": ["Whiskers Accessory"],


					"npc_colors_torso": [60, 60, 60],

					"npc_colors_feet": [60, 60, 60],

					"npc_colors_paw_front_one": [210, 210, 210],


					...


			}
Below is a table listing all NPC Metadata keys and their possible values.
| NPC Metadata Key | Allowed Values | Description |
|---|---|---|
"npc_enabled" |
true, false |
Whether is NPC is enabled or not. If enabled, the NPC will appear in-game; if disabled, the NPC will not appear in-game. |
"npc_type" |
"cat", "mole", "spirit", "invisible" |
What type of NPC this is. This value is one of the most important aspects of the NPC's metadata. |
"npc_loyalty" (optional) |
"player_colony", "none", "emblem_legacy_A_forest" |
Which loyalty emblem should be displayed for this NPC. You can either specify an Emblem UID, which is the same as its filename (minus the .png extension) of the emblem image file located in /gameresources/emblems; or you can instead use one of 2 special values. "player_colony" means this NPC should show the same icon as the player's colony; "none" means this NPC should not display a loyalty emblem at all. |
"npc_buddy_system_enabled" (optional, "type": "cat" only) |
true, false |
Whether or not this NPC can participate in the Buddy System, which allows the player to bring them along on their adventures once their friendship rank is high enough. |
"npc_buddy_system_passive_trait" (optional, "type": "cat" only) |
"", "Vivacious", "Tough", "Lucky", "Hardy", "Adaptive", "Inspiring", "Subtle" |
Which Passive Trait this NPC has while participating in the Buddy System. Passive traits grant benefits to this NPC or the player while this NPC is adventuring alongside the player. Leave blank ( "" ) for no passive trait. See below for a full list of what each trait can do. |
"npc_buddy_system_active_trait" (optional, "type": "cat" only) |
"", "Enterprising", "Renowned", "Caring", "Persistent", "Delicate", "Fierce", "Keen" |
Which Active Trait this NPC has while participating in the Buddy System. Active traits grant specific triggerable benefits to this NPC or the player while this NPC is adventuring alongside the player. Leave blank ( "" ) for no active trait. See below for a full list of what each trait can do. |
"npc_wedding_guest_override_list" (optional) |
[ "spark", ... ] |
Optional key. Allows you to specify a list of NPCs that absolutely must attend the wedding if this NPC gets married, regardless of the player's friendship rank with those particular NPCs. Leave the list empty ( [] ) if no NPCs are close enough to this NPC to be required to attend their wedding. |
"npc_cat_voice" (type:cat only) |
1-10 or 11 |
What soundfont to use for the cat's voice. There are 10 unique cat voices to choose from, numbered 1-10. Set to 11 for no voice. |
"npc_cat_voice_pitch_modifier" (type:cat only) |
-1.0 - 1.0 |
Specifies a flat pitch modifier to this cat's voice. Lower values will be a deeper voice; higher values will make for a higher voice. |
"npc_mole_appearance" (type:mole only) |
"mole_appearance_molo", "mole_appearance_molu", "mole_appearance_molay", "mole_appearance_moldric", "mole_appearance_molcee", "mole_appearance_molt", "mole_appearance_mold", "mole_appearance_molby" |
Specifies what appearance this mole will have in-game. |
"npc_spirit_appearance" (type:spirit only) |
"spirit_appearance_lioness", "spirit_appearance_tiger", "spirit_appearance_entity" |
Specifies what appearance this spirit will have in-game. |
"npc_spirit_voice" (type:spirit only) |
"lion", "tiger", "none" |
What soundfont to use for the spirit's voice. Set to "none" for no voice. |
"npc_appearance_torso" (type:cat only) |
"cat_shorthair_torso", "cat_fluffy_torso", "cat_slender_torso", "cat_large_torso" |
NPC torso type. Changes the appearance of the NPC's body. |
"npc_appearance_face" (type:cat only) |
"cat_shorthair_face", "cat_fluffy_face", "cat_slender_face", "cat_large_face" |
NPC face type. Changes the appearance of the NPC's head. |
"npc_appearance_ears" (type:cat only) |
"cat_shorthair_ears", "cat_fluffy_ears", "cat_large_ears", "cat_huge_ears", "cat_angled_ears", "cat_torn_ears", "cat_tipped_ears", "cat_missing_ears", "cat_small_ears" |
NPC ear type. Changes the appearance of the NPC's ears. |
"npc_appearance_tail" (type:cat only) |
"cat_stump_tail", "cat_downward_tail", "cat_upward_tail", "cat_fluffy_tail", "cat_downward_fluffy_tail", "cat_bobtail", "cat_curly_tail", "cat_short_tail", "cat_kinked_tail" |
NPC tail type. Changes the appearance of the NPC's tail. |
"npc_accessories" (type:cat only) |
[ "Whiskers Accessory", "Beaky Accessory", ... ] |
Contains an array of all the accessories that this NPC will wear. For a full list of Accessories, see the item unique identifiers section below. Leave blank (Like so: [] ) for no Accessories. Note that Pet Accessories will not work properly on NPCs. |
"npc_colors_..." (torso | feet | paw_front_one | paw_front_two | paw_back_one | paw_back_two | face | stripes | face_stripes | belly | muzzle | eyes_left | eyes_right | ear_outer_left | ear_outer_right | ears_inner | tail | tail_tip | patches_one | patches_two | rosettes | nose | point | stripes_two | speckles) (type:cat only) |
[0-255, 0-255, 0-255] |
Defines NPC coat colorations. The value is an array consisting of 3 integer values, ranging from 0-255. These three numbers make up an RGB color (R,G,B). |
"npc_has_shop" (optional) |
true, false |
Whether or not this NPC has an associated shop. |
"npc_shop_uid" (npc_has_shop:true only) |
"", "[ShopFilename]" |
Use an empty string if the NPC has no associated shop. Otherwise, insert the filename of the associated shop (see the Shops section below for more info. For example, "ShopEmber".) |
"npc_festival_shop_uid" (optional) |
"shopuid" (ex. "shopfestivalcoco") |
A special optional key that allows this NPC to run a shop during festivals. This overrides the default behavior of festivals, which typically disable NPC shops. Specify the exact UID of the shop you would like this NPC to operate during festivals. |
"npc_festival_games" (optional) |
[ {} ... ] |
A list of what minigames this NPC offers to the player during specific festivals. |
"npc_can_be_festival_opponent" (optional) |
true, false |
Specifies if this NPC can appear as an opponent during certain festival games. Note that only type:cat NPCs can compete in the games. |
"npc_has_colony_options" (optional) |
true, false |
Whether or not this NPC has the power to let the player change their colony metadata, including name, titles, and emblem. |
"npc_has_museum_donate" (optional) |
true, false |
Whether or not this NPC has the ability to let the player donate Curios to the museum. |
"npc_has_influence_options" (optional) |
true, false |
Whether or not this NPC has the power to let the player view their colony stockpiles and assign squads. |
"npc_has_name_change" (optional) |
true, false |
Whether or not this NPC has the power to let the player change their own name. |
"npc_has_healing" (optional) |
true, false |
Whether or not this NPC has the power to heal the player for a fee, like a doctor. NPCs with this property will provide a 10% discount on their healing prices if the player has achieved a 4-star friendship rank with them. |
"npc_is_befriendable" |
true, false |
Whether or not this NPC can be befriended. |
"npc_is_datable" |
true, false |
Whether or not this NPC can be dated and married. Note that "npc_is_befriendable" must also be true if you want to make this NPC datable. |
"npc_show_friendship_rank" (befriendable:true only) |
true, false |
Whether or not this NPC's friendship stars should appear to the player, or be hidden. If false, the NPC will also not appear in the Social panel if they are not being dated by the player or married to the player. Useful for creating "secret" befriendable cats or eligible marriage candidates. Most NPCs should have a value of true. |
"npc_birthday_season" (befriendable:true only) |
"Spring", "Summer", "Autumn", "Winter" |
What season this NPC's birthday takes place during. |
"npc_birthday_day" (befriendable:true only) |
1-10 |
What day of the season this NPC's birthday falls on. Note that generally, choosing the 10th is a bad idea as this is when festivals will occur. |
"npc_starting_friendship_rank" (befriendable:true only) |
0-4 |
What friendship rank this NPC has with the player at the start of the game. By default most NPCs start with rank 1 friendship. |
"npc_starting_dating_rank" (befriendable:true only) |
0-4 |
What dating rank this NPC has with the player if they begin dating. By default most NPCs start with rank 1. |
"npc_starting_marriage_rank" (befriendable:true only) |
0-4 |
What marriage rank this NPC has with the player if they get married. By default most NPCs start with rank 1. |
"npc_friendship_difficulty_modifier" (optional) |
0.0-9.0 (default: 1.0) |
Acts as a multiplicative modifier for any friendship point gains. For example, if the player should gain 20 friendship points with this NPC but this value is set to 0.5, they will instead gain 10 friendship points. Note that this modifier does not affect negative friendship point modifications (i.e. giving a bad gift, ignoring the NPC, etc.) Also affects dating/marriage points. |
"npc_item_loves" (befriendable:true only) |
[ "Mouse", "Blackberries [Good]", "Portobello", ... ] |
A list of items that this NPC loves to receive. Giving them these items will allow the player to gain a large amount of friendship with this NPC. Use Item UIDs in this list. |
"npc_item_likes" (befriendable:true only) |
[ "Trout", "Goldenseal [Poor]", "Valerian [Fair]", ... ] |
A list of items that this NPC likes to receive. Giving them these items will allow the player to gain a modest amount of friendship with this NPC. Use Item UIDs in this list. |
"npc_item_dislikes" (befriendable:true only) |
[ "Gold Ore", "Red Ladybug", "Banded Darter", ... ] |
A list of items that this NPC dislikes to receive. Giving them these items will lose the player a modest amount of friendship with this NPC. Use Item UIDs in this list. |
"npc_item_hates" (befriendable:true only) |
[ "Rock Debris", "Lavender [Poor]", "Quartz", ... ] |
A list of items that this NPC hates to receive. Giving them these items will lose the player a large amount of friendship with this NPC. Use Item UIDs in this list. |
"npc_item_gifts" (befriendable:true only) |
[ "Mouse", "Lavender [Fair]", "Barbel", ... ] |
A list of items that this NPC might give to the player. This list is used if a Dialog Object containing the special dialog language key "lang_npc_give_gift" is triggered. Note that all items in the list are weighted equally. You can artificially make an item more likely to be chosen by including it in the list multiple times. Use Item UIDs in this list. |
"intro_dialog_objects" |
[ { ... }, { ... }, { ... }, ... ] |
See the discussion below on Dialog Objects for information about this complex list. |
"dialog_objects" |
[ { ... }, { ... }, { ... }, ... ] |
See the discussion below on Dialog Objects for information about this complex list. |
Many NPCs can be brought along for an adventure once the player reaches a high enough level of friendship. This is called the buddy system. Each NPC can optionally have a Passive Trait and an Active Trait that augment their abilities while participating in the buddy system. Below is a full list of all possible traits an NPC can possess:
Passive Traits:Some NPCs have schedules, daily timestamps that specify where that NPC should exist in the world and what their behavior should be once they get there. Some NPCs do not have schedules and will always exist at a set place with a set behavior.
NPCs schedules are specified in the optional "npc_schedule" key of the NPC's .meta file. NPCs that do not have a schedule do not have a "npc_schedule" key in their respective .meta file.
NPCs will attempt to logically path between their schedule points at the appropriate times; but note that if an NPC is unable to path to their given schedule point, they may fall back to certain default behaviors (like standing outside their own den instead of a non-existent building) or even instantaneously teleport if necessary. It is important that any two chronologically-adjacent schedule blocks be in adjoining map regions so that the NPC can find an intuitive and logical path between the map regions. Otherwise, they will most definitely teleport instead of pathing more than 1 map region away.
"npc_schedule" contains a list of Schedule Block JSON objects. Each Schedule Block JSON object specifies a place where the NPC should be located and may optionally specify a schedule block type, a region, a time, a behavior for the NPC to exhibit, etc.
| NPC Schedule Block Key | Allowed Values | Description |
|---|---|---|
"type" required |
"coordinate", "building", "festival", "foundersstone", "taskboard" |
This is the most important value in any given schedule block. It specifies the TYPE of the schedule block, which dictates how the rest of the schedule block should be formatted and how the values of the schedule block are interpreted by the game engine. The default, simplest value here is "coordinate", which allows you to specify a region, an x,y coordinate, and a timestamp at which the schedule block should occur.
"coordinate": Specify an absolute x,y coordinate, a timestamp, and a map region and this NPC will relocate to that exact coordinate at the given time.
"building": Specify a building UID, a relative x,y coordinate (added to the value of the building's location), and a timestamp and the NPC will relocate to the relative position near the specified building at the given time.
"festival": Specify a festival UID and an absolute x,y coordinate and this NPC will appear during the given festival at the given coordinate.
"foundersstone": A special value that relocates this NPC to the Founder's Stone in the colony town at the relative x,y coordinate (added to the value of the Founders Stone's location) at the given time.
"taskboard": A special value that relocates this NPC to the Task Board in the colony town at the relative x,y coordinate (added to the value of the Task Board's location) at the given time.
|
"x" required |
0-1440 |
At which x value should the NPC locate themselves during this schedule block? Note that some schedule block types will read this as an absolute position (coordinate) and others will read this as a relative position (building, foundersstone, taskboard) |
"y" required |
0-1440 |
At which y value should the NPC locate themselves during this schedule block? Note that some schedule block types will read this as an absolute position (coordinate) and others will read this as a relative position (building, foundersstone, taskboard) |
"hour" required, except for "type":"festival" |
0-23 |
At which minimum hour does this schedule block become active? Use military time (24hr clock) to set this value. 0 = midnight, 12 = noon, 23 = 11pm. |
"minute" required, except for "type":"festival" |
0, 15, 30, 60 |
At which minimum minute does this schedule block become active? Use military time (24hr clock) to set this value. Use only in 15 minute increments (0, 15, 30, 60). |
"direction" optional |
"south", "north", "east", "west" |
When the NPC arrives at their end destination for this schedule block, which direction should they face? |
"behavior" optional |
"standing", "sitting", "sleeping" |
When the NPC arrives at their end destination for this schedule block, which behavior should they exhibit? Note that in "sitting" and "sleeping" behaviors, the only valid "direction"s are "east" or "west". Note that a "sleeping" NPC cannot be spoken to while they are asleep. |
"festival_uid" required, "type":"festival" ONLY |
"{festivalUID}" (ex. "springfestival") |
Which festival is this schedule block related to? |
"building_uid" required, "type":"building" ONLY |
"{buildingUID}" (ex. "cocoden") |
Which building is this schedule block related to? |
Every NPC that is befriendable:true has a friendship rank with the player that can change over the course of play.
Additionally, every NPC that is datable:true has dating and marriage ranks with the player.
Each category of ranks has a value between 0-4. Typically, the player begins at rank 1 friendship at the start of the game with each of these NPCs. If they begin dating an NPC, they usually enter the dating relationship at rank 1 dating. If they marry, they usually enter the marriage relationship at rank 1 marriage.

Friendship is noted with star icons near the NPC's portrait.

Dating is noted with heart icons near the NPC's portrait.

Marriage is noted with ring icons near the NPC's portrait.
Here's an important note: If you are dating OR married to an NPC, you are ALSO considered to be rank 4 friendship with that NPC. However, if you are married to an NPC, you are NOT considered to be dating that NPC.
It is possible for an NPC that is dating or married to the player to be so miserable in the relationship that they want to break up with the player. This will automatically happen if the player is at rank 0 dating or marriage with that NPC and continues to treat them poorly, by either ignoring them or giving them bad gifts repeatedly.
Each NPC has multiple Dialog Files, which store translated versions of the NPC's name and dialog. These files may be modified to change dialog or introduce new dialog lines into the game. Additional Dialog Files may be created to add support for additional languages.
Dialog files are located in the /gameresources/npcs/lang directory of the Game Installation Path (see above discussion.) For each NPC, there will be 1 Dialog File for each language.
The contents of a Dialog File are structured in the JSON format. Essentially, the contents are structured as human-readable key-value pairs.
The naming convention for Dialog Files is as follows:
A few examples of Dialog File names:
These files contain several important pieces of translatable text associated with a given NPC. For example, the NPC's display name may be translated within these files. Below is a table listing of important keys, along with descriptions of what they should hold:
| Dialog File Key | Description |
|---|---|
"lang_npc_name" |
Stores a translated version of the NPC's name. In many cases, names will not be translated and should remain the same as their "English" versions. |
"lang_npc_give_gift" |
Stores a translated string of dialog text that will display to the player if this NPC gives the player a gift. Use the special dialog command #gift_item# to insert the name of the item being given to the player into the text. |
"lang_npc_give_birthday_gift" |
Automatically replaces "lang_npc_give_gift" (see above) on the player's birthday. Stores a translated string of dialog text that will display to the player if this NPC gives the player a gift on the player's birthday. Use the special dialog command #gift_item# to insert the name of the item being given to the player into the text. |
"lang_npc_love_item_dialog" (befriendable:true only) |
Stores a translated string of dialog text that will display to the player if this NPC is given an item that they love. |
"lang_npc_like_item_dialog" (befriendable:true only) |
Stores a translated string of dialog text that will display to the player if this NPC is given an item that they like. |
"lang_npc_neutral_item_dialog" (befriendable:true only) |
Stores a translated string of dialog text that will display to the player if this NPC is given an item that they are neutral towards. |
"lang_npc_dislike_item_dialog" (befriendable:true only) |
Stores a translated string of dialog text that will display to the player if this NPC is given an item that they dislike. |
"lang_npc_hate_item_dialog" (befriendable:true only) |
Stores a translated string of dialog text that will display to the player if this NPC is given an item that they hate. |
"lang_npc_love_item_birthday_dialog" (befriendable:true only) |
Stores a translated string of dialog text that will display to the player if this NPC is given an item that they love on the NPC's birthday. |
"lang_npc_like_item_birthday_dialog" (befriendable:true only) |
Stores a translated string of dialog text that will display to the player if this NPC is given an item that they like on the NPC's birthday. |
"lang_npc_neutral_item_birthday_dialog" (befriendable:true only) |
Stores a translated string of dialog text that will display to the player if this NPC is given an item that they are neutral towards on the NPC's birthday. |
"lang_npc_dislike_item_birthday_dialog" (befriendable:true only) |
Stores a translated string of dialog text that will display to the player if this NPC is given an item that they dislike on the NPC's birthday. |
"lang_npc_hate_item_birthday_dialog" (befriendable:true only) |
Stores a translated string of dialog text that will display to the player if this NPC is given an item that they hate on the NPC's birthday. |
"lang_npc_too_many_gifts_dialog" (befriendable:true only) |
Stores a translated string of dialog text that will display to the player if this NPC is given more than 1 gift in a day (they will not accept the 2nd gift). |
"lang_npc_black_rose_dialog" (befriendable:true only) |
Stores a translated string of dialog text that will display to the player if this NPC is given a Black Rose by the player, which instantly sets their friendship to rank 0. If the player is dating or married to this NPC, they will break up instantly. |
"lang_npc_red_rose_reject_dialog" (befriendable:true only) |
Stores a translated string of dialog text that will display to the player if this NPC is given a Red Rose by the player, but they reject it because they either are not high enough friendship level with the player or are not datable. |
"lang_npc_red_rose_reject_player_married_to_someone_else_dialog" (befriendable:true only) |
Stores a translated string of dialog text that will display to the player if this NPC is given a Red Rose by the player, but they reject it because the player is already married to another NPC. |
"lang_npc_shiny_trinket_reject_player_married_to_someone_else_dialog" (befriendable:true only) |
Stores a translated string of dialog text that will display to the player if this NPC is given a Shiny Trinket by the player, but they reject it because the player is already married to another NPC. |
"lang_npc_shiny_trinket_reject_dialog" (befriendable:true only) |
Stores a translated string of dialog text that will display to the player if this NPC is given a Shiny Trinket by the player, but they reject it because they either are not high enough dating level with the player or are not datable. |
"lang_npc_red_rose_reject_already_accepted_dialog" (datable:true only) |
Stores a translated string of dialog text that will display to the player if this NPC is given a Red Rose by the player, but they do not take it because they are already dating or married to the player. |
"lang_npc_red_rose_accept_dialog" (datable:true only) |
Stores a translated string of dialog text that will display to the player if this NPC is given a Red Rose by the player, and they accept it and therefore begin dating. |
"lang_npc_shiny_trinket_reject_while_dating_dialog" (datable:true only) |
Stores a translated string of dialog text that will display to the player if this NPC is given a Shiny Trinket by the player while actively dating the player, but they reject it because they are not high enough dating level to accept it yet. |
"lang_npc_shiny_trinket_reject_already_accepted_dialog" (datable:true only) |
Stores a translated string of dialog text that will display to the player if this NPC is given a Shiny Trinket by the player, but they do not take it because they are already married to the player. |
"lang_npc_shiny_trinket_accept_dialog" (datable:true only) |
Stores a translated string of dialog text that will display to the player if this NPC is given a Shiny Trinket by the player, and they accept it and therefore get married. |
"lang_npc_dating_break_up_with_player_dialog" (datable:true only) |
Stores a translated string of dialog text that will display to the player if this NPC is unhappy in their dating relationship or given a Black Rose while dating, in which they instantly break up with the player. |
"lang_npc_married_break_up_with_player_dialog" (datable:true only) |
Stores a translated string of dialog text that will display to the player if this NPC is unhappy in their marriage or given a Black Rose while married, in which they instantly break up with the player. |
Dialog may contain special markup strings and commands that give it a unique appearance or animation. Below is a table of all possible commands and special strings:
| Command | Effect |
|---|---|
#player_name# |
Replaces the special string with the player's name, in blue. |
#player_significant_other_name# |
Replaces the special string with the player's dating partner's name, in red, and a small portrait of the player's significant other. If the player is not dating, it will display an empty string. If the player is dating multiple cats at once, it will choose the first name it finds. |
#player_spouse_name# |
Replaces the special string with the player's spouse's name, in red, and a small portrait of the player's spouse. If the player is unmarried, it will display an empty string. |
#player_most_recent_spouse_name# |
Replaces the special string with the player's most recent spouse's name, in red, and a small portrait of the player's most recent spouse. If the player has never been married, it will display an empty string. If the player is currently married this will always display the name of their current spouse; if they are currently unmarried but have been divorced, it will display the name of their last partner. |
#timestamp# |
Replaces the special string with the current timestamp. For example, "2:00 AM" or "4:50 PM". |
#season# |
Replaces the special string with the name of the current season. For example, "Spring" or "Autumn". |
#day_number# |
Replaces the special string with the current day number. For example, "1" or "8". |
#year_number# |
Replaces the special string with the current year number. For example, "1" or "2". |
#npc_name_(NPC_Unique_ID)# |
Replaces the special string with an NPC's translated name, in red, and a small portrait of the NPC. For example, #npc_name_krampy# will display the text "Krampy" in red, alongside a small portrait of Krampy's face. |
#last_item_given# |
Inserts the translated name of the last item the player gave out to any NPC into the text, in green. Note that if the player has not given out any items during this play session, this will return an empty string. Most useful in immediate replies to gifts, such as "lang_npc_like_item_dialog". |
#power_paw# |
Replaces the special string with the translated phrase for "Power Paw". |
#dialog_path# |
Replaces the special string with the current dialog path key. This is usually used for debugging. |
#item_name_(mouse | dove | gold_ore | conch | ...)# |
Replaces the special string with the translated item name, in green. |
#leader_title# |
Inserts the current active leader title into the text. The default is "leader". Other examples include "commander", "monarch", "warlord", etc. Useful when an NPC is referring to the player character, who is the leader of the colony. Displays in blue. |
#leader_title_with_article# |
Inserts the current active leader title into the text, along with its appropriate article. The default is "the leader". Other examples include "the commander", "the monarch", "the warlord", etc. Useful when an NPC is referring to the player character, who is the leader of the colony. Displays in blue. |
#leader_title_capitalized# |
Same as #leader_title#, but all words in the leader title will have their first letter capitalized (ex. "Leader".) Displays in blue. |
#leader_title_capitalized_with_article# |
Same as #leader_title#, but all words in the leader title will have their first letter capitalized. Plus, the article will be added (ex. "the Leader".) Displays in blue. |
#leader_title_capitalized_with_article_capitalized# |
Same as #leader_title#, but all words in the leader title will have their first letter capitalized. Plus, the article will be added and capitalized (ex. "The Leader".) Displays in blue. |
#leader_title_with_demonstrative_article#, #leader_title_with_demonstrative_article_capitalized# |
Inserts the current active leader title into the text, along with its appropriate demonstrative article. The default is "this leader". Other examples include "this commander", "this monarch", "this warlord", etc. Use the "_capitalized" variety to capitalize the first letter of the article. |
#leader_title_with_definite_article#, #leader_title_with_definite_article_capitalized# |
Inserts the current active leader title into the text, along with its appropriate definite article. The default is "the leader". Other examples include "the commander", "the monarch", "the warlord", etc. Use the "_capitalized" variety to capitalize the first letter of the article. |
#leader_title_with_indefinite_article#, #leader_title_with_indefinite_article_capitalized# |
Inserts the current active leader title into the text, along with its appropriate indefinite article. The default is "a leader". Other examples include "a commander", "a monarch", "a warlord", etc. Use the "_capitalized" variety to capitalize the first letter of the article. |
#colony_title# |
Inserts the current active colony title into the text. The default is "colony". Other examples include "kingdom", "domain", "realm", etc. Useful when an NPC is referring to the colony in which the player lives. Displays in orange. |
#colony_title_with_article# |
Inserts the current active colony title into the text, along with its appropriate article. The default is "the colony". Other examples include "the kingdom", "the domain", "the realm", etc. Useful when an NPC is referring to the colony in which the player lives. Displays in orange. |
#colony_title_capitalized# |
Same as #colony_title#, but the first letter of each word in the colony title will be capitalized (ex. "Colony".) Displays in orange. |
#colony_title_capitalized_with_article# |
Same as #colony_title#, but the first letter of each word in the colony title will be capitalized. Plus, the article will be added (ex. "the Colony".) Displays in orange. |
#colony_title_capitalized_with_article_capitalized# |
Same as #colony_title#, but the first letter of each word in the colony title will be capitalized. Plus, the article will be added and capitalized (ex. "The Colony".) Displays in orange. |
#colony_title_with_demonstrative_article#, #colony_title_with_demonstrative_article_capitalized# |
Inserts the current active leader title into the text, along with its appropriate demonstrative article. The default is "this colony". Use the "_capitalized" variety to capitalize the first letter of the article. |
#colony_title_with_definite_article#, #colony_title_with_definite_article_capitalized# |
Inserts the current active leader title into the text, along with its appropriate definite article. The default is "the colony". Use the "_capitalized" variety to capitalize the first letter of the article. |
#colony_title_with_indefinite_article#, #colony_title_with_indefinite_article_capitalized# |
Inserts the current active leader title into the text, along with its appropriate indefinite article. The default is "a colony". Use the "_capitalized" variety to capitalize the first letter of the article. |
#colony_name# |
Inserts the current active colony name into the text. This is the customizable portion of the full colony name. For example, "Forest" or "Mystic" or "Mountain". Displays in orange. |
#colony_full_name# |
Inserts the full proper name of the player's colony into the text. For example, "Forest Colony" or "Mountain Domain". Displays in orange. |
#colony_full_name_with_article# |
Inserts the full proper name of the player's colony into the text, plus any appropriate articles. For example, "the Forest Colony" or "the Mountain Domain". Displays in orange. |
#colony_full_name_capitalized_with_article# |
Inserts the full proper name of the player's colony into the text, plus any approriate articles, capitalized. For example, "The Forest Colony" or "The Mountain Domain". Displays in orange. |
#mine_deepest_level# |
Inserts an integer displaying the number of the deepest level of the mine that the player has ever reached, ranging from 0-100. |
#total_mine_descends# |
Inserts an integer displaying the total number of times the player has descended a level in the mines. |
#total_mine_rocks# |
Inserts an integer displaying the total number of rocks the player has destroyed in the mines. |
#reached_bottom_of_mine_flavor# |
Inserts the special lang string, "lang_mine_reached_bottom_flavor" (found in the .lang file.) If the player has never reached the bottom of the mine, it will instead insert an empty string. |
#impressive_mine_stats_flavor# |
Inserts the special lang string, "lang_mine_impressive_stats_flavor" (found in the .lang file.) If the player does not have impressive mine stats (>= 100 total descends and >= 1000 rocks destroyed), it will instead insert an empty string. |
#mine_bottom_level_visits# |
Inserts an integer displaying the total number of times the player has reached Level 100 in the mines. |
#nl# |
Inserts a newline into the text. |
/// |
Inserts a hard break into the dialog, forcing the dialog to "split" into two separate prompts at this location. |
[neutral] |
Changes the dialog portrait to the Neutral emotion. This is a self-closing BBCode tag. |
[playful] |
Changes the dialog portrait to the Playful emotion. This is a self-closing BBCode tag. |
[happy] |
Changes the dialog portrait to the Happy emotion. This is a self-closing BBCode tag. |
[thinking] |
Changes the dialog portrait to the Thinking emotion. This is a self-closing BBCode tag. |
[sad] |
Changes the dialog portrait to the Sad emotion. This is a self-closing BBCode tag. |
[angry] |
Changes the dialog portrait to the Angry emotion. This is a self-closing BBCode tag. |
[shocked] |
Changes the dialog portrait to the Shocked emotion. This is a self-closing BBCode tag. |
[blushing] |
Changes the dialog portrait to the Blushing emotion. This is a self-closing BBCode tag. |
[special] |
Changes the dialog portrait to the Special emotion. This is a self-closing BBCode tag. |
[b]Example text here[/b] |
Bold |
[i]Example text here[/i] |
Italics |
[u]Example text here[/u] |
Underline |
[s]Example text here[/s] |
|
[rainbow]Example text here[/rainbow] |
Rainbow colored text (animated) |
[bouncy]Example text here[/bouncy] |
Bouncy text (animated) |
[scary]Example text here[/scary] |
Scary text (animated) |
[outline]Example text here[/outline] |
Puts a black outline around the text |
[outline white]Example text here[/outline white] |
Puts a white outline around the text |
[red]Example text here[/red] |
Red colored text |
[orange]Example text here[/orange] |
Orange colored text |
[yellow]Example text here[/yellow] |
Yellow colored text |
[green]Example text here[/green] |
Green colored text |
[light blue]Example text here[/light blue] |
Light blue colored text |
[blue]Example text here[/blue] |
Blue colored text |
[purple]Example text here[/purple] |
Purple colored text |
[white]Example text here[/white] |
White colored text |
[gray]Example text here[/gray] |
Gray colored text |
[black]Example text here[/black] |
Black colored text |
[brown]Example text here[/brown] |
Brown colored text |
[meow] |
Inserts a "meow" sound effect at this location. This is a self-closing BBCode tag. |
[hiss] |
Inserts a "hiss" sound effect at this location. This is a self-closing BBCode tag. |
[purr] |
Inserts a "purr" sound effect at this location. This is a self-closing BBCode tag. |
Please note that these special effects are only available within Dialog strings.
Occasionally, an NPC will have a question for the player, or a branch in their dialog. The game can display multiple answer options for the player to choose from, and the dialog will progress based on the player's answer.
For a simple example, consider an NPC who wants to ask the player a question about their opinion on the taste of Snake. Here's what this interaction looks like within a Dialog File:
				"lang_npc_neutral_dialog_0": "[neutral]Hello, #player_name#. I had a question for you... what do you think about the taste of [green]Snake[/green]?",

				"lang_npc_neutral_dialog_0_choice_0": "It's delicious!",

				"lang_npc_neutral_dialog_0_choice_0_path": "lang_npc_snake_is_delicious",

				"lang_npc_neutral_dialog_0_choice_1": "It's disgusting!",

				"lang_npc_neutral_dialog_0_choice_1_path": "lang_npc_snake_is_disgusting",

				"lang_npc_neutral_dialog_0_choice_2": "I have no opinion.",

				"lang_npc_neutral_dialog_0_choice_2_path": "lang_npc_snake_no_opinion",


				"lang_npc_snake_is_delicious": "[happy]Oh, really? I thought I was the only one who loved the taste of [green]Snake[/green]! Glad to know I'm not alone.",

				"lang_npc_snake_is_disgusting": "[shocked]Wow, you have a very strong opinion on this subject. [sad]I'll bet you've never even tried it.",

				"lang_npc_snake_no_opinion": "[thinking]Next time I catch one, I'll be sure to share with you. [happy]Then we can figure it out together!",
There's a lot to break down in the above example, so let's walk through each part:
First, you have the dialog that precedes the question. In this example, that's the value of "lang_npc_neutral_dialog_0".
Then, we've appended several choices to that dialog prompt by adding a few keys directly below it. In this example, our choices are "lang_npc_neutral_dialog_0_choice_0", "lang_npc_neutral_dialog_0_choice_1", and "lang_npc_neutral_dialog_0_choice_2". You can append up to 10 choices (0-9) to any given dialog prompt.
Next, we've added choice paths, which tell the dialog what "path" to take when the player selects the associated choice. In this example, our choice paths are "lang_npc_neutral_dialog_0_choice_0_path", "lang_npc_neutral_dialog_0_choice_1_path", and "lang_npc_neutral_dialog_0_choice_2_path". The values of these choice paths must be another dialog prompt's key.
Finally, we've implemeted the dialog that will display for each possible player choice. In the above example, these are "lang_npc_snake_is_delicious", "lang_npc_snake_is_disgusting", and "lang_npc_snake_no_opinion".
This is a powerful tool that can be added to any dialog prompt to add depth and flavor to an NPC. In general terms, you can add a question & answer prompt in the following manner:
When the player talks to an NPC, the NPC can reply with a variety of dialog possibilities. Often these bits of dialog center on thoughts or opinions about the current situation in-game. For example, a character may make a remark about the weather, or about their relationship with the player. All of these dialog possibilities are stored in Dialog Objects, which are contained in the "dialog" array within the NPC's Meta file.
At the start of each day, an NPC will select 1 dialog object to be active. When the player talks to the NPC, the NPC will quickly calculate if it needs to switch to a new dialog object, or if the existing dialog object is satisfactory, in which case it will not change.
These Dialog Objects contain data that determines when each piece of dialog can be displayed. Note that the actual translated text displayed to the player is stored separately in the NPC's lang file, not directly in the dialog objects.
| Dialog Objects Key | Description |
|---|---|
"intro_dialog_objects" |
Stores an array with all possible intro dialog objects, along with prerequisite data. |
"dialog_objects" |
Stores an array with all possible dialog options available to this NPC, along with prerequisite data. |
In the Dialog Objects "dialog" array, each Dialog Object contains the following keys:
| Dialog Object Key | Description |
|---|---|
"dialog_lang_key" |
Stores the name of a foreign key from the NPC's corresponding lang file that this dialog object is attached to. For example, "lang_npc_neutral_dialog_0". Occasionally you'll want to use a Special Dialog Language Key for a special behavior. |
"dialog_weight" |
A value, ranging from 1-9999, that determines what weighting this option should be given when multiple options are available to the NPC. A higher weighting indicates that this dialog will be more likely to be chosen. Alternatively, use the value of -1 to guarantee the highest priority. If multiple dialog objects are available weighted at a value of -1, the first one in the list (towards the top) will be selected. |
"dialog_unique" |
Boolean, true or false. Usually set to false. This flag indicates if this dialog should only ever be displayed once. |
"dialog_filters" |
Optionally, use this array to specify prerequisites that must be met before this dialog option will display to the player. See Dialog Object Filters below for a full discussion. |
There are a small handful of special dialog language keys that allow the NPC to perform special behaviors, such as offering a gift to the player. These special keys are noted below. In order to use the effects of one of these keys, set the "dialog_lang_key" of a Dialog Object to the value listed in the table below.
| Special Dialog Language Key | Description |
|---|---|
"lang_npc_give_gift" |
Instructs this NPC to offer a gift to the player. This may only be triggered once per day. After offering the gift, an NPC will select a different arbitrary dialog object to activate in the usual manner. The dialog displayed here is stored in the NPC's "lang_npc_give_gift" language key, as noted in the Dialog Files section. The gift given to the player will be chosen from the NPC's "npc_item_gifts" list. Note that any dialog object marked with this key will ignore a value of "dialog_unique": true. |
Use these filters to provide prerequisites that must be met before a particular dialog object will display to the player.
Below is a table of all available filters.
| Dialog Object Filter Key | Allowed Values | Description |
|---|---|---|
"filter_player_is_dating" |
true, false |
Specifies if this dialog option can appear when the player is dating any arbitrary NPC. Note that the player does not need to be dating the particular NPC they are speaking to in order for this to be true. |
"filter_player_is_dating_#NPC_Unique_ID#" |
true, false |
Requires that the player has is currently dating a specific NPC before this dialog will appear. For example, use the filter "filter_player_is_dating_ember": true to make this dialog only appear while the player is dating Ember, or use "filter_player_is_dating_talon": false to require that the player NOT be dating Talon if this dialog is to appear. |
"filter_player_is_married" |
true, false |
Specifies if this dialog option can appear when the player is married to any arbitrary NPC. Note that the player does not need to be married to the particular NPC they are speaking to in order for this to be true. |
"filter_player_is_married_to_#NPC_Unique_ID#" |
true, false |
Requires that the player has is currently married to a specific NPC before this dialog will appear. For example, use the filter "filter_player_is_married_to_elli": true to make this dialog only appear while the player is married to Elli, or use "filter_player_is_married_to_glimmer": false to require that the player NOT be married to Glimmer if this dialog is to appear. |
"filter_player_birthday" |
true, false |
Specifies if this dialog option can appear when it is the player's birthday. |
"filter_birthday" |
true, false |
Specifies if this dialog option can appear when it is this NPC's birthday. |
"filter_spring" |
true, false |
Specifies whether this dialog option should be available in the Spring season. (defaults true.) |
"filter_summer" |
true, false |
Specifies whether this dialog option should be available in the Summer season. (defaults true.) |
"filter_autumn" |
true, false |
Specifies whether this dialog option should be available in the Autumn season. (defaults true.) |
"filter_winter" |
true, false |
Specifies whether this dialog option should be available in the Winter season. (defaults true.) |
"filter_year" |
1-9999 |
Specifies the minimum Year that this dialog option will be available. For example, a value of 2 means that it will be available in any Year after the first. |
"filter_year_max" |
1-9999 |
Specifies the maximum Years that can pass before this dialog option will no longer be available. For example, a value of 3 means that after Year 3, the dialog option will no longer be available. |
"filter_day" |
1-999999 |
Specifies the minimum Total Days that must pass before this dialog option will be available. For example, a value of 30 means that it will become available on Day 30 and beyond. |
"filter_day_max" |
1-999999 |
Specifies the maximum Total Days that can pass before this dialog option will no longer be available. For example, a value of 15 means that after Day 15, the dialog option will no longer be available. |
"filter_season_day" |
1-10 |
Specifies the minimum Seasonal Day that this dialog option will be available. For example, a value of 5 means that it will be available only on the 5th day of each season or later. |
"filter_season_day_max" |
1-10 |
Specifies the maximum Seasonal Day after which this dialog option will no longer be available. For example, a value of 7 means that it will no longer be available after the 7th day of each season. |
"filter_hour" |
0-23 |
Specifies the minimum Hour that this dialog option will become available. |
"filter_hour_max" |
0-23 |
Specifies the maximum Hour that this dialog option will become available. |
"filter_time" |
"day", "night" |
Specifies if this dialog option should only be available during the day (4am - 8:59pm) or during the night (9pm - 3:59am). |
"filter_sun" |
true, false |
Specifies if this dialog option should be available during sunny weather (defaults true). |
"filter_fog" |
true, false |
Specifies if this dialog option should be available during foggy weather (defaults true). |
"filter_rain" |
true, false |
Specifies if this dialog option should be available during rainy weather (defaults true). |
"filter_storm" |
true, false |
Specifies if this dialog option should be available during stormy weather (defaults true). |
"filter_snow" |
true, false |
Specifies if this dialog option should be available during snowy weather (defaults true). |
"filter_blizzard" |
true, false |
Specifies if this dialog option should be available during blizzard weather (defaults true). |
"filter_has_met_#NPC_Unique_ID#" |
true, false |
Requires that the player has already interacted with another NPC at least once before this dialog will appear. For example, use the filter "filter_has_met_coco": true to make this dialog only appear after the player has interacted with Coco, or use "filter_has_met_krampy": false to require that the player NOT meet Krampy if this dialog is to appear. |
"filter_is_at_festival" |
true, false |
Specifies if this dialog should appear when the NPC is at a festival. |
"filter_is_inside" |
true, false |
Specifies if this dialog should appear when the NPC is in any interior area, such as a den. |
"filter_is_in_den" |
true, false |
Specifies if this dialog should appear when the NPC is inside their own den. |
"filter_is_in_players_den" |
true, false |
Specifies if this dialog should appear when the NPC is inside the player's den. |
"filter_player_health_max" |
0-18 |
Specifies a maximum value for player health before this NPC will use this dialog option. Useful for commenting on how "beat up" the player appears. |
"filter_player_hunger_max" |
0-1000 |
Specifies a maximum value for player hunger before this NPC will use this dialog option. Useful for commenting on how famished the player appears. |
"filter_friendship" |
0-4 |
Specifies the minimum friendship rank at which this dialog will appear. Note that 0 is reserved for the "dislike" rank; the player begins at rank 1 with most NPCs. See the section on NPC ranks for important usage information. |
"filter_friendship_max" |
0-4 |
Specifies the maximum friendship rank at which this dialog will appear. Note that 0 is reserved for the "dislike" rank; the player begins at rank 1 with most NPCs. See the section on NPC ranks for important usage information. Also note that if this filter is set to a value of 4, any NPC that is dating or married to the player will not pass this filter! |
"filter_dating" |
0-4 |
Specifies the minimum dating rank at which this dialog will appear. The player typically begins at rank 1 when they start dating this NPC. At rank 4, marriage proposal requests will be successful. See the section on NPC ranks for important usage information. |
"filter_dating_max" |
0-4 |
Specifies the maximum dating rank at which this dialog will appear. The player typically begins at rank 1 when they start dating this NPC. At rank 4, marriage proposal requests will be successful. See the section on NPC ranks for important usage information. |
"filter_marriage" |
0-4 |
Specifies the minimum marriage rank at which this dialog will appear. The player typically begins at rank 1 when they first marry this NPC. See the section on NPC ranks for important usage information. |
"filter_marriage_max" |
0-4 |
Specifies the maximum marriage rank at which this dialog will appear. The player typically begins at rank 1 when they first marry this NPC. See the section on NPC ranks for important usage information. |
"filter_mine_level" |
1-100 |
This is a very rare filter that should only be used in special cases (like certain Mole NPCs.) This filter allows a dialog object to only appear when the player is both actively in the mines and on a particular mine level. |
"filter_cave_index" |
1-3 |
This is a very rare filter that should only be used in special cases (like certain Mole NPCs.) This filter allows a dialog object to only appear when the player is both actively in the mines and in a specific mine (1, 2, or 3). |
"filter_mine_stairs_found" |
true, false |
This is a very rare filter that should only be used in special cases (like certain Mole NPCs.) This filter allows a dialog object to only appear when the player is both actively in the mines and has found at least 1 downward staircase (true) or has not yet found any downward staircases (false). |
"filter_accessory_equipped" |
"{AccessoryUID}" (ex. "Beaky") |
This filter will make the dialog only appear if the given accessory if currently being worn by the player. |
"filter_npc_x_min" |
0-1440 |
This filter will make the dialog only appear if the npc is at a minimum x value as specified by the filter. |
"filter_npc_x_max" |
0-1440 |
This filter will make the dialog only appear if the npc is at a maximum x value as specified by the filter. |
"filter_npc_y_min" |
0-1440 |
This filter will make the dialog only appear if the npc is at a minimum y value as specified by the filter. |
"filter_npc_y_max" |
0-1440 |
This filter will make the dialog only appear if the npc is at a maximum y value as specified by the filter. |
"filter_npc_sitting" |
true, false |
This filter will make the dialog only appear if the npc is currently sitting. |
"filter_map_uid_#map_region_uid#" |
true, false |
This filter will make the dialog only appear if the current map region is #map_region_uid#. For example, "filter_map_uid_playercolony": true will make the dialog only appear when in the "playercolony" map region. |
"filter_npc_is_present_#npc_uid#" |
true, false |
This filter will make the dialog only appear if the specified npc is present in the map region. For example, "filter_npc_is_present_spark": true will make the dialog only appear if Spark is present in the map region when the dialog is triggered. |
"filter_has_kittens" |
true, false |
This filter will make the dialog only appear if the player already has kittens (or does not have kittens.) |
"filter_kitten_age" |
0-99999 |
This filter specifies the minimum kitten age (in days) before this dialog option will appear. |
"filter_kitten_age_max" |
0-99999 |
This filter specifies the maximum kitten age (in days) until this dialog option will stop appearing. |
"filter_mine_two_unlocked" |
true, false |
This filter specifies if this dialog should appear only before or after the Second Mine is unlocked. |
"filter_mine_three_unlocked" |
true, false |
This filter specifies if this dialog should appear only before or after the Third Mine is unlocked. |
"filter_is_ngp" |
true, false |
This filter specifies if this dialog should appear only if this is a New Game+ file (or not). |
"filter_ngp_parent" |
"{NPC_UID}" (ex. "spark") |
This filter will make the dialog only appear if in a New Game+ file and the specified NPC is the player's parent. |
"filter_rival_marriage_completed_{RivalMarriageUID}" |
true, false |
This filter will make the dialog only appear if a specific rival marriage pairing has been completed (or not completed). For example, "filter_rival_marriage_completed_krampyandtalon": true will make this dialog only appear if the Krampy and Talon rival marriage has been completed. See rival marriages below for more details on the rival marriage system. |
"filter_event_witnessed_{EventUID}" |
true, false |
This filter will make the dialog only appear if a specific Event has been witnessed by the player (or not witnessed). For example, "filter_event_completed_elliandchamp1": true will make this dialog only appear if the Elli and Champ Event 1 has been witnessed by the player. See Events for more details on the Event system. |
"filter_wc_fate" |
-1, 0, 1 |
This filter will make the dialog only appear if a specific Main Story outcome has been achieved. 0 = Main Story incomplete. -1 = Main Story complete, Wildwood Champion vanquished; 1 = Main Story complete, Wildwood Champion spared. |
Some predetermined pairings of NPCs may eventually end up together, married, and possibly have kittens of their own (unlockable NPCs) as the game progresses. These pairings, along with all their associated data (including which kittens they will have!) are stored in rival marriage .meta files.
Each pairing should have its own .meta file. The name for this file can be decided arbitrarily, but we've gone with {partner_uid}and{partner_uid}.meta for the official ones.
Within these files are stored the following key/value pairs:
| Rival Marriages Key | Allowed Values | Description |
|---|---|---|
"partner_primary_uid" |
"{NPC_UID}" (ex. "alabaster") |
Stores the unique identifier for the primary partner for this rival marriage pairing. The primary partner will be the one who's den is moved into after the pair gets married, and the primary partner will also be the one who will come to the player in confidence to ask for the player's advice prior to the couple getting together. |
"partner_secondary_uid" |
"{NPC_UID}" (ex. "fliss") |
Stores the unique identifier for the other partner for this rival marriage pairing. The primary & secondary partners form the rival marriage couple. |
"kitten_uids" |
[ "{NPC_UID}", "{NPC_UID}", ... ] (ex. [ "bubby", "basil", ... ]) |
Stores a list of unique identifiers for the kitten NPCs that may be born from this rival marriage pairing. You may have a list of one NPC UID (i.e. [ "aster" ]) if this couple will only have 1 child; similarly, leave the list empty (i.e. [ ]) if they are not to have any children at all. Any NPC UID included in this list will be automatically "locked" and unavailable from the start of the game for a new savefile! These "child" NPCs will only be unlocked if the associated rival marriage couple ends up together. |
"kitten_birthday_season" |
"Spring", "Summer", "Autumn", "Winter" |
Specifies the season in which this couple will "give birth" to their associated kittens (see the "kitten_uids" key above) after getting married. At this time the kittens will become "unlocked" NPCs and join the colony. All kittens born to this couple will share this one birthday. |
"kitten_birthday_day" |
1-10 |
Specifies the day in which this couple will "give birth" to their associated kittens (see the "kitten_uids" key above) after getting married. At this time the kittens will become "unlocked" NPCs and join the colony. All kittens born to this couple will share this one birthday. Optionally, you can set this value to an invalid number (such as 0 or 999) if you wish for this couple's associated kittens to never be born. |
"wedding_attendees" |
[ "{NPC_UID}", "{NPC_UID}", ... ] |
Stores a list of unique identifiers for the NPCs that will attend this rival marriage couple's wedding ceremony (if already unlocked by the time they get married.) |
"prerequisite_events" (optional) |
[ "{EventUID}", "{EventUID}", ... ] |
Stores a list of unique identifiers for Events that must be witnessed by the player prior to this Rival Marriage couple getting together. Leave empty or do not include this key if you don't wish to require any Events to be witnessed for this couple. See the discussion on Events below for more information about that system. |
Events are special cutscenes that can take place over the course of gameplay. An event interrupts the flow of regular gameplay to introduce a short narrative segment, then wraps up and resets the game to the state it was in prior to the event.
Events are stored in the /gameresources/events directory. These files are named {eventUID}.meta and must be uniquely named.
Below is a table listing all the associated keys an event.meta file can have:
| Event Key | Allowed Values | Description |
|---|---|---|
"event_map_uid" |
"{map_region_uid}" (i.e. "emberandsparkden", "festivalplaza", etc.) |
Which map region this Event should take place in. Events are triggered upon entering a new region, so the game will check exactly once for an active Event the moment the player enters a different map region. |
"event_unique" |
true, false (default is true) |
Whether this event is unique, meaning it can only trigger exactly once per playthrough, or not unique, in which case it can trigger indefinitely. Almost all events should be unique. |
"event_can_skip" (optional) |
true, false (default is true) |
Whether or not the player can skip this Event at any time by pausing and selecting Skip Event from the pause menu. By default all Events can be skipped, but if you specify this value to be false then the player will not be able to skip this Event once it starts. |
"event_chance" (optional) |
0-100 |
Allows you to specify a random chance for this event to trigger (or not to trigger.) This value is a percentage value, where the higher the number the greater the chance for this event to trigger when its conditions are fully met. A chance of 0 means this event will never trigger; a chance of 100 means this event will always trigger; a chance of 50 means this event will trigger half the time. |
"event_high_priority" (optional) |
true, false |
Allows you to specify if this event is high priority or not. By default, events are not high priority. Typically, only 1 Event can occur in a given day, in order to not overwhelm the player with constant interruptions. However, high priority events can trigger regardless of whether or not other Events have already triggered on this day. |
"event_music" (optional) |
"{trackUID}" (i.e. "romanticrefrain", "suspiciousbehavior") |
Allows you to specify a music track ID that will play during the unfolding of this Event. See the discussion on music tracks below. |
"event_filters" |
{ "{filter_type}": {filter_value}, "{filter_type}": {filter_value}, ... } |
Event filters are specific conditions that must be met before this Event will trigger. See the full discussion on Event Filters below. |
"event_blocks" |
[ { ... }, { ... }, ... ] |
Event blocks represent the sequence of things that occur during the unfolding of this Event. This is a list of event block objects. See the discussion on Event Blocks below. |
Event filters should be carefully specified as they are essentially requirements that must be satisfied in order for a particular Event to occur.
Below is a table of all valid Event Filters and their associated values:
| Filter Key | Allowed Values | Description |
|---|---|---|
"filter_player_is_dating" |
true, false |
Specifies if this Event can be triggered when the player is dating any arbitrary NPC. |
"filter_player_is_married" |
true, false |
Specifies if this Event can be triggered when the player is married to any arbitrary NPC. |
"filter_spring" |
true, false |
Specifies whether this Event can be triggered in the Spring season. (defaults true.) |
"filter_summer" |
true, false |
Specifies whether this Event can be triggered in the Summer season. (defaults true.) |
"filter_autumn" |
true, false |
Specifies whether this Event can be triggered in the Autumn season. (defaults true.) |
"filter_winter" |
true, false |
Specifies whether this Event can be triggered in the Winter season. (defaults true.) |
"filter_year" |
1-9999 |
Specifies the minimum Year that this Event can be triggered. For example, a value of 2 means that it will be available in any Year after the first. |
"filter_year_max" |
1-9999 |
Specifies the maximum Years that can pass before this Event can no longer be triggered. For example, a value of 3 means that after Year 3, the Event will no longer be available. |
"filter_day" |
1-999999 |
Specifies the minimum Total Days that must pass before this Event will be available. For example, a value of 30 means that it will become available on Day 30 and beyond. |
"filter_day_max" |
1-999999 |
Specifies the maximum Total Days that can pass before this Event will no longer be available. For example, a value of 15 means that after Day 15, the Event will no longer be available. |
"filter_season_day" |
1-10 |
Specifies the minimum Seasonal Day that this Event will be available. For example, a value of 5 means that it will be available only on the 5th day of each season or later. |
"filter_season_day_max" |
1-10 |
Specifies the maximum Seasonal Day after which this Event will no longer be available. For example, a value of 7 means that it will no longer be available after the 7th day of each season. |
"filter_hour" |
0-23 |
Specifies the minimum Hour that this Event will become available. |
"filter_hour_max" |
0-23 |
Specifies the maximum Hour that this Event will become available. |
"filter_time" |
"day", "night" |
Specifies if this Event should only be available during the day (4am - 8:59pm) or during the night (9pm - 3:59am). |
"filter_sun" |
true, false |
Specifies if this Event should be available during sunny weather (defaults true). |
"filter_fog" |
true, false |
Specifies if this Event should be available during foggy weather (defaults true). |
"filter_rain" |
true, false |
Specifies if this Event should be available during rainy weather (defaults true). |
"filter_storm" |
true, false |
Specifies if this Event should be available during stormy weather (defaults true). |
"filter_snow" |
true, false |
Specifies if this Event should be available during snowy weather (defaults true). |
"filter_blizzard" |
true, false |
Specifies if this Event should be available during blizzard weather (defaults true). |
"filter_accessory_equipped" |
"{AccessoryUID}" (ex. "Beaky") |
This filter will make the Event only trigger if the given accessory if currently being worn by the player. |
"filter_player_birthday" |
true, false |
Specifies if this Event can be triggered on the player's birthday. |
"filter_player_health_max" |
0-18 |
Specifies a maximum value for player health before this Event can be triggered. |
"filter_player_hunger_max" |
0-1000 |
Specifies a maximum value for player hunger before this Event can be triggered. |
"filter_has_met_#NPC_UID#" (ex. "filter_has_met_coco") |
true, false |
Specifies if the player has ever met a particular NPC before this Event can be triggered. |
"filter_player_is_dating_#NPC_UID#" (ex. "filter_player_is_dating_glimmer") |
true, false |
Specifies if this Event should be available while the player is dating a particular NPC. |
"filter_player_is_married_to_#NPC_UID#" (ex. "filter_player_is_married_to_talon") |
true, false |
Specifies if this Event should be available while the player is married to a particular NPC. |
"filter_birthday_#NPC_UID#" (ex. "filter_birthday_fliss") |
true, false |
Specifies if this Event should be available on a particular NPC's birthday. |
"filter_friendship_#NPC_UID#" (ex. "filter_friendship_ember") |
0-4 |
Specifies if this Event should be available when the player has reached this minimum friendship rank with a particular NPC. |
"filter_friendship_max_#NPC_UID#" (ex. "filter_friendship_max_ember") |
0-4 |
Specifies the maximum friendship rank with a particular NPC at which this Event should be available. |
"filter_dating_#NPC_UID#" (ex. "filter_dating_krampy") |
0-4 |
Specifies if this Event should be available when the player has reached this minimum dating rank with a particular NPC. |
"filter_dating_max_#NPC_UID#" (ex. "filter_dating_max_krampy") |
0-4 |
Specifies the maximum dating rank with a particular NPC at which this Event should be available. |
"filter_marriage_#NPC_UID#" (ex. "filter_marriage_champ") |
0-4 |
Specifies if this Event should be available when the player has reached this minimum marriage rank with a particular NPC. |
"filter_marriage_max_#NPC_UID#" (ex. "filter_marriage_max_champ") |
0-4 |
Specifies the maximum marriage rank with a particular NPC at which this Event should be available. |
"filter_has_kittens" |
true, false |
Specifies if this Event is (or is not) available after the player has a litter of kittens. |
"filter_mine_two_unlocked" |
true, false |
This filter specifies if this Event should be available only before or after the Second Mine is unlocked. |
"filter_mine_three_unlocked" |
true, false |
This filter specifies if this Event should be available only before or after the Third Mine is unlocked. |
"filter_is_ngp" |
true, false |
This filter specifies if this Event should appear only if this is a New Game+ file (or not). |
"filter_ngp_parent" |
"{NPC_UID}" (ex. "spark") |
This filter will make this Event only appear if in a New Game+ file and the specified NPC is the player's parent. |
"filter_rival_marriage_completed_{RivalMarriageUID}" |
true, false |
This filter will make the Event only appear if a specific rival marriage pairing has been completed (or not completed). For example, "filter_rival_marriage_completed_krampyandtalon": true will make this Event only appear if the Krampy and Talon rival marriage has been completed. See rival marriages above for more details on the rival marriage system. |
"filter_event_witnessed_{EventUID}" |
true, false |
This filter will make the Event only appear if a specific other Event has been witnessed by the player (or not witnessed). For example, "filter_event_completed_elliandchamp1": true will make this Event only appear if the Elli and Champ Event 1 has been witnessed by the player. |
"filter_wc_fate" |
-1, 0, 1 |
This filter will make the Event only appear if a specific Main Story outcome has been achieved. 0 = Main Story incomplete. -1 = Main Story complete, Wildwood Champion vanquished; 1 = Main Story complete, Wildwood Champion spared. |
Event Blocks allow you to specify a step-by-step listing of things that will occur during this Event. The Event controller will step through each Event Block, one at a time, starting with the topmost block and ending with the bottommost block, executing the commands contained within in their proper order. Once all Event Blocks have been exhausted, the event will automatically end.
Each Event Block is comprised of a JSON Object with a variety of special keys, specific to the type of Event Block. The one key that remains constant across all types of Event Blocks and must be included in each is "block_type" (as this tells the game what type of Event Block object this particular Event Block is.)
Here is an example Event Block JSON object:
			{

					"block_type": "wait",

					"seconds": 3.5

			},

			{

					"block_type": "dialog_branch",

					"speaker_uid": "coco",

					"lang_key": "lang_event_1",


					"choice_1_key": "lang_event_choice_1",

					"choice_1_path": "event_blocks_yes_response",

					"choice_1_consequences": {

						"friendship_change_coco": 25

					},


					"choice_2_key": "lang_event_choice_2",

					"choice_2_path": "event_blocks_no_response",

					"choice_2_consequences": {

						"friendship_change_coco": -25

					}

			}
Here is a helpful listing of all Event Block types, along with their associated keys.
"block_type": "wait"
"seconds": # (required) Specifies the number of seconds to wait before continuing with the event. Useful for pauses.
"block_type": "camera"
"cat_uid": "{catUID}" (optional) Specifies a particular cat to focus the camera on (i.e. "spark".) You can also set this value to "player" to focus the camera on the player.
"x": #, "y": # (optional) Specifies a particular x,y coordinate to center the camera on. Must use both "x" and "y" parameters together in an event block if one is specified.
"block_type": "warp_player"
"x": #, "y": # (required) Warps the player to the specified x,y coordinates immediately.
"direction": "north/east/south/west" (required) Specifies which direction the player should be facing after the immediate warp.
"block_type": "warp_npc"
"npc_uid": "{npcUID}" (required) Warps the specified NPC (i.e. "spark") to the specified x,y coordinates immediately.
"x": #, "y": # (required) Warps the specified NPC (i.e. "spark") to the specified x,y coordinates immediately.
"direction": "north/east/south/west" (required) Specifies which direction the NPC should be facing after the immediate warp.
"behavior": "standing/sleeping/sitting" (required) Specifies the behavior the NPC should adopt after the immediate warp. Default is "standing".
"block_type": "dialog"
"speaker_uid": "{npcUID}" (required) Specifies the speaker UID of the NPC who will say this line of dialog. You can also use the special string "narrative" to get a generic grey dialog box instead.
"lang_key": "{langKey}" (required) Specifies which specific line of dialog to trigger here, matching a key from a .lang file. For example, "lang_event_dialog_0"
"block_type": "dialog_branch"
"speaker_uid": "{npcUID}" (required) Specifies the speaker UID of the NPC who will say this line of dialog. You can also use the special string "narrative" to get a generic grey dialog box instead.
"lang_key": "{langKey}" (required) Specifies which specific line of dialog to trigger here, matching a key from a .lang file. For example, "lang_event_dialog_0"
"choice_#_key": "{langKey}" (optional, 1-6) Specifies the first choice text language key, matching a key from a .lang file. For example, "lang_event_choice_1"
"choice_#_path": "{newEventBlockUID}" (optional, 1-6, required for each "choice_#_key" present) Specifies which new Event Block list the event should proceed down if the associated choice is picked. For example, "event_blocks_yes_response" or "event_blocks_no_response". The new Event Block list will override the default "event_blocks" list for the remainder of the Event. You must create the new Event Block list yourself and name it the same name as the {newEventBlockUID} specified in this key.
"choice_#_consequences": { ... } (optional, 1-6) Specifies a list of mechanical consequences that will occur if the associated choice is selected by the player. A full listing of possible consequences and their values is below:
"friendship_change_{npcUID}": # Changes the player's friendship/dating/marriage value with the associated NPC by the amount specified (use negative numbers to lose friendship points.)"block_type": "move_npc"
"npc_uid": "{npcUID}" (required) Specifies which NPC to move (i.e. "spark".)
"x": #, "y": # (required) Specifies the coordinate to move this NPC to.
"direction": "north/east/south/west" (required) Specifies which direction this NPC should face once they reach their destination.
"behavior": "standing/sleeping/sitting/destroy" (required) Specifies the behavior this NPC should adopt upon arrival at their destination. Default behavior is "standing".
"speed_mod": # (optional) Changes this NPC's movement speed for this move command. This is a multiplier; 1.0 means regular speed; 0.5 means half speed; 2.0 means double speed; etc.
"block_type": "move_player"
"x": #, "y": # (required) Specifies the coordinate to move the player to.
"direction": "north/east/south/west" (required) Specifies which direction the player should face once they reach their destination.
"block_type": "spawn_item"
"item_uid": "{itemUID}" (required) Specifies which item to spawn (must be a valid Item UID, i.e. "Trout").
"x": #, "y": # (required) Specifies the coordinate where the item should spawn.
"block_type": "emote"
"target": "{npcUID}/player" (required) Specifies which cat this emote will appear at (i.e. "krampy" or "player").
"emote_type": "meow/heart/check/x/distress/exclam/question/ellipsis" (required) Specifies the type of emote to display on the target cat.
"block_type": "hold_item"
"target": "{npcUID}/player" (required) Specifies which cat this item will appear to be held by (i.e. "krampy" or "player").
"item_uid": "{itemUID}" (required) Specifies the type of item that the target cat will appear to be holding (i.e. "Frog").
"block_type": "drop_item"
"target": "{npcUID}/player" (required) Specifies which cat should drop their currently-held event item (i.e. "lainey" or "player").
"block_type": "grant_item"
"item_uid": "{item_uid}" (required) Specifies which item should be granted to the player (i.e. "Honeycomb" or "Raspberries [Poor]"). Note that only 1 of the item can be granted to the player for each of these event blocks. If the player's inventory is full at the moment the item is granted, it will instead be added to their storage.
Bundles allow you to lock access to a particular NPC until a number of specific items have been donated. This is how the "recruiting new cats to your colony" feature operates.
The player can visit the Pillar of the Wildwood in the Temple of the Forest Guardian and view up to 6 active Bundles at a time. By donating the requisite items, a Bundle may be completed, in which case it will disappear from the Pillar of the Wildwood and the associated NPC(s) will be unlocked for the player to interact with from that point onward.
Each Bundle has 1 associated .meta file in the /gameresources/bundles directory. This files may be named anything you like as all the important data is stored inside.
Below is a table listing the important keys and possible values for a Bundle .meta file:
| Bundle Key | Allowed Values | Description |
|---|---|---|
"bundle_unlock_npc_uids" |
[ "{NPC_UID}", "{NPC_UID}", ... ] |
A list of all the NPCs that completing this Bundle will unlock. Most bundles only unlock 1 NPC, in this case use [ "{NPC_UID}" ] . For example, ["glimmer"] would make this Bundle completion unlock Glimmer. Whereas ["lainey", "fliss"] would make this Bundle completion unlock both Lainey and Fliss. By default, any NPCs specified in this list in any Bundle will be automatically locked at the start of a new game!! |
"bundle_priority" |
0-9999999 |
Specifies the listing priority of the bundle. Lower numbers are higher priority. Remember, the player only has access to the top 4 priority Bundles at any given time; so choose this number wisely. When a high priority bundle is completed, the next highest priority bundle will take its place in the player's active Bundles GUI. |
"bundle_post_story" (optional) |
false, true |
This optional flag, if set to true, will restrict this bundle's availability until the Main Story has been completed. |
"bundle_colony_points" |
0-99 |
Specifies how many Colony Points unlocking this Bundle will grant to the player's colony. These points are used for Main Story progression. |
"bundle_feature_label" |
"", "museum", "squads", "gardening" |
Specifies a label for a certain feature that unlocking this bundle will grant to the player's colony. Note that this label does not actually make the Bundle unlock the given feature; the label is cosmetic only. These special feature unlocks are hard-coded to specific NPCs (Glimmer, Talon, Alabaster.) |
"bundle_item#_uid" (1-5) |
"{ITEM_UID}", "" (ex. "Mouse") |
Specifies a specific item that must be turned in to complete the Bundle. Note that Bundles that include ranked herbs as required items will also accept any herb that is HIGHER rank than the specified item (for example, a bundle that requires "Goldenseal [Poor]" will also accept "Goldenseal [Fair]" and "Goldenseal [Good]" to progress; however, a bundle that requires "Goldenseal [Good]" will not accept the lesser varieties to progress.) Use an empty string "" if this bundle does not require an item in this number slot. |
"bundle_item#_quantity" (1-5) |
0-999 |
Specifies the number of items that the player must turn in to complete this particular part of the bundle. For example, if "bundle_item2_uid" is "Mouse" and "bundle_item2_quantity" is 3, the player must turn in three Mouse items to complete this part of the Bundle. |
Several NPCs run shops where the player can purchase items, accessories, and upgrades. The Shop .meta files, located within the Game Installation Path under the /gameresources/npcs/shops directory (see above discussion), contain all shop data.
Note that shopkeepers will provide a 10% discount on all items in their shop if they are befriendable and the player has achieved a 4-star friendship rank with them.
The contents of a shop.meta file are structured in the JSON format. Essentially, the contents are structured as human-readable key-value pairs. Below is a sample of the structure:
			{


					"shop_title": "ember_shop_name",


					"currency_type": "mews",


					"buy_dialog": "lang_ember_shop_buy",

					"sell_dialog": "lang_ember_shop_sell",

					"sell_everything_dialog": "lang_ember_shop_sell_everything",

					"sell_everything_invalid_dialog": "lang_ember_shop_sell_everything_invalid",

					"sell_everything_nothing_dialog": "lang_ember_shop_sell_everything_nothing",

					"cannot_sell_dialog": "lang_ember_shop_cannot_sell",

					"thanks_dialog": "lang_ember_shop_thanks",

					"not_enough_inventory_dialog": "lang_ember_not_enough_inventory",

					"not_enough_currency_dialog": "lang_ember_not_enough_currency",


					"allow_selling": true,


					"shop_items":

					[

					...

					]

				}
A shop meta file must be named "shop____.meta". For example, "shopember.meta" or "shopdev.meta".
Below is a table of important keys and their possible values, along with descriptions of each.
| Shop Key | Allowed Values | Description |
|---|---|---|
"currency_type" |
"mews", "mole cash", "festival tokens", "task tokens" |
Specifies the type of currency that is accepted at this shop. |
"allow_selling" |
true, false |
Whether or not the player is able to sell their items at this shop. Usually, the shopkeeper will pay in Mews; if the shop is a Mole Cash shop, the shopkeeper will pay in Mole Cash (and only accept specific items.) |
"shop_title" |
"[shop_name_key]" |
This key points to another key, located within the appropriate NPC's translated Dialog Files. The other key should contain the localized shop name. |
"buy_dialog" |
"[buy_dialog_key]" |
This key points to another key, located within the appropriate NPC's translated Dialog Files. The other key should contain dialog that the shopkeeper will say when the player attempts to purchase an item. |
"sell_dialog" |
"[sell_dialog_key]" |
This key points to another key, located within the appropriate NPC's translated Dialog Files. The other key should contain dialog that the shopkeeper will say when the player attempts to sell them an item. |
"sell_everything_dialog" |
"[sell_everything_dialog_key]" |
This key points to another key, located within the appropriate NPC's translated Dialog Files. The other key should contain dialog that the shopkeeper will say when the player attempts to sell everything they are holding to them, and the player has at least 1 sellable item, in addition to NO unsellable items. (Whether or not an item can be sold is dependent on the currency type of the shop.) |
"sell_everything_invalid_dialog" |
"[sell_everything_invalid_dialog_key]" |
This key points to another key, located within the appropriate NPC's translated Dialog Files. The other key should contain dialog that the shopkeeper will say when the player attempts to sell everything they are holding to them, and the player has at least 1 sellable item, in addition to at least 1 unsellable item. The shopkeeper will allow them to sell all their eligible items. (Whether or not an item can be sold is dependent on the currency type of the shop.) |
"sell_everything_nothing_dialog" |
"[sell_everything_nothing_dialog_key]" |
This key points to another key, located within the appropriate NPC's translated Dialog Files. The other key should contain dialog that the shopkeeper will say when the player attempts to sell everything they are holding to them, and the player has NO sellable items. The shopkeeper will not allow the transaction to take place. (Whether or not an item can be sold is dependent on the currency type of the shop.) |
"cannot_sell_dialog" |
"[cannot_sell_dialog_key]" |
This key points to another key, located within the appropriate NPC's translated Dialog Files. The other key should contain dialog that the shopkeeper will say when the player attempts to sell them an item that cannot be sold at this particular shop. |
"thanks_dialog" |
"[thanks_dialog_key]" |
This key points to another key, located within the appropriate NPC's translated Dialog Files. The other key should contain dialog that the shopkeeper will say after the player successfully purchases an item from their shop. |
"not_enough_inventory_dialog" |
"[not_enough_inventory_dialog_key]" |
This key points to another key, located within the appropriate NPC's translated Dialog Files. The other key should contain dialog that the shopkeeper will say if the player attempts to buy an item, but has no free inventory space. |
"not_enough_currency_dialog" |
"[not_enough_currency_dialog_key]" |
This key points to another key, located within the appropriate NPC's translated Dialog Files. The other key should contain dialog that the shopkeeper will say if the player attempts to buy an item, but cannot afford it. |
"shop_items" |
[ {}, {}, {}, ... ] |
Contains an array of all the items for sale at this shop. See below for a more detailed look at how to structure an item in this array. |
The special key "shop_items" contains an array of all the available items at a particular shop. An item is listed as a JSON object within this array. Below is an example of the "shop_items" structure:
			"shop_items":

			[


				{

					"item_name": "Mouse",

					"item_base_price": 10,

					"item_filters": {}

				},

				{

					"item_name": "Dove",

					"item_base_price": 16,

					"item_filters": {}

				},

				{

					"item_name": "Rabbit",

					"item_base_price": 18,

					"item_filters": {}

				},

				...


			]
Below is a table explaining how to structure an Item JSON object:
| Item Key | Allowed Values | Description |
|---|---|---|
"item_name" |
"Mouse", "Dove", "Gold Ore", etc. |
Specifies what item to sell. Use the item unique identifier here. A full listing of all item unique identifiers can be found here. Note that in some cases, these may be different than the English-translated display name of the item in-game! |
"item_base_price" |
0-9999 |
Specifies the base price that the shopkeeper will charge for the item. |
"item_filters" |
{ "filter1": value, "filter2": value, ... } |
This key contains a JSON object of item filters. Filters are entirely optional; leave the JSON object empty (like so: {} ) if you do not wish to apply any filters to this item listing. A discussion on item filters can be found below. |
In some cases, a shop will carry different items at different times. The "item_filters" key exists to serve this function.
The "item_filters" key may optionally be left as an empty JSON object, like so:
"item_filters": {}
In this case, the item will always display in the shop for purchase.
It should also be noted that certain items may only be purchased one time (Accessories, Furniture, and Upgrades.) These items will auto-filter out of the shop if they have already been purchased or unlocked by the player. No need to set a filter for this functionality!
Additionally, ranked Upgrade items (such as "Inventory Upgrade I/II/III") have built-in prerequisites that will automatically apply. For example, Upgrade II will not appear until the player has unlocked Upgrade I. In order to have a shop display all possible ranks for an upgrade, you must add each rank separately to the "shop_items" array.
Below is an example of an item that has been filtered to only appear in the shop in Spring or Summer, Year 2 or later:
			"item_filters": {

				"filter_spring": true,

				"filter_summer": true,

				"filter_autumn": false,

				"filter_winter": false,

				"filter_year": 2

			}
Below is a table of all available filters.
| Item Filter Key | Allowed Values | Description |
|---|---|---|
"filter_spring" |
true, false |
Specifies whether this item should appear in the shop during the Spring season. (defaults true.) |
"filter_summer" |
true, false |
Specifies whether this item should appear in the shop during the Summer season. (defaults true.) |
"filter_autumn" |
true, false |
Specifies whether this item should appear in the shop during the Autumn season. (defaults true.) |
"filter_winter" |
true, false |
Specifies whether this item should appear in the shop during the Winter season. (defaults true.) |
"filter_year" |
1-9999 |
Specifies the minimum Year that this item will appear. For example, a value of 2 means that it will appear in any Year after the first. |
"filter_year_max" |
1-9999 |
Specifies the maximum Years that can pass before this item will no longer be listed. For example, a value of 3 means that after Year 3, the item will no longer be listed at the shop. |
"filter_day" |
1-999999 |
Specifies the minimum Total Days that must pass before this item will appear. For example, a value of 30 means that it will appear on Day 30 and beyond. |
"filter_day_max" |
1-999999 |
Specifies the maximum Total Days that can pass before this item will no longer be listed. For example, a value of 15 means that after Day 15, the item will no longer be listed at the shop. |
"filter_season_day" |
1-10 |
Specifies the minimum Seasonal Day that this item will appear. For example, a value of 5 means that it will appear only on the 5th day of each season or later. |
"filter_season_day_max" |
1-10 |
Specifies the maximum Seasonal Day after which this item will no longer be listed. For example, a value of 7 means that the item will no longer appear after the 7th day of each season. |
"filter_hour" |
0-23 |
Specifies the minimum Hour that this item will appear. |
"filter_hour_max" |
0-23 |
Specifies the maximum Hour that this item will appear. |
"filter_time" |
"day", "night" |
Specifies if this item should only be available during the day (4am - 8:59pm) or during the night (9pm - 3:59am). |
"filter_friendship_#NPC_UID#" |
0-4 |
Specifies the minimum friendship rank with a particular NPC that the player must have before this item will be available in this shop. |
"filter_wc_fate" |
-1, 0, 1 |
This filter will make the item only appear if a specific Main Story outcome has been achieved. 0 = Main Story incomplete. -1 = Main Story complete, Wildwood Champion vanquished; 1 = Main Story complete, Wildwood Champion spared. |
There are lots and lots of items to collect in Cattails: Wildwood Story! These items are defined in the item .meta files, which are located in the Game Installation Path (see discussion above) in the /gameresources/items directory.
Item names and descriptions are localized. These files are found within the /gameresources/items/lang directory.
Below is a sample of an item .meta file:
				{

					"item_uid": "Iron Ore",

					"item_rarity": "Common",

					"item_sorting_priority": 31000,

					"item_mews_value": 1,

					"item_mole_cash_value": 2,

					"item_can_sell": true,

				}
Each item has its own item .meta file. An Item .meta file should be named "___item.meta". For example, "ironoreitem.meta" or "paintedbutterflyitem.meta".
Within each file is a JSON object that corresponds to a single item. In each item JSON object, the following keys may be present:
| Item Key | Allowed Values | Description |
|---|---|---|
"item_uid" |
"Mouse", "Shrew", "Inventory Upgrade I", etc. |
Provides an identifier for the item. This string must be unique. |
"item_rarity" |
"Common", "Uncommon", "Rare", "Legendary" |
Specifies the rarity of the item (changes the item text color and a few other special effects.) |
"item_sorting_priority" |
0-999999999 |
Specifies what priority the item has when sorting. A lower priority will always appear before a higher priority in the player's inventory. In general, food items have the lowest priority values; healing and effect items have moderate priority values; and items with no immediate effects have a high priority value. |
"item_mews_value" |
0-9999999 |
Specifies the base selling price, in Mews, of the item at any Mews shop. |
"item_mole_cash_value" |
0-9999999 |
Specifies the base selling price, in Mole Cash, of the item at any Mole Cash shop. A value of 0 indicates that the item cannot be sold at a Mole Cash shop. |
"item_can_sell" |
true, false |
Specifies whether or not the item can be sold. |
"item_hunger_amount" (optional) |
0-1000 |
(Optional key) If > 0, this item can be eaten and will restore an amount of hunger to the player. Note that every increment of 100 will restore exactly 1 hunger bar. |
"item_heal_amount" (optional) |
0-18 |
(Optional key) If > 0, this item can be used to heal the player's health. Every 1.0 heals 1 heart; 0.5 heals half a heart. |
"item_buddy_xp_amount" (optional) |
0-9999 |
(Optional key) If > 0, this item can be used to increase the Buddy XP of the current buddy that is following the player. The item cannot be used while no Buddy is actively following the player. Any amount of Buddy XP gained above the current Buddy XP level cap will be discarded and the item consumed. |
"item_cures_poison" (optional) |
true, false |
(Optional key) If true, this item can be used to instantly cure poison. |
"item_immunity_amount" (optional) |
0-100000 |
(Optional key) If > 0, this item can be used to provide temporary status effect immunity to the player. Note that this value is provided in gameticks, where 60 ticks is equivalent to 1 second. |
"item_attack_amount" (optional) |
0-100000 |
(Optional key) If > 0, this item can be used to provide a temporary attack boost to the player. Note that this value is provided in gameticks, where 60 ticks is equivalent to 1 second. |
"item_stealth_amount" (optional) |
0-100000 |
(Optional key) If > 0, this item can be used to provide a temporary stealth boost to the player. Note that this value is provided in gameticks, where 60 ticks is equivalent to 1 second. |
"item_speed_amount" (optional) |
0-100000 |
(Optional key) If > 0, this item can be used to provide a temporary speed boost to the player. Note that this value is provided in gameticks, where 60 ticks is equivalent to 1 second. |
"item_swim_amount" (optional) |
0-100000 |
(Optional key) If > 0, this item can be used to provide a temporary swim boost to the player. Note that this value is provided in gameticks, where 60 ticks is equivalent to 1 second. |
"item_venom_amount" (optional) |
0-100000 |
(Optional key) If > 0, this item can be used to provide a temporary venom effect to the player's attacks. Note that this value is provided in gameticks, where 60 ticks is equivalent to 1 second. |
"item_confusion_amount" (optional) |
0-100000 |
(Optional key) If > 0, this item can be used to add a confusion effect to the player. Note that this value is provided in gameticks, where 60 ticks is equivalent to 1 second. |
"item_catnip_amount" (optional) |
0-100000 |
(Optional key) If > 0, this item can be used to provide a temporary catnip visual effect to the player. Note that this value is provided in gameticks, where 60 ticks is equivalent to 1 second. |
"item_influence_amount" (optional) |
0-100 |
(Optional key) This item can be consumed to change the player colony's influence value in a non-locked region. Note that using this item while in a region that is locked or does not have "show_influence": true will have no effect whatsoever. |
"item_random_effect" (optional) |
true, false |
(Optional key) If true, this item can be used to provide a random effect to the player. It may be good, it may be bad! |
"item_prey_resource_value" (optional) |
0-999 |
(Optional key) If > 0, this item can be donated to the colony stockpile to gain "prey" in the amount specified. |
"item_herbs_resource_value" (optional) |
0-999 |
(Optional key) If > 0, this item can be donated to the colony stockpile to gain "herbs" in the amount specified. |
"item_treasure_resource_value" (optional) |
0-999 |
(Optional key) If > 0, this item can be donated to the colony stockpile to gain "treasure" in the amount specified. |
"item_wood_resource_value" (optional) |
0-999 |
(Optional key) If > 0, this item can be donated to the colony stockpile to gain "wood" in the amount specified. |
"item_stone_resource_value" (optional) |
0-999 |
(Optional key) If > 0, this item can be donated to the colony stockpile to gain "stone" in the amount specified. |
"item_sand_resource_value" (optional) |
0-999 |
(Optional key) If > 0, this item can be donated to the colony stockpile to gain "sand" in the amount specified. |
"item_can_explode" (optional) |
true, false |
(Optional key) If true, this item can be consumed to cause an explosion that will destroy all nearby mine rocks. |
"item_is_farsighted" (optional) |
true, false |
(Optional key) If true, this item can be consumed to temporarily locate nearby downward staircases in the mines (even if concealed by rocks.) |
"bundle_uids" (optional) |
[ "FurnitureUID_1", "FurnitureUID_2", etc. ] |
If this item is used as a Furniture Bundle in a shop, you must specify this list of Furniture UIDs that will unlock when this Bundle is purchased. The price of a Furniture Bundle automatically adjusts to the proportion of how many items in the bundle are already owned by the player. |
"item_can_drop_on_death" (optional) |
true, false |
Defaults true. Optional. Specifies if this item can be lost by the player upon dying as a death penalty. For most items, this value should be true. |
Some items are "ranked" (Goldenseal, Marigold, etc.) These items are marked with the special keywords [Poor], [Fair], and [Good] in their item unique identifiers. [Poor] items' names will automatically display with ★; [Fair] items' names will automatically display with ★★; and [Good] items' names will automatically display with ★★★.
| Mouse | Shrew | Squirrel | Vole | Rabbit | Hare |
| Rat | Bat | Stoat | Weasel | Thrush | Magpie |
| Sparrow | Wren | Pigeon | Robin | Finch | Crow |
| Dove | Starling | Frog | Lizard | Toad | Snake |
| Adder | Turtle | Trout | Carp | Salmon | Bass |
| Pike | Minnow | Barbel | White Button | Portobello | Morel |
| Coprinus | Amanita | Licorice [Poor] | Licorice [Fair] | Licorice [Good] | Raspberries [Poor] |
| Raspberries [Fair] | Raspberries [Good] | Blackberries [Poor] | Blackberries [Fair] | Blackberries [Good] | Blueberries [Poor] |
| Blueberries [Fair] | Blueberries [Good] | Goldenseal [Poor] | Goldenseal [Fair] | Goldenseal [Good] | Marigold [Poor] |
| Marigold [Fair] | Marigold [Good] | Valerian [Poor] | Valerian [Fair] | Valerian [Good] | Peppermint [Poor] |
| Peppermint [Fair] | Peppermint [Good] | Thistle [Poor] | Thistle [Fair] | Thistle [Good] | Snake Lily [Poor] |
| Snake Lily [Fair] | Snake Lily [Good] | Foxglove [Poor] | Foxglove [Fair] | Foxglove [Good] | Catnip [Poor] |
| Catnip [Fair] | Catnip [Good] | Lavender [Poor] | Lavender [Fair] | Lavender [Good] | Queen of the Night |
| Daisy | Red Rose | Black Rose | Shiny Trinket | Honeycomb | Red Ladybug |
| Yellow Ladybug | Black Ladybug | Blue Ladybug | Sphinx Moth | Ermine Moth | Tussock Moth |
| Rosy Moth | Painted Butterfly | Tiger Butterfly | Tropical Butterfly | Lunar Butterfly | White Firefly |
| Yellow Firefly | Green Firefly | Black Firefly | Southern Damselfly | Brown Hawker | Banded Darter |
| Northern Emerald | Hermit Beetle | Ash Beetle | Bark Beetle | Ghost Beetle | Scallop |
| Coral | Turret | Whorl | Conch | Bee | Spider |
| Wolf Spider | Rock Debris | Iron Ore | Silver Ore | Gold Ore | Quartz |
| Topaz | Amethyst | Sapphire | Amber | Emerald | Ruby |
| Diamond | Pet Firefly Accessory | Pet Ladybug Accessory | Pet Moth Accessory | Pet Beetle Accessory | Pet Butterfly Accessory |
| Pet Dragonfly Accessory | Pet Bee Accessory | Pet Spider Accessory | Pet Wolf Spider Accessory | Pet Turtle Accessory | Pet Bat Accessory |
| Pet Ghost Accessory | Halo Accessory | Magic Hat Accessory | Captain Hat Accessory | Top Hat Accessory | Gold Crown Accessory |
| Silver Crown Accessory | Ceremonial Crown Accessory | White Flower Accessory | Horns Accessory | Antlers Accessory | Tiara Accessory |
| Bow Accessory | Butterfly Wings Accessory | Dragon Wings Accessory | Round Glasses Accessory | Square Glasses Accessory | Beaky Accessory |
| Theater Mask Accessory | Whiskers Accessory | Eyepatch Accessory | Teeth Mask Accessory | Spike Collar Accessory | White Spike Collar Accessory |
| Collar Accessory | Green Scarf Accessory | Bowtie Accessory | Bell Accessory | Face Scar Accessory | Snowy Sweater Accessory |
| Knitted Sweater Accessory | Striped Sweater Accessory | Summer Sweater Accessory | Surcoat Accessory | Inventory Upgrade I | Inventory Upgrade II |
| Inventory Upgrade III | Headlamp Upgrade Recipe | Polished Stone | Polished Stone Recipe | Dried Roots | Dried Roots Recipe |
| Gift Box | Crab | Cardinal | Bluejay | Sea Bass | Mackerel |
| Headlamp Accessory | Headlamp Upgrade I | Headlamp Upgrade II | Headlamp Upgrade III | Brown Cave Cricket | White Cave Cricket |
| Black Cave Cricket | Gold Cave Cricket | Masonry Kit | Voidmarrow | Plant Food | Goldenseal Seeds |
| Valerian Seeds | Licorice Seeds | Raspberries Seeds | Blackberries Seeds | Blueberries Seeds | Marigold Seeds |
| Peppermint Seeds | Thistle Seeds | Snake Lily Seeds | Foxglove Seeds | Catnip Seeds | Lavender Seeds |
| Queen of the Night Seeds | Daisy Seeds | Red Rose Seeds | Mystery Seeds | Raspberries Seeds Recipe | Blackberries Seeds Recipe |
| Blueberries Seeds Recipe | Valerian Seeds Recipe | Licorice Seeds Recipe | Goldenseal Seeds Recipe | Marigold Seeds Recipe | Peppermint Seeds Recipe |
| Thistle Seeds Recipe | Snake Lily Seeds Recipe | Foxglove Seeds Recipe | Catnip Seeds Recipe | Lavender Seeds Recipe | Queen of the Night Seeds Recipe |
| Daisy Seeds Recipe | Red Rose Seeds Recipe | Mystery Seeds Recipe | Masonry Kit Recipe | Garden Upgrade I | Garden Upgrade II |
| Spring 1 Record | Spring 2 Record | Spring 3 Record | Spring Festival Record | Summer 1 Record | Summer 2 Record |
| Summer 3 Record | Summer Festival Record | Autumn 1 Record | Autumn 2 Record | Autumn 3 Record | Autumn Festival Record |
| Winter 1 Record | Winter 2 Record | Winter 3 Record | Winter Festival Record | Wildwood Record | Credits Record |
| Underground Industry Record | Dark Ruins Record | Vial of Spring Showers | Confetti Bag | Glow Potion | Bubble Wand |
| Plant Food Recipe | Elixir of Healing | Elixir of Healing Recipe | Mushroom Salad | Mushroom Salad Recipe | Battle Potion |
| Battle Potion Recipe | Training Manual | Wretched Talisman | Greedy Paw Accessory | Magnet Upgrade I | Magnet Upgrade II |
| Magnet Upgrade III | Unidentified Curio | Metal Curio | Long Curio | Soft Curio | Hard Curio |
| Crinkly Curio | Stretchy Curio | Shiny Curio | Wiry Curio | Small Curio | Marked Curio |
| Sweet Curio | Concave Curio | Bouncy Curio | Wooden Curio | Springy Curio | Pointy Curio |
| Inky Curio | Sparkly Curio | Wooly Curio | Festive Curio | Jingly Curio | Plastic Curio |
| Bendy Curio | Cardboard Curio | Cork Curio | Heavy Curio | Fuzzy Curio | Flexible Curio |
| Formal Curio | Clicky Curio | Granite | Platinum Ore | Bismuth | Aquamarine |
| Malachite | Alexandrite | Shale | Abyssal Ore | Gloomshard | Pitlode |
| Shimmercrag | Brightstone | Supply Trove | Supply Trove Recipe | Dynamite | Dynamite Recipe |
| Farsighted Orb | Farsighted Orb Recipe | Bright Insignia | Bright Insignia Recipe | Autograph | |
Item sprites are stored in the /gameresources/items/sprites directory. Each item has 1 associated sprite in this location. These sprites will display when the item is 1. laying on the ground; 2. being held; 3. in inventory; 4. in a shop.


Item sprites should be 32x32 pixels in resolution (except Accessory item sprites, which should be 20x20) and named in the following manner:
The following are some examples of valid item sprite file names:
Accessory info is stored in Accessory .meta files, which are located in the Game Installation Path (see discussion above) under the /gameresources/items/accessories directory.
Below is a sample of an Accessory .meta file:
				{

				"accessory_uid": "Bell Accessory",

				"accessory_type": "head",

				"unlocked": true,

				"sorting_priority": 300

				}
An accessory .meta file should be named "_____accessory.meta". For example, "bellaccessory.meta" or "beakyaccessory.meta".
Each accessory .meta file is a single JSON object that corresponds to an Accessory. For each Accessory there should be a matching Item .meta file with the same UID string. Below is a table describing each key in an accessory JSON object:
| Accessory Key | Allowed Values | Description |
|---|---|---|
"accessory_uid" |
"Whiskers Accessory", "Bell Accessory", "Snowy Sweater Accessory", etc. |
Specifies the accessory's UID. This should match an item UID in an Item .meta file. |
"accessory_type" |
"head", "torso", "pet"* |
Specifies how the accessory is "attached" to the wearer. In general, hats should use a value of "head". "torso" accessories will be applied like a 'pattern' (i.e. they will only appear on the cat where their sprite overlaps the cat's sprite.)Note that at this time it is not possible to add additional "pet" accessories via modifying this file. |
"unlocked" |
true, false |
Whether or not this accessory should be available to the player by default. |
"sorting_priority" |
0-9999999 |
This value determines what depth order the Accessory will be drawn to the screen, and also what order it will appear in the Accessories menu in-game. Lower values are drawn on top of Accessories with higher values. |
Accessory sprites can be found in the Game Installation Path (see discussion above) under the /gameresources/items/sprites/accessories directory.


Each Accessory should have 4 or 5 sprites in this location, in 48x48 resolution. These sprites must be named in the following manner:
Valid direction strings are right, left, up, down, and (optionally) downalt. DownAlt sprites will be shown only if the cat is using the ear type "cat_missing_ears". This is useful for accessories such as collars.
The following are examples of valid accessory sprite names:
Some of the default accessories have built-in special effects. These are noted below:
Additionally, it should be noted that the order in which the accessories are listed in the "accessories" array will determine what order the accessories will be drawn in-game. Later entries will draw beneath earlier entries.
Herbs are special items that may spawn once per day in each map region randomly. An herb item will despawn if a full day passes and the player leaves the map region in which it spawned.
Herbs always grow on plants. The default herb plant is a small cluster of leaves, like a flower. Alternatively, an herb may grow on a Bush. You can specify which item unique identifiers should grow on a bush instead of a leaf cluster via the bushherbs.meta file, located in the /gameresources/herbs directory.
Herbs may be ranked or unranked. A ranked herb has multiple versions of the same item, noted by 3 different unique identifiers ([Poor], [Fair], and [Good].) Unranked herbs simply have 1 version of the item, and thus 1 unique identifier.
Examples of Ranked herbs:
Examples of Unranked herbs:
To specify if an item is a ranked herb, you must add it to the list of ranked herbs within the rankedherbs.meta file, located in the /gameresources/herbs directory. When doing so, only include the part of the item unique identifier of the herb that does not include [Poor], [Fair], or [Good]. (ex. "Raspberries" or "Goldenseal".)
Each herb will only grow in certain seasons. To specify which seasons to allow which herbs to grow, edit the seasonalherbs.meta file, located in the /gameresources/herbs directory. Add the item unique identifiers for each herb to each season that you would like to allow them to grow in. When doing so, only include the part of the item unique identifier of the herb that does not include [Poor], [Fair], or [Good]. (ex. "Raspberries" or "Goldenseal".)
Any item may be treated as an herb and grow randomly throughout the world. But remember, you must add the item unique identifier to the seasonalherbs.meta list for the appropriate seasons, or else it will never spawn!
When spawning herbs, the game will take into account the item's rarity. More common items are more likely to spawn as herbs than rare items.
Some herbs only grow at night (8pm or later.) You can specify which herbs should only be found at night by editing the nightherbs.meta file, located in the /gameresources/herbs directory. It's important to note that night-time herbs are spawned at the same time as all other herbs, but they will not appear to the player until it is night-time. Night herbs do count towards the total number of spawned herbs in a given map region on any given day.
You can change which herbs will spawn in which areas by editing the mapregions.meta file (see below.)
For a full discussion on Language Files, see above.
Translations for the name & description of each item are stored in the /gameresources/items/lang directory. For each language, there should exist 1 subdirectory with the name of the language. For example, for english, the item .lang files should all be stored in the /gameresources/items/lang/english directory.
Within this directory should be placed 1 .lang file for each item .meta file, named in the same manner. For example, an item meta file named goldensealitem.meta should have 1 matching goldensealitem.lang file for each language in the appropriate /gameresources/items/lang/* directories.
Each item .lang file stores 6 keys, labelled "item_uid_do_not_translate", "lang_item_name", "lang_item_demonstrative_article", "lang_item_definite_article", "lang_item_indefinite_article", and "lang_item_description". Give these key the appropriate values.
Here is an extended example:
Suppose we have an item which has the unique identifier of "Scallop". Let's assume that we must provide translations in english, español, français, and deutsche.
This item has an Item Meta File named scallopitem.meta stored in the /gameresources/items directory.
Now, we must provide the language files. We do this by placing a file named scallopitem.lang in each of the following directories:
If the above directories do not exist, we create them before placing the files there.
Then, we open each ScallopItem.lang file and fill it in with the appropriate language translations and UID. For example, we would fill in the english .lang file in the following manner:
			{

			"item_uid_do_not_translate": "Scallop",


			"lang_item_name": "Scallop",

			"lang_item_demonstrative_article": "this",

			"lang_item_definite_article": "the",

			"lang_item_indefinite_article": "a",


			"lang_item_description": "A small seashell with a pink hue. Smooth to the touch.",

			}
Furniture can be used to decorate your den. A piece of furniture has many properties that can be modified through the furniture files. These files can be found at the /gameresources/furniture directory.
Each type of furniture has several files associated with it:
.meta Metadata file;.lang language files, one per installed language.The furniture .meta file contains all the properties and behaviors of the furniture piece. The name of the file should be {FurnitureUID}.meta, where {FurnitureUID} is the furniture piece's unique identifier (must be unique.) For example, grassbed.meta or celestiallamp.meta.
The following table lists all properites of the Furniture .meta file, noting which keys are required and which are optional.
| Furniture Key | Required/Optional | Allowed Values | Description |
|---|---|---|---|
"attachment" |
required | "freestanding", "wall", "floor" |
Specifies how this furniture exists in the world, for depth and shadow purposes. Freestanding furniture depth sorts and can be placed on any floor. Wall furniture can only be placed on walls. Floor furniture can only be placed on floors. |
"unlocked" |
required | true, false |
Specifies if this furniture is available to the player at the start of the game. If not specified, this value defaults to true. Any furniture unlocked is available to the player and may be selected for den decoration, in unbounded quantities. |
"is_rotatable" |
required | true, false |
Specifies if this furniture can be rotated in the 4 cardinal directions. |
"is_seasonal" |
required | true, false |
Specifies if this furniture has separate appearances for each of the 4 seasons. |
"sprite" |
required | "PngFilename" (ex. "grassbed") |
Specifies which image file this furniture should use (see Furniture Image Files). |
"function" |
optional | "none", "bed", "storage", "calendar", "pond", "emblem", "clock", "recordplayer", "skills", "craftingstation", "wackywhiskers" |
Specifies if this object has any interactive functions that the player can use. "none" means no function. "bed" indicates that the player can use this item to sleep. "storage" indicates that the player can access their personal storage from this furniture. "calendar" means the player can view the calendar from this furniture. "pond" means the player can use this item like the Crystal Clear Pond to determine the weather and see other visions. "emblem" means that in place of typical rendering, this furniture item will render the current colony emblem at its location. "clock" means that clock hands will be drawn over the furniture item to indicate the current time. "recordplayer" indicates that this furniture item can play music discs purchased at a shop. "craftingstation" means this furniture can be used to craft certain recipes (specified in another key). "skills" means this furniture item can be used to train Skills. "wackywhiskers" means this item can be used to play the Wacky Whiskers minigame. |
"is_solid" |
optional | true, false |
Specifies if this object has a solid, impassable region. |
"blocker_x_mod" |
required | 0-9999 |
Specifies the horizontal offset of the object's active region that cannot be walked through when is_solid=true, and also the horizontal offset of the region that this object physically occupies for the purposes of moving/adding/removing furniture, starting from the upper-left hand corner of the image. |
"blocker_y_mod" |
required | 0-9999 |
Specifies the vertical offset of the object's active region that cannot be walked through when is_solid=true, and also the vertical offset of the region that this object physically occupies for the purposes of moving/adding/removing furniture, starting from the upper-left hand corner of the image. |
"blocker_width" |
required | 1-9999 |
Specifies the width of the object's active region that cannot be walked through when is_solid=true, and also the width of the region that this object physically occupies for the purposes of moving/adding/removing furniture. |
"blocker_height" |
optional, suggested when is_solid=true and is_rotatable=false | 1-9999 |
Specifies the height of the object's active region that cannot be walked through when is_solid=true, and also the height of the region that this object physically occupies for the purposes of moving/adding/removing furniture. |
"blocker_x_mod_south", "blocker_x_mod_west", "blocker_x_mod_north", "blocker_x_mod_east" |
optional, suggested when is_rotatable=true | 0-9999 |
Specifies the individual horizontal modifiers, one per cardinal direction. |
"blocker_y_mod_south", "blocker_y_mod_west", "blocker_y_mod_north", "blocker_y_mod_east" |
optional, suggested when is_rotatable=true | 0-9999 |
Specifies the individual horizontal modifiers, one per cardinal direction. |
"blocker_width_south", "blocker_width_west", "blocker_width_north", "blocker_width_east" |
optional, suggested when is_rotatable=true | 1-9999 |
Specifies the individual widths of the blocker regions, one per cardinal direction. |
"blocker_height_south", "blocker_height_west", "blocker_height_north", "blocker_height_east" |
optional, suggested when is_rotatable=true | 1-9999 |
Specifies the individual heights of the blocker regions, one per cardinal direction. |
"is_light" |
optional | true, false |
Specifies if this object sheds light. There are several keys that affect how the light will appear. See below. |
"light_color" |
optional, suggested when is_light=true | [ 0-255, 0-255, 0-255 ] (ex. [ 255, 167, 184 ]) |
Specifies the color of the light that is shed by the object, in an RGB array. |
"light_radius" |
optional, suggested when is_light=true | 0-9999 |
Specifies the radius of the light shed from this object. Larger values mean a larger light source. |
"light_intensity" |
optional, suggested when is_light=true | 0.0-1.0 |
Specifies the intensity of the light shed from this object. 1.0 is full intensity, 0.0 is no intensity. |
"light_x_mod" |
optional, suggested when is_light=true | 0-9999 |
Specifies the horizontal offset of the center of the light source shed from this object, starting from the upper-left corner. |
"light_y_mod" |
optional, suggested when is_light=true | 0-9999 |
Specifies the vertical offset of the center of the light source shed from this object, starting from the upper-left corner. |
"animation_speed" |
optional, suggested when the furniture has multiple frames of animation | 1-99999 |
Specifies the number of milliseconds that should pass between animation frame changes. The default value is 200 (5 frames/second) if this key is not specified. See the discussion on Animated Furniture Image Files below. |
"allow_furniture_ontop" |
optional, only for attachment="floor" | true, false |
Specifies if freestanding furniture may be placed ontop of this floor furniture. Defaults true if not specified. |
"is_table" |
optional, only for attachment="freestanding" | true, false |
Specifies if this furniture should be treated as a table for the purposes of placing other, smaller pieces of furniture ontop of it. Defaults false if not specified. |
"tabletop_placement" |
optional, only for attachment="freestanding" | true, false |
Specifies if this furniture can be placed ontop of other freestanding furniture where is_table=true. Defaults false if not specified. |
"crafting_station_uid" |
optional, only for function="craftingstation" | "{craftingstationUID}" (ex. "herbalistworkbench", "moleforge", "seedmaker") |
Specifies which crafting station this furniture item is, and thus which recipes are craftable from this furniture item. Only works if the "function" value of this furniture item is set equal to "craftingstation". |
Here's a visual reference for the blocker region (if is_solid, an impassable region; in all cases, the region used for placement/removal of the furniture) of a freestanding furniture item. Note that rotatable items may have 1 blocker region that applies to all 4 directions; or they may have 4 separate blocker regions, one for each unique cardinal direction.

For a full discussion on Language Files, see above.
Translations for the name & description of each piece of furniture are stored in the /gameresources/furniture/lang directory. For each language, there should exist 1 subdirectory with the name of the language. For example, for english, the furniture .lang files should all be stored in the /gameresources/furniture/lang/English directory.
Within this directory should be placed 1 .lang file for each furniture .meta file, named in the same manner. For example, a furniture meta file named grassbed.meta should have 1 matching grassbed.lang file for each language in the appropriate /gameresources/furniture/lang/* directories.
Each furniture .lang file stores 2 keys, labelled "lang_furniture_name" and "lang_furniture_description". Give these key the appropriate values.
Here is an extended example:
Suppose we have a furniture piece which has the unique identifier of "campfire". Let's assume that we must provide translations in english, español, français, and deutsche.
This item has an furniture Meta File named campfire.meta stored in the /gameresources/furniture directory.
Now, we must provide the language files. We do this by placing a file named campfire.lang in each of the following directories:
If the above directories do not exist, we create them before placing the files there.
Then, we open each campfire.lang file and fill it in with the appropriate language translations. For example, we would fill in the english .lang file in the following manner:
			{

			"lang_furniture_name": "Campfire",

			"lang_furniture_description": "A cheery fire, fueled by cut tree limbs. Casts a warm light on the area around it.",

			}
A furniture image file is a .png image that contains one or more separate sprites, separated into cells. A furniture image file may be any size.
If a piece of furniture is neither rotatable nor seasonal, this image file will only contain 1 subimage. This is the most simple case.

If a piece of furniture is only rotatable or seasonal (not both), this image file will contain 4 subimages, which will either be 1. the same item in 4 directions; or 2. the same item in 4 seasonal variants.

or

If a piece of furniture is both rotatable and seasonal, this image file will contain 16 subimages, which the game will automatically separate by dividing the width of the image cleanly into 16 even parts. This is the most complex case.

Below is an example of a furniture image file that is neither rotatable nor seasonal:

Below is an example of a furniture image file that is rotatable, but not seasonal:

Below is an example of a furniture image file that is seasonal, but not rotatable:

Optionally, a furniture piece may have a looping animation, which may be up to 10 frames in length. You can set the speed of the animation by modifying the animation_speed property of the furniture's .meta file.
To animate a furniture piece, you must place multiple image files in the resources/furniture/images folder. Their names must all follow the format: {furnitureName}{frameNumber}.png, where {furnitureName} is the same string across all files of the same furniture piece, and {frameNumber} is an integer ranging from 0 to 9. For example, fireflyjar0.png, fireflyjar1.png, fireflyjar2.png, etc.
Throughout the course of the game, the player may receive mail in their personal mailbox. Mail might just be a simple letter, or it may contain a gift for the player as an attachment.
A piece of mail will be received by the player as soon as all of its filters are satisfied and a once-a-day new mail check has passed. The once-a-day new mail check occurs immediately when a new day arrives.
Each letter, or piece of mail, is comprised of the following:
.meta Metadata file;.lang language files, one per installed language.The mail .meta file contains all the properties and behaviors of the piece of mail. The name of the file should be {MailUID}.meta, where {MailUID} is the piece of mail's unique identifier (must be unique.) For example, newyearletter1.meta or cocogreetingcard.meta.
The following table lists all properites of the Mail .meta file, noting which keys are required and which are optional.
| Mail Key | Required/Optional | Allowed Values | Description |
|---|---|---|---|
"enabled" |
required | true, false |
Specifies if this mail is enabled or not. If it is not enabled, it will never appear in-game. |
"paper_type" |
required | "parchment", "lined", "starry", "fancy", "dark", "pinstripe", "blueprint", "cats", "plants", "modern", "plaid", "drawing" |
Specifies what type of parchment this piece of mail will display when opened. See below for images of all types. |
"attachment" |
required | "none", "{ItemUID} (ex. Mouse)", "Mews", "Mole Cash", "Festival Tokens", "Task Tokens" |
Specifies if an item is attached to this piece of mail as a gift to the player. Use "none" to indicate no attachment. |
"attachment_quantity" |
required | 0-999 |
Specifies how many of the attached item are attached. For example, if "attachment" is "Mouse" and "attachment_quantity" is 2, then the player will receive 2 Mouse items attached to this piece of mail. |
"mail_filters" |
required | { "filter_...": true, ... } |
A map of filters that define when this mail should be received by the player. The mail will be received as soon as all filters are satisfied and the once-a-day new mail check has passed. See below for a discussion on mail filters. |
"parchment"

"lined"

"starry"

"fancy"

"dark" (Special property: Text is rendered WHITE against this paper type.)

"pinstripe"

"blueprint" (Special property: Text is rendered WHITE against this paper type.)

"cats"

"plants"

"modern"

"plaid"

"drawing"

Use these filters to provide prerequisites that must be met before a particular piece of mail will be sent to the player.
Below is a table of all available Mail filters.
| Mail Object Filter Key | Allowed Values | Description |
|---|---|---|
"filter_spring" |
true, false |
Specifies whether this Mail should be sent in the Spring season. (defaults true.) |
"filter_summer" |
true, false |
Specifies whether this Mail should be sent in the Summer season. (defaults true.) |
"filter_autumn" |
true, false |
Specifies whether this Mail should be sent in the Autumn season. (defaults true.) |
"filter_winter" |
true, false |
Specifies whether this Mail should be sent in the Winter season. (defaults true.) |
"filter_year" |
1-9999 |
Specifies the minimum Year that this Mail will be available. For example, a value of 2 means that it will be available in any Year after the first. |
"filter_year_max" |
1-9999 |
Specifies the maximum Years that can pass before this Mail will no longer be available. For example, a value of 3 means that after Year 3, the Mail will no longer be available. |
"filter_day" |
1-999999 |
Specifies the minimum Total Days that must pass before this Mail will be available. For example, a value of 30 means that it will become available on Day 30 and beyond. |
"filter_day_max" |
1-999999 |
Specifies the maximum Total Days that can pass before this Mail will no longer be available. For example, a value of 15 means that after Day 15, the Mail will no longer be available. |
"filter_season_day" |
1-10 |
Specifies the minimum Seasonal Day that this Mail will be available. For example, a value of 5 means that it will be available only on the 5th day of each season or later. |
"filter_season_day_max" |
1-10 |
Specifies the maximum Seasonal Day after which this Mail will no longer be available. For example, a value of 7 means that it will no longer be available after the 7th day of each season. |
"filter_player_is_dating" |
true, false |
Specifies if this Mail can be sent when the player is dating any arbitrary NPC. |
"filter_player_is_married" |
true, false |
Specifies if this Mail can be sent when the player is married to any arbitrary NPC. |
"filter_player_recently_married" |
true, false |
Specifies if this Mail can be sent the day after the player has their wedding event. |
"filter_player_birthday" |
true, false |
Specifies if this Mail can be sent on the player's birthday. |
"filter_mine_level" |
0-100 |
Specifies the minimum deepest level in the mines that the player must reach before this Mail will be sent. |
"filter_has_used_healing_services" |
true, false |
Specifies if this Mail will be sent if the player has ever stopped by the doctor to be healed. |
"filter_has_changed_name" |
true, false |
Specifies if this Mail will be sent if the player has ever changed their name at the name changing service. |
"filter_has_met_#NPC_UID#" (ex. "filter_has_met_coco") |
true, false |
Specifies if the player has ever met a particular NPC before this Mail will be sent. |
"filter_player_is_dating_#NPC_UID#" (ex. "filter_player_is_dating_glimmer") |
true, false |
Specifies if this Mail should be sent while the player is dating a particular NPC. |
"filter_player_is_married_to_#NPC_UID#" (ex. "filter_player_is_married_to_talon") |
true, false |
Specifies if this Mail should be sent while the player is married to a particular NPC. |
"filter_birthday_#NPC_UID#" (ex. "filter_birthday_fliss") |
true, false |
Specifies if this Mail should be sent on a particular NPC's birthday. |
"filter_friendship_#NPC_UID#" (ex. "filter_friendship_ember") |
0-4 |
Specifies if this Mail should be sent when the player has reached this minimum friendship rank with a particular NPC. |
"filter_friendship_max_#NPC_UID#" (ex. "filter_friendship_max_ember") |
0-4 |
Specifies the maximum friendship rank with a particular NPC at which this Mail should be sent. |
"filter_dating_#NPC_UID#" (ex. "filter_dating_krampy") |
0-4 |
Specifies if this Mail should be sent when the player has reached this minimum dating rank with a particular NPC. |
"filter_dating_max_#NPC_UID#" (ex. "filter_dating_max_krampy") |
0-4 |
Specifies the maximum dating rank with a particular NPC at which this Mail should be sent. |
"filter_marriage_#NPC_UID#" (ex. "filter_marriage_champ") |
0-4 |
Specifies if this Mail should be sent when the player has reached this minimum marriage rank with a particular NPC. |
"filter_marriage_max_#NPC_UID#" (ex. "filter_marriage_max_champ") |
0-4 |
Specifies the maximum marriage rank with a particular NPC at which this Mail should be sent. |
"filter_has_kittens" |
true, false |
Specifies if this mail will (or will not) be delivered after the player has a litter of kittens. |
"filter_kitten_age" |
0-99999 |
Specifies the minimum age (in days) that the player's kittens must be for this mail to be delivered. |
"filter_kitten_age_max" |
0-99999 |
Specifies the maximum age (in days) that the player's kittens must be for this mail to be delivered. |
"filter_curios" |
0-999 |
Specifies the minimum number of Curios that the player must have donated to the Museum before this mail will be delivered. |
"filter_rival_marriage_completed_{RivalMarriageUID}" |
true, false |
Specifies a particular rival marriage pairing that must be completed (or not completed) before this mail will be delivered. For example, "filter_rival_marriage_completed_krampyandtalon": true will make this mail only get delivered after the Krampy and Talon rival marriage pairing has been completed. See rival marriages above for more details on the rival marriage system. |
"filter_event_witnessed_{EventUID}" |
true, false |
This filter will make the Mail only be delivered if a specific Event has been witnessed by the player (or not witnessed). For example, "filter_event_completed_elliandchamp1": true will make this Mail only appear if the Elli and Champ Event 1 has been witnessed by the player. See Events for more details on the Event system. |
"filter_wc_fate" |
-1, 0, 1 |
This filter will make the Mail only appear if a specific Main Story outcome has been achieved. 0 = Main Story incomplete. -1 = Main Story complete, Wildwood Champion vanquished; 1 = Main Story complete, Wildwood Champion spared. |
For a full discussion on Language Files, see above.
Translations for the name & description of each piece of mail are stored in the /gameresources/mail/lang directory. For each language, there should exist 1 subdirectory with the name of the language. For example, for english, the mail .lang files should all be stored in the /gameresources/mail/lang/english directory.
Within this directory should be placed 1 .lang file for each Mail .meta file, named in the same manner. For example, a Mail meta file named TestMail1.meta should have 1 matching testmail1.lang file for each language in the appropriate /gameresources/mail/lang/* directories.
Each mail .lang file stores 4 keys, labelled "lang_mail_subject", "lang_mail_content_header", "lang_mail_content_body", and "lang_mail_content_signature". Give these key the appropriate values.
Here is an extended example:
Suppose we have a piece of mail which has the unique identifier of "greetingcard1". Let's assume that we must provide translations in english, español, français, and deutsche.
This mail has a mail meta file named greetingcard1.meta stored in the /gameresources/mail directory.
Now, we must provide the language files. We do this by placing a file named greetingcard1.lang in each of the following directories:
If the above directories do not exist, we create them before placing the files there.
Then, we open each greetingcard1.lang file and fill it in with the appropriate language translations. For example, we would fill in the english .lang file in the following manner:
			{

			"lang_mail_subject": "Greetings!",

			"lang_mail_content_header": "Greetings, #player_name#!",

			"lang_mail_content_body": "How are you doing today? I hope you are well. I might stop by later to chat, so keep an eye out for me, ok?",

			"lang_mail_content_signature": "Sincerely, #npc_name_Coco#",

			}
You can use the special keys #player_name# and #npc_name_{NPC_UID}# to insert any NPC's name (ex. "#npc_name_krampy#") or the player's name into any of these 4 keys.
The Map is composed of several chunks of regional data, referred to as Map Regions. These regions are logically ordered in a 2D grid, each region having its own (x,y) coordinate within the grid. The player may traverse between any two adjacent regions in the grid by moving their character in-game to the boundary between the two regions, assuming they are not blocked by any obstacles.
Here is an example of what a map grid "looks" like, with each region's unique identifier and (x,y) coordinates filled in:
| ... | ... | ... | ... | ... | ... | ... | ... | ... |
| ... | theoldfarm [7,7] |
strangetarn [8,7] |
claypits [9,7] |
blossomingfield [10,7] |
northmeadow [11,7] |
northfoothills [12,7] |
mountainsummit [13,7] |
... |
| ... | creepinghollow [7,8] |
thicketburrows [8,8] |
northfloodplain [9,8] |
westmeadow [10,8] |
centralmeadow [11,8] |
westfoothills [12,8] |
mountainlake [13,8] |
... |
| ... | chainoflakes [7,9] |
birchlake [8,9] |
birchholt [9,9] |
festivalplaza [10,9] |
meadowoutskirts [11,9] |
southfoothills [12,9] |
eastfoothills [13,9] |
... |
| ... | thestaunchstones [7,10] |
westwoodland [8,10] |
westcentral [9,10] |
playercolony [10,10] |
eastcentral [11,10] |
eastforest [12,10] |
thegrimclearing [13,10] |
... |
| ... | woodedbog [7,11] |
theconfluence [8,11] |
rivervale [9,11] |
southcentral [10,11] |
badlandsmaze [11,11] |
scorcheddesert [12,11] |
northernwastes [13,11] |
... |
| ... | swampnorth [7,12] |
riverdell [8,12] |
crater [9,12] |
southglade [10,12] |
aridplains [11,12] |
westernwastes [12,12] |
ashenknolls [13,12] |
... |
| ... | swampcorner [7,13] |
wetlandestuary [8,13] |
beachwest [9,13] |
beachsidewoods [10,13] |
beacheast [11,13] |
volcanicbasin [12,13] |
caldera [13,13] |
... |
| ... | ... | ... | ... | ... | ... | ... | ... | ... |
There is some important metadata about the Map stored in the map.meta file, located in the /gameresources/map directory. Below is a table describing all the keys available in the map.meta file:
| Map Key | Allowed Values | Description |
|---|---|---|
"map_size_horizontal" |
1-99 |
Specifies how large the entire world map can be, in horizontal units. Each unit represents 1 map region. The default value is 19. |
"map_size_vertical" |
1-99 |
Specifies how large the entire world map can be, in vertical units. Each unit represents 1 map region. The default value is 19. |
"start_region_coordinate" |
[x,y] (for example, [50,50]) |
Specifies which map region the player should initially be spawned into. The default value is 50,50. |
"start_player_coordinate" |
[x,y] (for example, [784,336]) |
Specifies the x,y value where the player should initially be spawned in the map region noted by the "start_region_coordinate" key. You can find a precise (x,y) value in-game by turning on "Show Diagnostics" under the Game Options. |
"respawn_region_uid" |
"krampyden", "playerden", "{RegionUID}", etc. |
Specifies which map region the player should respawn into after dying. |
"respawn_coordinate" |
[x,y] (for example, [440,850]) |
Specifies the x,y value where the player should respawn after dying in the region specified in the "respawn_region_uid" key. You can find a precise (x,y) value in-game by turning on "Show Diagnostics" under the Game Options. |
"respawn_dir" |
"north", "east", "south", "west" |
Specifies which direction the player should face during the respawn scene. |
"assign_squads_npc" |
"talon", "{NPC_UID}", etc. |
Specifies the NPC UID who will speak to you while assigning squads. |
"doctor_respawn_npc" |
"krampy", "{NPC_UID}", etc. |
Specifies the NPC UID of the doctor NPC that will speak to you if you die and need to respawn. |
"doctor_respawn_coordinate" |
[x,y] (for example, [440,790]) |
Specifies the x,y value where the doctor NPC should be placed during the respawn scene. You can find a precise (x,y) value in-game by turning on "Show Diagnostics" under the Game Options. |
"doctor_respawn_dir" |
"north", "east", "south", "west" |
Specifies which direction the doctor NPC should face during the respawn scene. |
"wedding_officiant_npc" |
"coco", "{NPC_UID}", etc. |
Specifies which NPC will act as the wedding officiant by default. If this NPC is wed, then the Forest Guardian will substitute for them at the ceremony. |
"warp_northwest_region", "warp_northeast_region", "warp_southwest_region", "warp_southeast_region" |
"{region_uid}" (i.e. "westernwastes", "thicketburrows", etc.) |
Specifies which map regions the tunnel exits that can be constructed by the player via the stockpile resource system will be placed in and warp to/from. |
"warp_northwest_x"/"warp_northwest_y" |
0-1440 |
Specifies the x/y coordinates of the tunnel exit, appearing in the map region specified by the "warp_northwest_region" key (see above.) |
"warp_northeast_x"/"warp_northeast_y" |
0-1440 |
Specifies the x/y coordinates of the tunnel exit, appearing in the map region specified by the "warp_northeast_region" key (see above.) |
"warp_southwest_x"/"warp_southwest_y" |
0-1440 |
Specifies the x/y coordinates of the tunnel exit, appearing in the map region specified by the "warp_southwest_region" key (see above.) |
"warp_southeast_x"/"warp_southeast_y" |
0-1440 |
Specifies the x/y coordinates of the tunnel exit, appearing in the map region specified by the "warp_southeast_region" key (see above.) |
"darkruins1_region", "darkruins2_region", "darkruins3_region", "darkruins4_region" |
"{region_uid}" (i.e. "eastforest", "southglade", etc.) |
Specifies which map regions the Dark Ruins should be placed in. (Puzzle/combat dungeons that are part of the main story) |
"darkruins1_x"/"darkruins1_y" |
0-1440 |
Specifies the x/y coordinates of the first Dark Ruins within the region specified by the "darkruins1_region" key (see above). |
"darkruins2_x"/"darkruins2_y" |
0-1440 |
Specifies the x/y coordinates of the second Dark Ruins within the region specified by the "darkruins2_region" key (see above). |
"darkruins3_x"/"darkruins3_y" |
0-1440 |
Specifies the x/y coordinates of the third Dark Ruins within the region specified by the "darkruins3_region" key (see above). |
"darkruins4_x"/"darkruins4_y" |
0-1440 |
Specifies the x/y coordinates of the fourth Dark Ruins within the region specified by the "darkruins4_region" key (see above). |
Map Region info is stored in the map region .region files, located in the Game Installation Path (see discussion above) under the /gameresources/map directory. Each region has its own file.
Each map region .region file should be named uniquely as the file name is used as the map region's unique identifier. Below are a few examples of appropriate map .region file names:
A typical map .region file may look like this:
				{

					"region_data": {

					"template": "Empty",

					"region_music": "seasonalexteriorpack",

					"region_battle_music": "seasonalbattlepack",

					"region_coordinate": [50,50],

					"pass_time": true,

					"interior": false,

					"show_mews": true,

					"show_mole_cash": false,

					"show_festival_tokens": false,

					"show_task_tokens": false,

					"max_prey": 3,

					"max_bugs": 10,

					"max_herbs": 8,

					"max_mushrooms": 3,

					"spawn_ladybugs": true,

					"spawn_moths": true,


					...


					"spawners": [

					{

					"type": "item",

					"item_uids": ["Scallop", "Conch", "Whorl", "Coral", "Turret"],

					"x": 126,

					"y": 256,

					"percent_chance": 25

					}

					],


					"world_objects": [],


					"custom_sprites": [],


					"water_tiles": [],


					"path_tiles": [],


					"cliff_tiles": [],


					"stair_tiles": [],


					"decorative_tiles": [],

					...

					"herbs_list": [

					"Goldenseal",

					"Valerian",

					"Thistle",

					"Foxglove",

					"Blueberries"

					],


					"prey_list": [

					"Mouse",

					"Shrew",

					"Wren",

					"Barbel",

					"Adder",

					"Rat"

					]

					}

					}
Below is a table that will explain in detail each key located within these files.
| Map Region Key | Allowed Values | Description |
|---|---|---|
"template" |
"Empty", "WestCentral", "Caldera", etc. |
Specifies which Region Template to use for this map region. A discussion on Region Templates, including a full listing of allowed values, can be found below. In most cases, when making a new map region, you'll want to use the "Empty" template. |
"region_coordinate" |
[x,y] (for example, [15,34]) |
Specifies where, in the map grid, this region is logically located. Increasing x moves the region east; decreasing x moves the region west; increasing y moves the region south; decreasing y moves the region north. Important: This value should be unique to each map region! Only 1 region may exist at any given (x,y) coordinate in the map grid. |
"region_music" |
"seasonalexteriorpack", "spring1", "undergroundindustry", etc. |
Which music track UID to play when the player is in this map region? You can specify either a single track UID or a Music Pack UID. See the Music documentation below for more information. |
"region_battle_music" |
"seasonalbattlepack", "battlespring", "none", etc. |
Which music track UID to play when the player is in this map region and in a battle with a voidling enemy? You can specify either a single track UID or a Music Pack UID. See the Music documentation below for more information. Defaults to "None". |
"pass_time" |
true, false |
Specifies if time should pass in this map region. If false, time will not pass here. |
"interior" |
true, false |
Specifies if this map region is an interior location. If true, weather and sky effects will not display here, and the atmosphere will be darkened. |
"allow_daily_battles" |
true, false |
Specifies if this map region can be the site of a daily random battle or not. Generally, exterior regions should be labelled true, and interior regions should be labelled false. |
"region_resource" (optional) |
"none", "prey", "herbs", "treasure", "wood", "stone", "sand" |
Specifies if this map region has resources that can be collected into the colony stockpile via the influence system. This value will have no effect if "show_influence": is false for this map region. |
"region_resource_quantity" (optional) |
1-999 |
Specifies the number of resources that can be gathered from this map region into the colony stockpile. The resource type is defined by the "region_resource" key (see above.) This value will have no effect if "show_influence": is false for this map region. Generally, this number will range from 1-4. |
"show_influence" (optional) |
true, false |
Specifies if this map region has the Influence system enabled or disabled. Defaults to false if not specified. If true, a player can win power in this region through a variety of methods to gain colony influence over the dark forces of the Wildwood, measured from 0% (player colony has no influence here) to 100% (player colony completely controls this region.) |
"influence_locked" (optional, only use when "show_influence": true) |
true, false |
Specifies if the influence value for this map region can change. Defaults to false if not specified. If true, whatever this region's influence value starts at will remain the influence value for the duration of the game and cannot be changed in any way. |
"player_colony_starting_influence" (optional, only use when "show_influence": true) |
0-100 |
Specifies the starting value for the player's colony influence in this map region. Defaults to 0 if not specified. This value also affects what the dark forces of the Wildwood's starting influence is in this region (100 - player colony influence = Wildwood influence starting value.) For example, if the player's colony starting influence is 25%, then the dark forces of the Wildwood will start with 75% influence in this region. |
"player_colony_owns_region" (optional, only use when "show_influence": true) |
true, false |
Specifies if the player's colony owns this map region by default at the start of the game. An "owned" region confers some benefits, such as making the region safer to pass through (random voidling enemies rarely spawn in owned regions.) Defaults to false if not specified. |
"influence_map_width" (optional, only use when "show_influence": true) |
0-400 |
Specifies the width of the rectangle drawn to the Map menu screen to indicate this map region's colony influence value. This rectangle is drawn centered on the "world_map_portrait_coordinate" coordinates. |
"influence_map_height" (optional, only use when "show_influence": true) |
0-400 |
Specifies the height of the rectangle drawn to the Map menu screen to indicate this map region's colony influence value. This rectangle is drawn centered on the "world_map_portrait_coordinate" coordinates. |
"show_mews" |
true, false |
If true, the player's Mews count will always be displayed in the GUI while in this map region. |
"show_mole_cash" |
true, false |
If true, the player's Mole Cash count will always be displayed in the GUI while in this map region. |
"show_festival_tokens" |
true, false |
If true, the player's Festival Tokens count will always be displayed in the GUI while in this map region. |
"show_task_tokens" |
true, false |
If true, the player's Task Tokens count will always be displayed in the GUI while in this map region. |
"world_map_portrait_coordinate" |
[x,y] (for example, [275, 225]) |
Specifies where, in pixels, the player's face portrait will appear when looking at the World Map menu while the player is physically located in this Map Region. Note that the World Map is a 500x500 .png file that can be modified. The coordinate specified will be used as a center anchor for the player's portrait. |
"max_prey" |
0-100 |
Specifies the maximum number of prey to spawn at any given time in this region. Total prey count is impacted by a variety of factors, including season, weather, and this value, which represents the absolute highest number of prey to spawn under perfectly ideal circumstances. |
"max_bugs" |
0-100 |
Specifies the maximum number of bugs to spawn at any given time in this region. Total bug count is impacted by a variety of factors, including season, weather, and this value, which represents the absolute highest number of bugs to spawn under perfectly ideal circumstances. |
"max_herbs" |
0-100 |
Specifies the maximum number of herbs to spawn at any given time in this region. Total herb count is impacted by a variety of factors, including season, weather, and this value, which represents the absolute highest number of herbs to spawn under perfectly ideal circumstances. |
"max_mushrooms" |
0-100 |
Specifies the maximum number of mushrooms to spawn at any given time in this region. Note that mushrooms only spawn during Autumn. |
"max_voidlings" |
0-100 |
Specifies the maximum number of voidling creatures to spawn at any given time in this region. Set to 0 to indicate that voidlings should not spawn here. |
"max_npc_fighters" |
0-100 |
Specifies the maximum number of your colony's random npc fighter cats to spawn at any given time in this region. Set to 0 to indicate that npc fighters should not spawn here. |
"spawn_ladybugs" |
true, false |
Whether or not ladybugs are allowed to spawn in this region. |
"spawn_moths" |
true, false |
Whether or not moths are allowed to spawn in this region. |
"spawn_butterflies" |
true, false |
Whether or not butterflies are allowed to spawn in this region. |
"spawn_fireflies" |
true, false |
Whether or not fireflies are allowed to spawn in this region. |
"spawn_dragonflies" |
true, false |
Whether or not dragonflies are allowed to spawn in this region. |
"spawn_beetles" |
true, false |
Whether or not beetles are allowed to spawn in this region. |
"background_type" |
"grass", "swamp_grass", "sand", "dirt", "rock", "basalt", "void", |
What type of background to use globally for this map region. Use the seasonal options to force the background to ignore seasonal changes (i.e. for interior locations.) A full list of all background types with images can be found below this table. |
"audio_ambience" (optional) |
"none", "woodland", "beach", "swamp", "cave", "river", "colony" |
Determines if any audio ambience should play in this map region, and if so, which type. Note that audio ambience is a complex system and different sounds may play at different times of day, during different seasons, or during weather events. Defaults to "none". Woodland: Birds chirping, bugs flying around, wind. Cave: Water drips, creepy noises. Swamp: Frogs croaking, swamp birds crowing, crickets. Beach: Waves. River: Same as woodland, but with a flowing water background track. Colony: a unique special sound pack for the player's custom colony region (it's fairly minimal.) |
"spawners" |
[ { "type": "item", "item_uids": ["Scallop", "Conch"], "x": 126, "y": 256", "percent_chance": 20 }, { ... }, ... ] |
A list of all Spawners at this map region. A spawner has a chance to spawn something at its location once per day. See the discussion on Spawners below for more information. Leave this as an empty array [] if no spawners are present in this region. |
"warps" |
[ { "map_uid": "MoleCave", "x": 720, "y": 640, "warp_to_x": 960, "warp_to_y": 1024 }, { ... }, ... ] |
A list of all warp collision zones that exist in this area. See the discussion below about warps. |
"world_objects" |
[ { "type": "oaktreea", "x": 32, "y": 64 }, { ... }, ... ] |
A list of all world objects that should appear in this map region. These are typically things like trees, rocks, lanterns, etc. Leave as a blank array [] if you do not wish to add any world objects to this region. A full listing of world objects, along with a discussion on their JSON structure, can be found below. |
"custom_sprites" |
[ { "filename": "SmileyFace", "x": 1200, "y": 800 }, { ... }, ... ] |
A list of all custom sprites should appear in this map region. Custom sprites are decorative images that appear to the player, but cannot be interacted with. Leave as a blank array [] if you do not wish to add any custom sprites to this region. A discussion on adding custom sprites can be found below. |
"water_tiles" |
[ { "type": "shallow", "tile_x": 1, "tile_y": 1 }, { ... }, ... ] |
A list of all water tiles that should appear in this map region. Note that water tiles use tile (x,y) coordinates, not regular (x,y) coordinates. See the discussion below about water tiles. |
"path_tiles" |
[ { "type": "dirt", "tile_x": 1, "tile_y": 1 }, { ... }, ... ] |
A list of all path tiles that should appear in this map region. Note that path tiles use tile (x,y) coordinates, not regular (x,y) coordinates. See the discussion below about path tiles. |
"decorative_tiles" |
[ { "tile_index": 4, "tile_x": 5, "tile_y": 30 }, { ... }, ... ] |
A list of all decorative tiles that should appear in this map region. Note that decorative tiles use tile (x,y) coordinates, not regular (x,y) coordinates. See the discussion below about decorative tiles. |
"cliff_tiles" |
[ { "type": 1, "tile_x": 1, "tile_y": 1 }, { ... }, ... ] |
A list of all cliff tiles that should appear in this map region. Note that cliff tiles use tile (x,y) coordinates, not regular (x,y) coordinates. See the discussion below about cliff tiles. |
"stair_tiles" |
[ { "type": 1, "tile_x": 1, "tile_y": 1 }, { ... }, ... ] |
A list of all stair tiles that should appear in this map region. Note that stair tiles use tile (x,y) coordinates, not regular (x,y) coordinates. See the discussion below about stair tiles. |
"herbs_list" |
[ "Goldenseal", "Marigold", "Valerian", etc... ] |
Which items should be spawned as herbs in this region. Include all item unique identifiers that should spawn as herbs in this list, excluding ranks (i.e. [Poor], [Fair], [Good].) Rarity is taken into account, so Common items will spawn as herbs more frequently than Rare ones. Any item unique identifier may be included. |
"prey_list" |
[ "Mouse", "Shrew", "Minnow", "Robin", etc... ] |
Which prey should spawn in this map region. Rarity is taken into account, so Common prey will spawn more frequently than Rare ones. See a full list of all available Prey types for this list below. |
"water_can_freeze" (optional) |
true, false |
Specifies if the water in this region can freeze, or not. Only used for non-interior regions. |
"wake_y" (optional) |
0-1440 |
Optional, specifies the minimum y value at which water tiles that do not have a neighbor immediately above them will generate a wake effect. Useful for beach-style areas. |
"is_npc_den" (optional) |
true, false |
Optional, specifies if this map region should be initialized as an NPC den. If this is not present, an NPC den will fail to be populated correctly. |
"npc_den_wall_style" (optional) |
1-8 |
Optional, specifies the type of wall that this NPC den should display. 1 = bush, 2 = mine, 3 = brick, 4 = wood, 5 = stone, 6 = temple brick, 7 = basalt, 8 = celestial. Requires "is_npc_den": true |
"npc_den_floor_style" (optional) |
1-13 |
Optional, specifies the type of floor that this NPC den should display. 1 = dirt 1, 2 = grass, 3 = sand, 4 = rock 1, 5 = basalt, 6 = brick, 7 = concrete, 8 = wood, 9 = rock 2, 10 = dirt 2, 11 = celestial, 12 = ruins, 13 = ice. Requires "is_npc_den": true |
"npc_den_grid" (optional) |
[ [0, 0, 0...], [0, 1, 1...], ... ] |
A 2D grid (31x31 cells) that stores the floorplan data for this NPC den. 1 = movable space at this grid tile, 0 = void space. Requires "is_npc_den": true |
"npc_den_furniture" (optional) |
[ { "uid": "StorageCrate", "x": 300, "y": 400, "direction": "south" }, { "uid": "GrassBed", ... }, ... ] |
Optional, provides a list of furniture items to initialize in an NPC den region. Required keys are "uid" (the furniture's unique identifier); "x" (horizontal position); "y" (vertical position); and "direction" (south/north/east/west). Requires "is_npc_den": true |
|
"grass"
|
"sand"
|
"dirt"
|
"rock"
|
|
|
"basalt"
|
"void"
|
"swamp_grass"
|
"temple_brick"
|
"dark_ruins_brick"
|
There is a decorative World Map that is displayed to the player via the in-game Map menu. This image is named worldmap.png and it is stored in the /gameresources/map directory.
This image is 500x500 resolution. If you change the structure or features of the map regions, you may consider updating this image as well to reflect your changes.
Each map region is built upon a template. Templates are predefined groupings of decorative tiles, water tiles, and world objects such as trees or rocks. They also include predefined herb spawning locations, beehive locations, and some may include general item spawners. The purpose of templates is to make the life of a map designer easier by providing a basis upon which to build a new map region.
In some cases, you may want to start with a blank canvas for a new map region. In this case, you'll want to use the "Empty" template. Below is a listing of all allowed values for a map region template.
| Empty | |||||
|
Empty |
|
A map region may be filled with many World Objects. These are typically things like trees, rocks, laterns, etc. World Objects are specified in the "world_objects" key of each map region file.
Below is an example of a World Object:
			{

			"type": "oaktreea",

			"x": 32,

			"y": 64

			}
If the above JSON object is placed within a region's "world_objects" key, then an oak tree will be spawned in that map region at the coordinate (32,64).
When specifying the coordinates of a World Object, note that the origin point of the object is typically near the bottom-middle of its sprite. Exceptions to this rule are noted in the list below.
Below is a table explaining each key of a World Object:
| World Object Key | Allowed Values | Description |
|---|---|---|
"type" |
"oaktreea", "oaktreeb", "birchtreea", etc. |
Specifies what type of World Object this is. A full listing of available World Objects is presented below. |
"x" |
0-1440 |
Specifies where, horizontally, this item should be located within the map region. Low x values are near the western side of the region; high x values are near the eastern side. |
"y" |
0-1440 |
Specifies where, vertically, this item should be located within the map region. Low y values are near the northern side of the region; high y values are near the southern side. |
Several World Objects can be modified to change their default look and collision boundaries, with some exceptions. In the table below, any object marked with an asterisk (*) can be placed in a map region, but its default behavior and look cannot be modified at this time.
| "invisiblewall16x16" * (spawns an invisible wall that will not be visible to the player. The coordinate given marks the middle of the invisible wall.) |  |
| "invisiblewall32x32" * (spawns an invisible wall that will not be visible to the player. The coordinate given marks the middle of the invisible wall.) |  |
| "invisiblewall32x32_ul" * (spawns a diagonal invisible wall that will not be visible to the player. The coordinate given marks the middle of the invisible wall.) |  |
| "invisiblewall32x32_ur" * (spawns a diagonal invisible wall that will not be visible to the player. The coordinate given marks the middle of the invisible wall.) |  |
| "invisiblewall32x32_dl" * (spawns a diagonal invisible wall that will not be visible to the player. The coordinate given marks the middle of the invisible wall.) |  |
| "invisiblewall32x32_dr" * (spawns a diagonal invisible wall that will not be visible to the player. The coordinate given marks the middle of the invisible wall.) |  |
| "destroyer16x16" * (spawns an invisible destroyer object that will destroy any world object, tile, or spawner that touches it. The coordinate given marks the middle of the destroyer. This object is spawned, checks for collisions, destroys colliding objects, then immediately despawns.) |  |
| "destroyer128x128" * (spawns an invisible destroyer object that will destroy any world object, tile, or spawner that touches it. The coordinate given marks the middle of the destroyer. This object is spawned, checks for collisions, destroys colliding objects, then immediately despawns.) | |
| "goldmew" * (spawns a floating golden Mew coin, worth 20 Mews.) |  |
| "silvermew" * (spawns a floating silver Mew coin, worth 5 Mews.) |  |
| "coppermew" * (spawns a floating copper Mew coin, worth 1 Mew.) |  |
| "molecash" * (spawns a floating Mole Cash coin, worth 5 Mole Cash.) |  |
| "festivaltoken" * (spawns a floating Festival Token, worth 1 Festival Token.) |  |
| "tasktoken" * (spawns a floating Task Token, worth 1 Task Token.) |  |
| "lamppost" * |  |
| "crystallamp" * |  |
| "blackcrystallamp" * |  |
| "redcrystallamp" * |  |
| "traditionallantern" * |  |
| "streetlight" * |  |
| "mininglantern" * (swings on its chain from an invisible ceiling far above. The origin is the top of the chain, so you'll likely need to spawn it with a y value far lower than you might expect to get the placement right.) |  |
| "ancientsconce" * |  |
| "bambootorch" * |  |
| "celestiallantern" * |  |
| "brazier" * |  |
| "oaktreea" |  |
| "oaktreeb" |  |
| "oaktreec" |  |
| "oaktreed" |  |
| "oaktreee" |  |
| "oaktreef" |  |
| "oaktreeg" |  |
| "oaktreeh" |  |
| "oaktreei" |  |
| "oaktreej" |  |
| "oakstumpa" |  |
| "oakstumpb" |  |
| "oakstumpc" |  |
| "oakstumpd" |  |
| "oakstumpe" |  |
| "oakstumppowerpaw" |  |
| "birchtreea" |  |
| "birchtreeb" |  |
| "birchtreec" |  |
| "birchtreed" |  |
| "birchtreee" |  |
| "birchtreef" |  |
| "birchtreeg" |  |
| "birchtreeh" |  |
| "birchtreei" |  |
| "birchtreej" |  |
| "birchstumpa" |  |
| "birchstumpb" |  |
| "birchstumpc" |  |
| "willowtreea" |  |
| "willowtreeb" |  |
| "willowtreec" |  |
| "willowtreed" |  |
| "willowtreee" |  |
| "willowtreef" |  |
| "willowtreeg" |  |
| "willowtreeh" |  |
| "willowtreei" |  |
| "willowtreej" |  |
| "willowstumpa" |  |
| "willowstumpb" |  |
| "willowstumpc" |  |
| "willowstumpd" |  |
| "willowstumpe" |  |
| "pinetreea" |  |
| "pinetreeb" |  |
| "pinetreec" |  |
| "pinetreed" |  |
| "pinetreee" |  |
| "pinetreef" |  |
| "pinetreeg" |  |
| "pinetreeh" |  |
| "pinetreei" |  |
| "pinetreej" |  |
| "palmtreea" |  |
| "palmtreeb" |  |
| "palmtreec" |  |
| "palmtreed" |  |
| "palmtreee" |  |
| "palmtreef" |  |
| "palmtreeg" |  |
| "palmtreeh" |  |
| "palmtreei" |  |
| "palmtreej" |  |
| "deadtreea" |  |
| "deadtreeb" |  |
| "deadtreec" |  |
| "deadtreed" |  |
| "deadtreee" |  |
| "deadtreef" |  |
| "deadtreeg" |  |
| "deadtreeh" |  |
| "deadtreei" |  |
| "deadtreej" |  |
| "gnarledtreea" |  |
| "gnarledtreeb" |  |
| "gnarledtreec" |  |
| "gnarledtreed" |  |
| "gnarledtreee" |  |
| "pinestumpa" |  |
| "pinestumpb" |  |
| "pinestumpc" |  |
| "pinestumpd" |  |
| "pinestumpe" |  |
| "busha" |  |
| "bushb" |  |
| "bushc" |  |
| "bushd" |  |
| "bushe" |  |
| "bushf" |  |
| "bushg" |  |
| "bushh" |  |
| "bushi" |  |
| "bushj" |  |
| "tropicalbusha" |  |
| "tropicalbushb" |  |
| "tropicalbushc" |  |
| "tropicalbushd" |  |
| "tropicalbushe" |  |
| "deadbusha" |  |
| "deadbushb" |  |
| "deadbushc" |  |
| "deadbushd" |  |
| "deadbushe" |  |
| "rocka" |  |
| "rockb" |  |
| "rockc" |  |
| "rockd" |  |
| "rocke" |  |
| "rockf" |  |
| "rockg" |  |
| "rockh" |  |
| "rocki" |  |
| "rockj" |  |
| "rockpowerpaw" |  |
| "caverocka" |  |
| "caverockb" |  |
| "caverockc" |  |
| "caverockd" |  |
| "caverocke" |  |
| "caverockf" |  |
| "caverockg" |  |
| "caverockh" |  |
| "caverocki" |  |
| "caverockj" |  |
| "basaltrocka" |  |
| "basaltrockb" |  |
| "basaltrockc" |  |
| "basaltrockd" |  |
| "basaltrocke" |  |
| "basaltrockf" |  |
| "basaltrockg" |  |
| "basaltrockh" |  |
| "basaltrocki" |  |
| "basaltrockj" |  |
| "crystala" |  |
| "crystalb" |  |
| "crystalc" |  |
| "crystald" |  |
| "crystale" |  |
| "crystalf" |  |
| "crystalg" |  |
| "crystalh" |  |
| "crystali" |  |
| "crystalj" |  |
| "ruinsa" * |  |
| "ruinsb" * |  |
| "ruinsc" * |  |
| "ruinsd" * |  |
| "ruinse" * |  |
| "ruinsf" * |  |
| "ruinsg" * |  |
| "ruinsh" * |  |
| "ruinsi" * |  |
| "ruinsj" * |  |
| "darkpillar" * |  |
| "springcarving" * |  |
| "summercarving" * |  |
| "autumncarving" * |  |
| "wintercarving" * |  |
| "moleanvil" |  |
| "molebellows" |  |
| "moletoolrack" |  |
| "moletoolbarrel" |  |
| "molefurnace" * |  |
| "greenthornsa" * |  |
| "greenthornsb" * |  |
| "greenthornsc" * |  |
| "greenthornsd" * |  |
| "greenthornse" * |  |
| "greenthornsf" * |  |
| "greenthornsg" * |  |
| "greenthornsh" * |  |
| "greenthornsi" * |  |
| "greenthornsj" * |  |
| "greenthornsk" * |  |
| "greenthornsl" * |  |
| "greenthornsm" * |  |
| "greenthornsn" * |  |
| "greenthornso" * |  |
| "greenthornsp" * |  |
| "greenthornsq" * |  |
| "greenthornsr" * |  |
| "yellowthornsa" * |  |
| "yellowthornsb" * |  |
| "yellowthornsc" * |  |
| "yellowthornsd" * |  |
| "yellowthornse" * |  |
| "yellowthornsf" * |  |
| "yellowthornsg" * |  |
| "yellowthornsh" * |  |
| "yellowthornsi" * |  |
| "yellowthornsj" * |  |
| "yellowthornsk" * |  |
| "yellowthornsl" * |  |
| "yellowthornsm" * |  |
| "yellowthornsn" * |  |
| "yellowthornso" * |  |
| "purplethornsa" * |  |
| "purplethornsb" * |  |
| "purplethornsc" * |  |
| "purplethornsd" * |  |
| "purplethornse" * |  |
| "purplethornsf" * |  |
| "purplethornsg" * |  |
| "signpost" |  |
| "stonefencea" |  |
| "stonefenceb" |  |
| "stonefencec" |  |
| "stonefenced" |  |
| "abandonedwell" |  |
| "stonemarker" |  |
Several World Objects can be modified to change their default appearance and collision behavior. It is also possible to create your own custom World Objects.
To do either, you'll need to navigate to the /gameresources/world_objects directory and modify or create new .meta files.
Each World Object has its own .meta file, which will be named #WorldObjectUID#.meta (for example, "oaktreea.meta" or "crystal3.meta".) You can create a new World Object by creating a new .meta file in this location with the appropriate name for your custom World Object's UID.
These files are fairly simple. Let's take a look at the contents of a World Object .meta file:
			{

			"world_object_uid": "oaktreea",

			"sprites": ["oaktreeaspring", "oaktreeasummer", "oaktreeaautumn", "oaktreeawinter"],

			"sprite_origin": [32, 63],

			"sprite_bbox": [8, 56, 42, 61]

			}
Below is a table listing each key, along with a short description.
| World Object Key | Allowed Values | Description |
|---|---|---|
"world_object_uid" |
"oaktreea", "oaktreee", "crystala", "birchstumpb", "willowtreea", "rockg", etc. |
Specifies this World Object's UID. This value should match the filename, minus the .meta extension! |
"sprites" |
[ "oaktreeaspring", ... ] |
Contains an array of filenames of images associated with this World Object. The array may have only 1 entry, in which case the World Object will look the same in any season (for example, [ "rock1" ].) Or, the array may have many entries, in which case the image will change based on the season (for example, ["rock1spring", "rock1summer", "rock1autumn", "rock1winter"].) When using many images, the order always must be Spring, Summer, Autumn, Winter. A discussion on World Object Sprites can be found below. |
"sprite_origin" |
[ origin_x, origin_y ] (for example, [16, 31]) |
Specifies the origin of this World Object. The origin coordinate is used to determine the placement of the object when it is rendered to the screen. Usually, the origin_x will be near the middle of the object; and the origin_y will be very close to the bottom. If you aren't sure, it's a safe bet to start by trying to set origin_x = half the width of the sprite, and origin_y = the height of the sprite, minus 2. These values are relative to the sprite, where the point 0,0 corresponds to the upper-left hand corner. |
"sprite_bbox" |
[ left_x, right_x, top_y, bottom_y ] (for example, [8, 56, 42, 61]) |
Specifies the bounding box that this World Object will use for collisions. World Objects are solid and cannot be passed through. To detect collisions, the game engine simplifies a World Object into 1 rectangular shape and tests for collisions against this rectangle. These values are relative to the sprite, where the point 0,0 corresponds to the upper-left hand corner. |
"collisions" (optional) |
true, false |
This key is entirely optional. If set to false, it will disable all collisions for this world object, allowing the player (and other entities) to move through it. |

Every World Object has 1 or more images (or sprites) associated with it. These sprites are stored in the /gameresources/world_objects/sprites directory.
These sprites must be .PNG image files, but they may be any size (up to a maximum of 2048x2048.) The filename of a sprite stored in this location may be used in a World Object .meta file to bind it to a particular World Object (see above.)
Many World Objects will only have 1 sprite in this directory, but some (such as trees) may have multiple versions so that their appearance will change with the seasons. In general, it's best practice to keep the resolution of all images for a particular World Object at the exact same resolution or else they will become stretched and skewed in-game.


Custom sprites are images that will appear to the player in-game, placed at a particular location in the game world. These images can be any arbitrary resolution. Custom sprite image files must be .png files.
A map region may have many custom sprites. There's no limit!
Visually, custom sprites will either appear "below" all world objects (such as trees, rocks, the player, NPCs, etc.) or "above" all world objects. In either case, they will appear above any tiles. When specifying the (x,y) coordinate for any custom sprite, note that the coordinate marks the upper-left hand corner of the image.
Custom sprite files are stored in the /gameresources/custom_sprites directory.
Custom sprite JSON objects should be placed in a map region's "custom_sprites" key. Below is an example of what a Custom Sprite JSON object looks like:
			{

			"filename": "customspritefilename",

			"position": "below",

			"x": 64,

			"y": 1732

			}
Here's an example. Let's say we have the following image, named smileyface.png, and we want it to appear in the game in a particular game region.

First, we need to add the smileyface.png file to the Cattails: Wildwood Story gameresources folder. We take the image file and place it in the /gameresources/custom_sprites directory.
Then, we need to tell the game where we want to display the custom sprite. So we open up the .region file where we would like to place the image. We edit the "custom_sprites" array like so:
			...


			"custom_sprites": [

			{

			"filename": "smileyface",

			"x": 1200,

			"y": 800

			}

			],


			...
We save the region file and boot up the game. Now, when we move to the appropriate map region and go to the specified coordinates, our beautiful custom sprite appears!

Tiles consist of four general categories: Water Tiles, Cliff Tiles, Stair Tiles, and Decorative Tiles. Tiles can be used to add life to a map region by increasing visual variety.
The most important thing to note about Tiles is that they must be snapped to a 32x32 pixel grid in their placement within the map region. Since every map region is 1440x1440 pixels in size, that means that there are 45x45 possible tile locations (2025 total.)
For example, a Tile placed at tile coordinate [2,3] will appear in the map region at x: 64, y: 96.
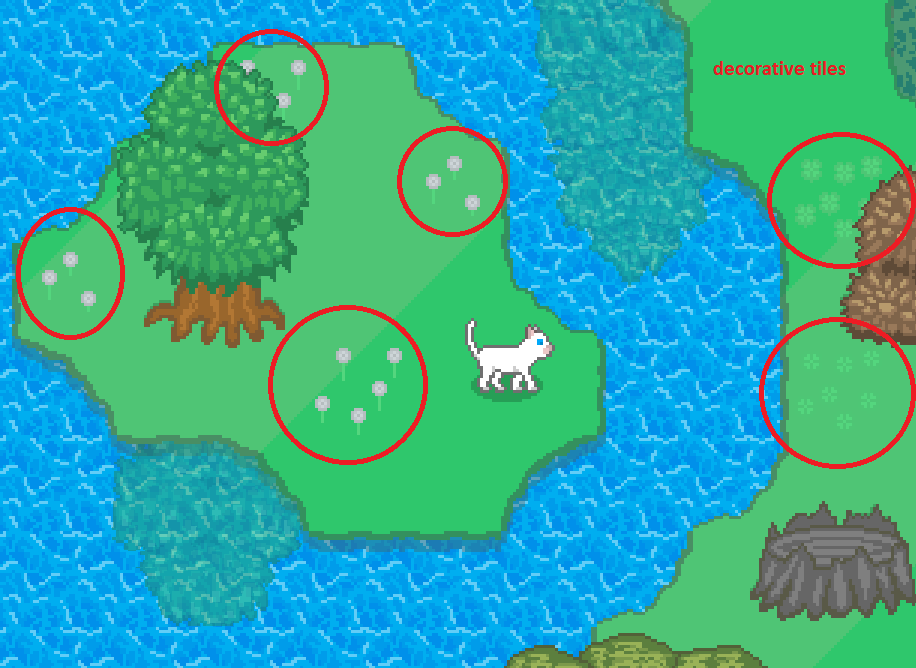

Water Tiles can be used to create bodies of water in a map region (such as rivers, lakes, or oceans.) The player can swim through water tiles, though they can be dangerous if the player lingers too long!
Water Tiles are designed to automatically smooth out their edges for a nice, rounded look, unlike other tiles.
Here is a sample Water Tile:
			{

			"type": "deep",

			"tile_x": 5,

			"tile_y": 12

			}
Like all tiles, they must be snapped to a 32x32 pixel grid, and they use tile coordinates instead of regular coordinates.
Below is a table listing the important information about water tiles:
| Water Tile Key | Allowed Values | Description |
|---|---|---|
"type" |
"none", "shallow", "swamp", "deep", "peculiar", "mountain" |
Specifies what type of water tile to spawn. Below is a table explaining the differences between water tile types. |
"tile_x" |
0-44 |
Specifies the horizontal placement of this tile, in 32-pixel wide segments. Each tile is snapped to a 32x32 pixel grid within the map region. For example, a value of "tile_x":2 translates to a real x value of 64. |
"tile_y" |
0-44 |
Specifies the vertical placement of this tile, in 32-pixel wide segments. Each tile is snapped to a 32x32 pixel grid within the map region. For example, a value of "tile_y":4 translates to a real y value of 128. |
| "none" | Removes an existing water tile from a specified coordinate. | |
| "shallow" | Relatively shallow water, but still too deep to touch the bottom. Cheery light-blue appearance. Freezes in Winter. |  |
| "swamp" | Dark, murky water. Freezes in Winter. |  |
| "deep" | Relatively deep water, with a deep, regal blue hue. Does not freeze in Winter. |  |
| "peculiar" | Strange water with a dark purpleish hue. Glows with faint light. Freezes in Winter. |  |
| "mountain" | Very calm shallow water from a serene mountain pool. Freezes in Winter. |  |
| "lava" | Red-hot lava. Freezes in Winter. |  |
Decorative Tiles are purely cosmetic. They do not (and cannot) interact with the player or game systems in any way. Still, they are useful in making a region look visually appealing.
Like all tiles, they must be snapped to a 32x32 pixel grid, and they use tile coordinates instead of regular coordinates.
Please also note that Decorative Tiles are not drawn in the player's custom colony map region if the background type is not "grass" or "swamp_grass". In this case, they are automatically made invisible.
Decorative Tiles are stored in tilesets, which are large images composed of many individual 32x32 tiles, oriented in a grid. Each possible tile has 4 variants (spring, summer, autumn, and winter) and there are therefore 4 tileset images total.
To remove an existing Decorative Tile from a map template, place a new Decorative Tile at the same position with a "tile_index" of 0. This will override the existing tile.
Decorative Tiles (Spring appearance)

Each tileset is 512x768 resolution, divided into 32x32 chunks.
To select which tile you'd like to place, you'll need the tile's index. The index is a value from 0-255 that represents its placement within the tileset. 0 is the top-left corner. 1 is the second tile in the top row. 255 is the bottom-right most corner. See below for some examples.


Decorative Tiles are included in a map region's .region file under the "decorative_tiles" key. A typical decorative tile JSON object looks like this:
			{

			"tile_index": 5,

			"tile_x": 17,

			"tile_y": 55

			}
Below is a table listing the important information about decorative tiles:
| Decorative Tile Key | Allowed Values | Description |
|---|---|---|
"tile_index" |
0-255 |
Specifies which tile index to display. See above for a discussion on tile indexes. |
"tile_x" |
0-44 |
Specifies the horizontal placement of this tile, in 32-pixel wide segments. Each tile is snapped to a 32x32 pixel grid within the map region. For example, a value of "tile_x":2 translates to a real x value of 64. |
"tile_y |
0-44 |
Specifies the vertical placement of this tile, in 32-pixel wide segments. Each tile is snapped to a 32x32 pixel grid within the map region. For example, a value of "tile_y":4 translates to a real y value of 128. |
Path Tiles can be used to create pathways through a region. If a Path Tile is placed ontop of a water tile, it will automatically become a bridge.
Path Tiles are designed to automatically smooth out their edges for a nice, rounded look, unlike other tiles.
Here is a sample Path Tile:
			{

			"type": "dirt",

			"tile_x": 18,

			"tile_y": 26

			}
Like all tiles, they must be snapped to a 32x32 pixel grid, and they use tile coordinates instead of regular coordinates.
Below is a table listing the important information about path tiles:
| Path Tile Key | Allowed Values | Description |
|---|---|---|
"type" |
"none", "dirt", "gravel", "brick", etc. |
Specifies what type of path tile to spawn. Below is a table explaining the differences between path tile types. |
"tile_x" |
0-44 |
Specifies the horizontal placement of this tile, in 32-pixel wide segments. Each tile is snapped to a 32x32 pixel grid within the map region. For example, a value of "tile_x":2 translates to a real x value of 64. |
"tile_y" |
0-44 |
Specifies the vertical placement of this tile, in 32-pixel wide segments. Each tile is snapped to a 32x32 pixel grid within the map region. For example, a value of "tile_y":4 translates to a real y value of 128. |
| "none" | Removes an existing path tile from a region. | |
| "dirt" | A patchwork of hard and soft dirt. |  |
| "gravel" | Small pebbles. |  |
| "brick" | A horizontally-oriented brick pattern. |  |
| "brick_decorative" | A fancy brick pattern. |  |
| "concrete" | Paver stones made of solid grey concrete. |  |
| "sand" | Grainy sand from a beach. |  |
| "white_stones" | Small white stones. |  |
| "basalt" | Dark stone with streaks of lava peaking through. |  |
| "wood_vertical" | Cut and treated wood planks oriented vertically. |  |
| "wood_horizontal" | Cut and treated wood planks oriented horizontally. |  |
| "glass" | Glass panes, reinforced with steel borders. |  |
| "ice" | Frozen ice. The player can travel faster over this path and even slip out of control. |  |
| "dirt_brown" | Dark brown dirt from a deep quarry. |  |
| "celestial" | A spectrum of brilliant, translucent colors. |  |
| "ruins" | Worn stones, cracked and weathered with age. |  |
| "grass" | Looks nearly identical to the normal grass pattern, but with an edge around the borders. Useful to place ontop of other background types (like sand or basalt.) |  |
A map region may contain cliffs to change the elevation of the landscape. These cliffs are stored in a tile grid. Cliffs are placed using tile coordinates.
Use the following method to add cliffs to any map region.

Cliff values must be selected from the following tileset, where the top-left cell is 0, the next tile to its right is 1, etc. Set "type": 0 to delete an existing cliff tile.

Here is a sample Cliff Tile:
			{

			"type": 1,

			"tile_x": 16,

			"tile_y": 14

			}
| Cliff Tile Key | Allowed Values | Description |
|---|---|---|
"type" |
0-55 |
Specifies what type of cliff tile to create. Refer to the tileset image above this table. |
"tile_x" |
0-44 |
Specifies the horizontal placement of this tile, in 32-pixel wide segments. Each tile is snapped to a 32x32 pixel grid within the map region. For example, a value of "tile_x":2 translates to a real x value of 64. |
"tile_y" |
0-44 |
Specifies the vertical placement of this tile, in 32-pixel wide segments. Each tile is snapped to a 32x32 pixel grid within the map region. For example, a value of "tile_y":4 translates to a real y value of 128. |
A map region may contain stairs that the player can walk up and down. These stairs are stored in a tile grid. Stairs are placed using tile coordinates.
Use the following method to add stairs to any map region.

Stair tiles come in 4 types: left, right, up, and down. See the table below.
| Stair Tile Type | Image |
|---|---|
0 |
 |
1 |
 |
2 |
 |
3 |
 |
Here is a sample Stair Tile:
			{

			"type": 2,

			"tile_x": 32,

			"tile_y": 8

			}
| Stair Tile Key | Allowed Values | Description |
|---|---|---|
"type" |
0-3 |
Specifies what type of stair tile to create. Refer to the table above. |
"tile_x" |
0-44 |
Specifies the horizontal placement of this tile, in 32-pixel wide segments. Each tile is snapped to a 32x32 pixel grid within the map region. For example, a value of "tile_x":2 translates to a real x value of 64. |
"tile_y" |
0-44 |
Specifies the vertical placement of this tile, in 32-pixel wide segments. Each tile is snapped to a 32x32 pixel grid within the map region. For example, a value of "tile_y":4 translates to a real y value of 128. |
| Mouse | Shrew | Squirrel | Vole | Rabbit | Hare |
| Rat | Bat | Stoat | Weasel | Thrush | Magpie |
| Sparrow | Wren | Pigeon | Robin | Finch | Crow |
| Dove | Starling | Frog | Lizard | Toad | Snake |
| Adder | Turtle | Trout | Carp | Salmon | Bass |
| Pike | Minnow | Barbel | Bee | Spider | Wolf Spider |
| Ghost | Crab | Cardinal | Bluejay | Sea Bass | Mackerel |
A Spawner is an invisible point in a Map Region that has a chance to spawn something once every day. Spawner definitions should be placed within a map .region file.
There are several types of Spawners:
An item spawner can spawn 1 item from a list of items at its location once per day. Any arbitrary item(s) may be spawned via an Item Spawner.
Item Spawners automatically take into account the rarity of the items in their list. Rarer items are less likely to spawn at an item spawner; more common items are more likely to spawn at an item spawner.

If an item spawned by an item spawner is not picked up the same day, it will automatically disappear when the player leaves the map region.
Here is an example of an Item Spawner:
			{

			"type": "item",

			"x": 325,

			"y": 1218,

			"item_uids": [ "Scallop", "Turret", "Whorl", "Conch", "Coral" ],

			"percent_chance": 25

			}
An herb spawner can spawn 1 herb from the "herbs_list" defined in the map's .region file at its location once per day. You'll likely want to fill a map region with many of these, as they act as "nodes" where herbs can potentially spawn. Herb spawners obey the maxmium herb number specified in the map's .region file.

If an herb spawned by an herb spawner is not picked up the same day, it will automatically disappear when the player leaves the map region.
Additionally, during Autumn, herb spawners are used as spawning locations for mushrooms. If you do not want mushrooms to appear in a given map region, set the max_mushrooms key to 0 in its .region file.
Here is an example of an Herb Spawner:
			{

			"type": "herb",

			"x": 64,

			"y": 640

			}
A beehive spawner can spawn 1 beehive at its location once per day. Each beehive spawner has a 0.5% chance to spawn a beehive on any given day. Beehives will not spawn in Winter. Additionally, only 1 beehive will spawn per Map Region per day.

Because each beehive spawner rolls its random daily chance separately, adding more beehive spawners means a higher chance of spawning a beehive. You may also consider adding multiple beehive spawners in the exact same location to make that particular location more likely to spawn a beehive.
A beehive spawned by a beehive spawner will disappear when the day is over and the player leaves the area.
Here is an example of a Beehive Spawner:
			{

			"type": "beehive",

			"x": 814,

			"y": 256

			}
A grass spawner is an invisible point that will spawn 1 cluster of tall grasses at its location once per day. These tall grasses can be destroyed by swiping at them, and occasionally hide small amounts of Mews for the player to find.

Grasses spawned by a grass spawner will disappear when the day is over and the player leaves the area.
There are several types of grass spawners! Each provides a different category of grasses. A table below illustrates all the types of grass spawners and what their grasses look like.
Here is an example of a Grass Spawner:
			{

			"type": "grass_grasses",

			"x": 640,

			"y": 128

			}
| "grass_grasses" | Pure green grasses, ranging from very short to very tall. |  |
| "grass_plains" | Grasses, seeded grass, thorns, and wildflowers. |  |
| "grass_river" | Cattails accent the short grasses and wildflowers in this grouping. |  |
| "grass_beach" | Short, stubby grasses, along with red heather, tall yellow grass, thorns, and wildflowers. |  |
| "grass_highland" | A collection of medium to long grasses, accented by gorgeous blue heather and wildflowers. |  |
| "grass_heather" | Short grass and all types of heather. |  |
| "grass_woods" | Short grasses, tall grasses, purple heather, yellow grass, seeds, and thorns. |  |
| "grass_flowers" | Just short grasses, wildflowers, and seeds. |  |
| "grass_all" | All 12 types of grasses can be found in this grouping. |  |
Each spawner exists as a JSON object in the "spawners" key of a given Map Region's JSON object. Spawners have the following important keys:
| Spawner Key | Allowed Values | Description |
|---|---|---|
"type" |
"item", "herb", "beehive" |
Specifies what type of Spawner you are defining. See above for information about the different types of Spawners. |
"x" |
0-1440 |
The x coordinate where this spawner will be located within the given Map Region. 0 is the far left-hand edge of the region; 1440 is the far right-hand edge. You can turn on "Show Diagnostics" in-game to get the current x,y player coordinates. |
"y" |
0-1440 |
The y coordinate where this spawner will be located within the given Map Region. 0 is the far top-hand edge of the region; 1440 is the far bottom-hand edge. You can turn on "Show Diagnostics" in-game to get the current x,y player coordinates. |
"item_uids" (type:item only) |
[ "Scallop", "Conch", "Turret", etc. ] |
A list of all item unique identifiers that could possibly spawn at this spawner on a given day. Only 1 item will spawn per day, maximum. The item will be selected from this list, with Rarity being taken into account (more Common items are more likely to be picked than more Rare items.) You may include the same item uid multiple times in order to more heavily weigh the random chance towards a particular item. |
"percent_chance"(type:item only) |
0-100 |
Specifies how likely this spawner is to spawn a single item on any given day, out of 100. 0 means it will never spawn an item; 100 means it will always spawn an item. |
"season"(optional, type:item only) |
"all", "spring", "summer", "autumn", "winter", "warm", "cold" |
Specifies during which season this item spawner is active. All means all seasons; Warm means Spring/Summer; Cold means Autumn/Winter. This key is optional. By default an item spawner has the value of "all" seasons. |
A warp is an invisible 32x32 zone. If the player collides with a warp zone, they will transition to a new map region. A warp could be used to transition between an interior and exterior location, for example, or for fast travel.

A warp is comprised of the following keys:
| Warp Key | Allowed Values | Description |
|---|---|---|
"map_uid" |
"molecave", "westcentral", etc.; "LastRegion" |
Specifies which map region to warp to. Use the region's Unique Identifier. Use the special value "LastRegion" to warp to whichever region the player was last in. |
"x" |
0-1440 |
The x coordinate where this warp will be located within the given Map Region. 0 is the far left-hand edge of the region; 1440 is the far right-hand edge. You can turn on "Show Diagnostics" in-game to get the current x,y player coordinates. This coordinate marks the center of the 32x32 warp region. |
"y" |
0-1440 |
The y coordinate where this warp will be located within the given Map Region. 0 is the far top edge of the region; 1440 is the far bottom edge. You can turn on "Show Diagnostics" in-game to get the current x,y player coordinates. This coordinate marks the center of the 32x32 warp region. |
"warp_to_x" |
0-1440, "BuildingUID" |
What x coordinate to place the player at in the map region where the warp takes the player. Use special value "BuildingUID" to warp right outside the last entered building (useful for exiting buildings.)
|
"warp_to_y" |
0-1440, "BuildingUID" |
What y coordinate to place the player at in the map region where the warp takes the player. Use special value "BuildingUID" to warp right outside the last entered building (useful for exiting buildings.) |
For a full discussion on Language Files, see above.
Translations for the name of each map region are stored in the /gameresources/map/lang directory. For each language, there should exist 1 subdirectory with the name of the language. For example, for English, the region .lang files should all be stored in the /gameresources/map/lang/English directory.
Within this directory should be placed 1 .lang file for each .region file, named in the same manner. For example, a region file named testregion.region should have 1 matching testregion.lang file for each language in the appropriate /gameresources/map/lang/* directories.
Each region .lang file stores a single key, labelled "lang_region_name". Give this key the value of the region's name that should display to the user for the given language.
Here is an extended example:
Suppose we have a region which has the unique identifier of "forestregion". Let's assume that we must provide translations in english, español, français, and deutsche.
This region has a Region File named forestregion.region stored in the /gameresources/map directory.
Now, we must provide the language files. We do this by placing a file named ForestRegion.lang in each of the following directories:
If the above directories do not exist, we create them before placing the files there.
Then, we open each forestregion.lang file and fill it in with the appropriate language translation. For example, in the english .lang file, we fill in "lang_region_name": "Forest Region".
As the player wanders the world of Cattails: Wildwood Story, they will hear a variety of background music tracks. You can add music files, override default music files, and change which tracks play at what time.
A music track is must be an .ogg file in order for the game engine to recognize it. The name of the .ogg file is its unique identifier (UID) for all purposes. For example, a file named test.ogg has a UID of "test".
Several .ogg music files come bundled with the game by default and their unique identifiers (UIDs) can be referenced at any time. This is a full list of default music track UIDs:
You can also import your own, custom music tracks by placing their .ogg files in the gameresources/music directory. You can also override the default tracks by placing an .ogg file in this location with the appropriate filename (for example, placing a new track named spring3.ogg in the gameresources/music directory will replace the game's default Spring 3 track with your new version.)
Generally, music plays according to a hierarchy of priority levels. These are the most common priority conditions in the descending order (higher entries mean higher priority:)
Music UIDs are specified in other files. For example, Region Music selections are specified in the appropriate {Map}.region files (see above for more information.)
A Music UID selection can be made in one of two ways: 1) by typing the exact name of a music track UID, in which case the selected track will loop endlessly while its condition to play is met and not overridden by a higher priority selection; or 2) by typing the UID of a Music Pack, which can have additional complex behavior. See below for more information about Music Packs.
If you need additional complexity to determine how music tracks should play in-game, you should use a Music Pack. A Music Pack is a JSON .meta file that can specify several music track UIDs and play them according to a set of conditional rules. For example, a "seasonal" Music Pack can play different tracks depending on the current season, weather, and time of day conditions.
A music pack is named {PackUID}.meta, such as "seasonalexteriorpack.meta" or "deninterior.meta". Music Pack JSON files are simple and contain only a small handful of key/value pairs. Most importantly, the "pack_type" key, which dictates the structure of the rest of the file and which keys should be present. Below is a listing of every valid "pack_type" key and what additional keys should be specified when using each type.
"pack_type": "seasonal"
This pack type exhibits seasonal external behavior. Tracks specified in this type of music pack will play if and only if: 1) it is daytime hours (5am-10pm); and 2) there is no current rain weather event (rain, storms). The active track is selected based on the current season and day.
Additional required keys for this pack type:
"pack_type": "seasonal_interior"
This pack type exhibits seasonal internal behavior. Tracks specified in this type of music pack will play based on the current season, with no time/day conditions. However, during Thunderstorms and Blizzards no track will play in this pack.
Additional required keys for this pack type:
"pack_type": "day_night"
This pack type exhibits day/night time sensitive behavior. One track is specified to play during the daylight hours (5am-10pm), and another track is specified to play during the nighttime hours (10:01pm-4:59am). During Thunderstorms and Blizzards no track will play in this pack.
Additional required keys for this pack type:
"pack_type": "mines"
This pack type exhibits mine-specific behavior and should not be generally used outside of the mine room. The track is selected based on the current level of the mine that the player is on. It also contains special logic that will play a track once all the way through, then pause the music for a random interval before picking back up again.
Additional required keys for this pack type:
"pack_type": "single_track_no_storms"
This pack type consists of 1 track that will play, on loop, endlessly, unless a Thunderstorm or Blizzard is currently occurring.
Additional required keys for this pack type:
The player's colony will always have a symbol that represents it. This symbol can be selected by the player in the game. These symbols are called Emblems. It is possible to customize which Emblems are available for the player to pick from by adding or modifying files in the /gameresources/emblems directory.


Each Emblem is a 32x32 resolution .png image file. To add new options for the player to choose from, simply add additional .png files to the /emblems directory.
Special events occur throughout the year. These special days are called Festivals.
Festival data is stored in the /gameresources/festivals location. Each Festival has one .meta file, as well as a calendar icon .png and possibly many language files.
A Festival .meta file should be named like so: {FestivalUID}.meta. For example, springfestival.meta. The contents of a Festival .meta file look like this:
			{

			"festival_uid": "springfestival",

			"festival_calendar_icon": "springfestivalicon",


			"festival_season": "Spring",

			"festival_day": 10,

			"festival_hour_start": 10,

			"festival_hour_end": 23,

			"festival_map_uid": "festivalplaza",

			"festival_music": "festivalspring",

			"festival_weather": "Sunny"

			}
Below is a table listing all the relevant keys and possible values for a Festival .meta file.
| Festival Key | Allowed Values | Description |
|---|---|---|
"festival_uid" |
"springfestival", "winterfestival", etc. |
Specifies the unique identifier for this festival. This should match the filename. |
"festival_world_objects" (optional) |
[ { "type": "festivalrug", "x": 350, "y": 720 }, { ... }, { ... }, ... ] |
An optional list of World Objects to spawn only during this festival. See the documentation for World Objects under map regions above for more information about how to create, modify, and format world objects. |
"festival_calendar_icon" |
"springfestivalicon", "winterfestivalicon", etc. |
The name of the .png image file that will be displayed on the in-game calendar on the appropriate day for this festival. These files are stored in the gameresources/festivals/sprites location. They should be .PNG files, 24x24 pixels in resolution. |
"festival_season" |
"Spring", "Summer", "Autumn", "Winter" |
Which month this festival will occur during. |
"festival_day" |
1-10 |
Which day this festival will occur on. |
"festival_hour_start" |
0-23 |
The earliest hour at which the festival can be attended. |
"festival_hour_end" |
0-23 |
The latest hour at which the festival can be attended. |
"festival_force_hour" (optional) |
0-23 |
Optional, specifies if the time should be forced to jump to a specific hour when this festival is joined by the player. Set to -1 to disable this behavior. |
"festival_map_uid" |
"festivalplaza", etc. |
Which map region the festival takes place in. |
"festival_music" |
"festivalspring", "festivalsummer", etc. |
Which music track UID to play during this festival? You can specify either a single track UID or a Music Pack UID. See the Music documentation below for more information. |
"festival_weather" |
"Sunny", "Fog", "Precipitation", "Severe" |
Guarantees the type of weather that will constantly happen during this festival's day. Note that the default is "Sunny" if not specified. |
"festival_warning_npc" (optional) |
"coco", {NPC_UID} |
Optional, specifies which NPC should warn the player if they arrive too early or too soon that they cannot enter the festival grounds. Defaults to "Coco". |
"festival_warning_early_dialog_path" (optional) |
"lang_festival_early_dialog", etc. |
Optional, specifies what dialog the warning NPC should tell the player if they arrive too early to the festival grounds when they deny them entry. Defaults to "lang_festival_early_dialog". |
"festival_warning_late_dialog_path" (optional) |
"lang_festival_late_dialog", etc. |
Optional, specifies what dialog the warning NPC should tell the player if they arrive too late to the festival grounds when they deny them entry. Defaults to "lang_festival_late_dialog". |
Each Festival will also have some .lang files which specify how the Festival title will be translated into various languages. At a minimum, each Festival should have an english lang file. A Festival .lang file looks like this:
			{

			"festival_uid_do_not_translate": "springfestival",

			"lang_festival_title": "Spring Festival"

			}
A crafting station is an object which the player can interact with to trade items for a desirable output. For example, the Seed Maker is a crafting station where the player can exchange fresh herbs for Seed items.
Crafting stations each have a list of associated recipes that are available to the player at that particular station. These recipe lists are stored in the crafting station's .meta file, which is located in /gameresources/crafting_stations.
Here is an example of the contents of a crafting station .meta file:
{

			"recipes_list": [ "Elixir of Healing Recipe", "Battle Potion Recipe", "Mushroom Salad Recipe" ]

		}
A recipe stores all the information needed for a player to exchange certain items for a desirable output at a given crafting station. Recipe files are located in the /gameresources/items/recipes location.
The inputs of a recipe must be regular items; the outputs may be regular items, upgrades, music discs, furniture, etc.
A single recipe may have up to 3 variants, which may be used to provide different quantity outputs or even different outputs altogether if needed.
Here is an example of the contents of a recipe .meta file:
		{

			"recipe_uid": "Plant Food Recipe",

			"unlocked": true,

			"recipe_variant_1": {

				"input": [

					{

						"uid": "Voidmarrow",

						"quantity": 1

					}

				],

				"output": {

					"uid": "Plant Food",

					"quantity": 1

				}

			},

			"recipe_variant_2": {

				...

			},

			"recipe_variant_3": {

				...

			}

		}
| Recipe Key | Allowed Values | Description |
|---|---|---|
"recipe_uid" |
"{Recipe UID}" (ex. "Plant Food Recipe") |
This key specifies the unique identifier for this recipe. This key should match an item .meta file's UID. |
"unlocked" |
true, false |
This key specifies if this recipe is available to the player by default (true) or if it must be unlocked later during gameplay (false). |
"recipe_variant_1" |
{ ... } |
This key holds a JSON object with information about the first recipe variant. This variant is required as each recipe must have at least 1 output variant. More information about recipe variants is listed below. |
"recipe_variant_2" (optional) |
{ ... } |
This key holds a JSON object with information about the second recipe variant. This variant is optional. More information about recipe variants is listed below. |
"recipe_variant_3" (optional) |
{ ... } |
This key holds a JSON object with information about the third recipe variant. This variant is optional. More information about recipe variants is listed below. |
| Variant Key | Allowed Values | Description |
|---|---|---|
"input" |
[ { "uid": "{inputUID}", "quantity": 1 }, { ... }, ... ] |
This key stores a list of JSON objects for the inputs for this recipe variant. You can specify up to 3 input items here. Note that these inputs MUST be regular items. |
"output" |
{ "uid": "{outputUID}", "quantity": 1 } |
This key specifies the output provided by this recipe variant. The output may be a regular item, an upgrade, a piece of furniture, an accessory, etc. |
A colony layout is essentially a starter template for one of many possible player colony configurations. A colony layout supplies the placement coordinates for various buildings, world objects (like trees), decorative tiles, bodies of water, and paths. The player will select one Colony Layout at the start of the game which will determine the initial layout of their colony (note that the player is able to modify most colony layout options later during gameplay.)

Colony layouts are stored in .meta files located in the /gameresources/colony_layouts directory.
The default colony layout is 1forest, but several other layouts are provided to the player to pick from at the start of the game.
Below you will find a table giving information about the various colony layout keys and their appropriate values.
| Key Values | Allowed Values | Description |
|---|---|---|
| "background_type" | "grass", "swamp_grass", "sand", "dirt", "rock", "basalt" |
Specifies the ground type for this colony layout. See all background types above for more information. |
| "player_den_starting_sprite" (optional) | "den_sprite_name" (ex. "den_tropical", "den_leanto", etc.) |
Specifies a default look for the player's den building in this colony layout (this will override the "sprite" value of the playerden Building if specified). Use the filename of a den sprite in the gameresources/buildings/sprites directory (without the extension). A full discussion on Buildings (and their sprites) can be found above. |
| "buildings" | [ { "uid": "playerden", "x": 720, "y": 720 }, { ... }, ... ] |
A list of JSON objects for each building you would like to spawn in this colony layout by default, along with their placement (x,y) positions. See below for a more thorough discussion on buildings. |
| "world_objects" | [ { "uid": "oaktreea", "x": 96, "y": 223 }, { ... }, ... ] |
A list of JSON objects for each world object you would like to spawn in this colony layout by default, along with their placement (x,y) positions. See above for a more thorough discussion on world objects. |
| "path_tiles" | [ { "type": "dirt", "tile_x": 1, "tile_y": 22 }, { ... }, ... ] |
A list of JSON objects for each path tile you would like to place in this colony layout by default, along with their placement positions (given in TILE COORDINATES). See above for a more thorough discussion on path tiles. |
| "water_tiles" | [ { "type": "shallow", "tile_x": 11, "tile_y": 3 }, { ... }, ... ] |
A list of JSON objects for each water tile you would like to place in this colony layout by default, along with their placement positions (given in TILE COORDINATES). See above for a more thorough discussion on water tiles. |
| "decorative_tiles" | [ { "tile_index": 21, "tile_x": 0, "tile_y": 1 }, { ... }, ... ] |
A list of JSON objects for each decorative tile you would like to place in this colony layout by default, along with their placement positions (given in TILE COORDINATES). See above for a more thorough discussion on decorative tiles. |
At the start of the game, the player will be given the choice of which colony layout they would like to use to start their colony town with. During this time, they will be presented each option with a localized Title, Description, and a preview image of each colony layout.
Each Colony Layout should have 1 preview image placed in the gameresources/colony_layouts/sprites directory, named {colony_layout_uid}.png (ex. "5volcano.png".) These preview images must be 400x250px in resolution.

Each Colony Layout also has a matching .lang file in the gameresources/colony_layouts/lang directory for each language. For example, 2meadow.lang corresponds to the "Meadow" colony layout.
These .lang files are very simple and contain only two keys: "lang_colony_layout_name", which stores the localized name of the colony layout (for example, "Meadow"); and "lang_colony_layout_description", which stores a brief summary of the colony layout (for example, "A gentle river winds through this flowery field.").
Buildings are special objects that allow the player to warp to and from an interior region. For example, cat dens/houses (including the player's den) are the most common building type. Other buildings include the Temple, the Mines, etc.


Each building has several files associated with it, always a .meta file located in the /gameresources/buildings directory, as well as an image file (.png) associated with its default appearance, stored in the /gameresources/buildings/sprites directory. Multiple buildings can share the same default appearance image. A building may also have an optional decor sprite, which will be overlaid ontop of the building's normal appearance sprite, to give it some individuality.
Below is a table outlining the important keys in a building's .meta file:
| Key Values | Allowed Values | Description |
|---|---|---|
| "unlocked" | true, false |
Specifies if this building is unlocked and available for the player to place in their colony by default or not. |
| "sprite" | "ImageFileName" (ex. "den_deadtree") |
Specify the name of a .png image file (without the extension) that is stored in the gameresources/buildings/sprites directory here. This will set the default appearance of this building. |
| "decor_sprite" | "ImageFileName" (ex. "decor_bob") |
Optionally, specify the name of a .png image file (without the extension) that is stored in the gameresources/buildings/sprites directory here. Leave this a blank string ("") for no decor sprite. The decor sprite will be overlaid ontop of the building's normal sprite when rendered in-game. |
| "blocker_width" | 0-9999 |
How wide is this building, in pixels? This will specify the width of the blocker region that the player cannot pass through that will spawn with this building. |
| "blocker_height" | 0-9999 |
How high is this building, in pixels? This will specify the height of the blocker region that the player cannot pass through that will spawn with this building. |
| "interior_region_id" | "{regionUID}" (ex. "bobden") |
Specifies the interior region associated with this building. See above for a discussion on map regions. |
| "interior_warp_x" | 0-9999 |
Specifies the x coordinate that the player should warp to upon entering this building (where does the player "start" after entering the interior region?) |
| "interior_warp_y" | 0-9999 |
Specifies the y coordinate that the player should warp to upon entering this building (where does the player "start" after entering the interior region?) |
| "npc_lock_list" | [ "{npcUID}", "{npcUID}", ... ] |
A list of all NPCs that will deny entry to the player if they are not at least 3-star friendship rank with that NPC. Note that you can specify as many or as few NPCs as you'd like. Also note that the player will gain entry as soon as they meet the friendship criteria with at least ONE of the NPCs given in this list. Add the special value "unlocked" to this list if the player is always allowed access to this building (i.e. the Clinic, the Store, etc.). |
| "lock_dialog_key" | "{lang_dialog_key}" (ex. "lang_bob_npc_den_locked") |
A pointer to a dialog lang key (stored in a dialog lang file) that will be displayed to the player in a dialog box if they are denied entry due to an NPC friendship lock. Leave this key blank if there is no lock dialog associated with this building. ( "" ) |
Cattails: Wildwood Story features tasks that the player may undergo on behalf of certain NPCs in order to gain Task Tokens, a valuable currency that can be traded for rewards. Completing a task will also increase the player's friendship value with the associated NPC. The player may have up to 4 active tasks at any given time, plus a special slot is available for the Main Quest in the task log.
One task is selected at the start of each day to become available to the player based upon the current season and which NPCs the player has already unlocked. This task can be accepted at the Task Board.
While a task is underway, the player can view information about the task and their progress to completing the task in the Task Log. They can also approach the associated NPC to ask about the task to get hints and background information about the task through dialog.
Upon completing the task's requirement, the player must speak with the associated NPC to complete the task and receive their rewards. There is no deadline for tasks in Cattails: Wildwood Story.
You can find all the files associated with the available Tasks in the gameresources/tasks directory. Each task has its own .meta file here, named {taskUID}.meta. Additionally each Task has a .lang file for each language that is installed, locatedd in the gameresources/tasks/languages/{languageUID} directories.
Below is a table detailing the keys in a Task's .meta file:
| Key Values | Allowed Values | Description |
|---|---|---|
| "task_npc_uid" | "coco", "ember", "molo", etc. |
Specifies the associated NPC with this task (i.e. the "task giver" NPC.) |
| "task_spring" | true, false |
Specifies if this task will be available during the Spring season. |
| "task_summer" | true, false |
Specifies if this task will be available during the Summer season. |
| "task_autumn" | true, false |
Specifies if this task will be available during the Autumn season. |
| "task_winter" | true, false |
Specifies if this task will be available during the Winter season. |
| "task_reward_tokens" | 0-999 |
Specifies the number of Task Tokens rewarded to the player for completing this task. Most tasks reward 3 task tokens, though some will reward less (if they are easy) or more (if they are difficult). |
| "task_goal_quantity" | 0-9999 |
Specifies the goal number to reach to complete this task. Its meaning is dependent on the "task_goal_type", as defined below. |
| "task_goal_type" | "items", "scouting", "gardening", "mine_descend", etc. |
Specifies the type of task that this task is. The default value is "items", though there are many types of tasks. A detailed list of all "task_goal_type"s can be found below. |
| "task_goal_item_uid" | "Mouse", "Goldenseal", "Wren", "Crab", "Conch", etc. |
Specifies what type of item to collect then turn in to complete this quest. Only valid for "task_goal_type": "items" tasks. |
| task_goal_type | Description |
|---|---|
"items" |
Specifies that this task's goal is to collect and turn in item(s), as specified by the "task_goal_item_uid" key. |
"scouting" |
Specifies that this task's goal is to visit several unique map regions. |
"gardening" |
Specifies that this task's goal is to plant seeds in the garden. |
"mine_descend" |
Specifies that this task's goal is to descend levels in any mine. |
"herbs" |
Specifies that this task's goal is to harvest a number of herbs in the wild. These herbs are not turned in for task completion. |
"prey" |
Specifies that this task's goal is to catch a number of prey. These prey are not turned in for task completion. |
"daily_battles" |
Specifies that this task's goal is to win a number of daily battles. |
"seasonal_carvings" |
Specifies that this task's goal is to visit a number of seasonal carvings. |
"voidlings" |
Specifies that this task's goal is to defeat a specific number of Voidling Cats. |
"darkcandles" |
Specifies that this task's goal is to defeat a specific number of Darkcandles (found in the mines). |
Each Task has a number of language files associated with it, one for each language that is installed. In these language files you will find the following keys:
| Key | Description |
|---|---|
"lang_task_title" |
Specifies the name of this task. |
"lang_task_description" |
Provides a short description of the duties of this task, as well as some context. |
"lang_task_in_progress_dialog" |
Specifies the dialog that the associated NPC will tell the player if the player inquires with them about the task while it is active. |
"lang_task_complete_dialog" |
Specifies the dialog that the associated NPC will tell the player once the task is complete and turned in to "wrap up" the task. |
A wedding venue is a physical location where the player can choose to hold their wedding ceremony. By default there are 4 wedding venues included in the base game: Temple, Beach, Festival Plaza, and Meadow.
A wedding venue consists of 3 files, all stored in the gameresources/wedding_venues directory. 1. A .meta file; 2. a .lang file; and 3. a thumbnail (.png).
Each wedding venue has a .meta file that stores important metadata about that location. For example, the Temple wedding venue has 3temple.meta in the gameresources/wedding_venues directory.
Below is a table listing all the relevant wedding venue .meta file keys and their possible values:
| Key | Description |
|---|---|
"wedding_map_uid" |
Specifies the unique ID of the map region associated with this wedding venue file. Use the UID of a map region. |
"wedding_music" |
Specifies which track to play during a wedding at this venue. Default is "lovetheme". |
"wedding_hour_start" |
Specifies the hour that the wedding in this venue should take place at. Time will not pass during a wedding ceremony. |
"wedding_hour_end" |
Specifies the hour that the wedding will end, which the clock will be automatically set to as soon as the player leaves the ceremony. |
"spouse_spawn_x" |
Specifies the x coordinate to spawn the player's spouse in this venue's associated map region when the wedding ceremony begins. Typically this is offset from the final location by a bit. |
"spouse_spawn_y" |
Specifies the y coordinate to spawn the player's spouse in this venue's associated map region when the wedding ceremony begins. Typically this is offset from the final location by a bit. |
"spouse_destination_x" |
Specifies the x coordinate that the player's spouse will walk towards in this venue's associated map region when the wedding ceremony is underway. This will be the final location of the player's spouse during the wedding. |
"spouse_destination_y" |
Specifies the y coordinate that the player's spouse will walk towards in this venue's associated map region when the wedding ceremony is underway. This will be the final location of the player's spouse during the wedding. |
"player_spawn_x" |
Specifies the x coordinate to spawn the player in this venue's associated map region when the wedding ceremony begins. This should be the final location for the player. |
"player_spawn_y" |
Specifies the y coordinate to spawn the player in this venue's associated map region when the wedding ceremony begins. This should be the final location for the player. |
"player_spawn_dir" |
Specifies which direction the player should be facing when the wedding begins. "north", "south", "east", or "west" are valid values. |
"officiant_spawn_x" |
Specifies the x coordinate to spawn the officiant (default Coco) in this venue's associated map region when the wedding ceremony begins. |
"officiant_spawn_y" |
Specifies the y coordinate to spawn the officiant (default Coco) in this venue's associated map region when the wedding ceremony begins. |
"wedding_world_objects" |
Holds a list of JSON objects representing optional wedding decor. For each wedding decor object, specify a "x", "y", and "type" (aka UID). |
"wedding_guest_positions" |
Holds a list of JSON objects representing possible wedding guest spawn locations during the ceremony. For each possible position, specify an "x" and a "y" position. Most venues should have around 30 guest positions specified (~20 guests are possible from the base game, but extra positions have been specified to provide support for additional modded NPC characters to also appear.) |
Each wedding venue will have 1 associated .lang file for each installed language, stored in the gameresources/wedding_venues/lang/{language_UID} directories.
These files are fairly straightforward and simply contain the translated/localized text for the wedding venue's name and description. Below is a table with the relevant keys:
| Key | Description |
|---|---|
"lang_wedding_venues_name" |
Specifies the display name of this wedding venue. For example, "Beach" or "Temple". |
"lang_wedding_venues_description" |
Specifies a short description of this wedding venue. For example, "A dreamy place to tie the knot while soaking up the sun." |
Each wedding venue should have 1 thumbnail .png file stored in the gameresources/wedding_venues/sprites directory. Name the thumbnail the same as the wedding venue UID (for example, "3temple.png").
These files must be .png image files with a resolution of 400x250px. Below are some examples of wedding venue thumbnails:


Whenever placing Power Paws throughout the world, you'll always have to specify an index associated with the particular power paw you wish to place. Below is a table indicating the index values of each power paw and their associated color/bonus.
There are 28 Power Paws total. 12 Red, 3 Yellow, 3 Green, 5 Blue, 3 Purple, and 2 Rainbow.
| Index Values | Color | Bonus |
|---|---|---|
| 0-11 | Red | These Power Paws increase the player's total health. |
| 12-14 | Yellow | These Power Paws increase the player's run speed. |
| 15-17 | Green | These Power Paws increase the player's luck, making rare prey and insects spawn more often. |
| 18-22 | Blue | These Power Paws increase the player's total hunger capacity, allowing them to go longer without eating. |
| 23-25 | Purple | These Power Paws increase the player's social grace, making it easier to make friends with others. |
| 26-27 | Rainbow | These Power Paws increase the player's attack charge speed, allowing them to launch into devastating attacks with greater speed. |
Cattails (c) Falcon Development LLC, 2016. Cattails: Wildwood Story (c) Falcon Development LLC, 2019. All rights reserved.